User guide
Zählwerk — User Guide
Last updated: 4 October 2026
Zählwerk is an app for iPhone and Android with which you record, analyse and keep an eye on your meter readings for electricity, gas and water. Your data stays on your device — there is no account and no server holding your meter readings. What you record belongs to you. The only exception is photo recognition: the meter photo you take is sent to Zählwerk recognition to be read (discarded afterwards, not stored) — only when you take a photo, and it can be switched off (see Cloud recognition).
Getting started: the setup assistant
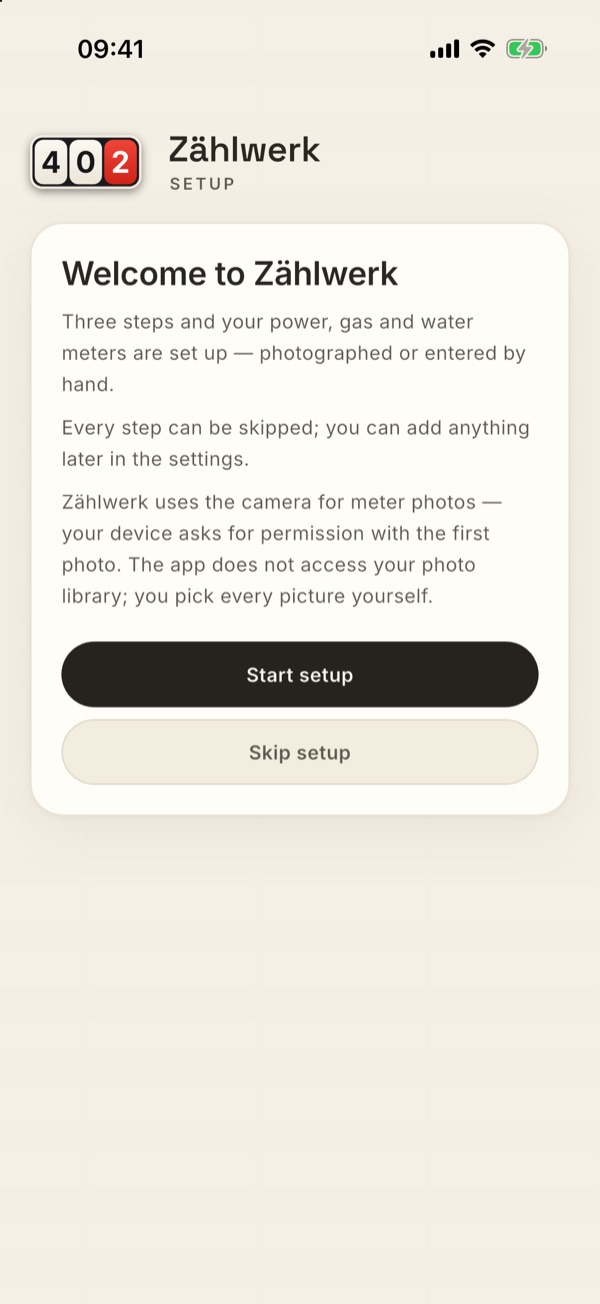
At the very first launch the setup assistant welcomes you. In four steps it sets up the basics with you — and you can skip it completely at any time (“Skip setup”). Everything it does can be done later in the settings just as well.
It only appears while there is not a single meter and no reading yet. So anyone who imports a database or a backup never sees it. And it does not come back: once you have finished it — run through or skipped — the app starts straight into Overview.
Back always works
Below the options of every step there is “Back” (on Android the device's back button does the same). Only the welcome step has none — there is nothing before it.
Back does not just page one screen back, it also undoes what the step created: if you have already saved a meter in a step, it is gone again together with its first meter reading, and your entries are waiting in the form to be corrected. The same in the address step: if you go back from the final step, the address you just created disappears again — your meters of course stay and are assigned again as soon as you save the address. A step you skipped is simply paged back to.
That way you can calmly put right a misread figure or a mistyped meter number without a second meter coming into being.
Steps 1–3: electricity, gas, water
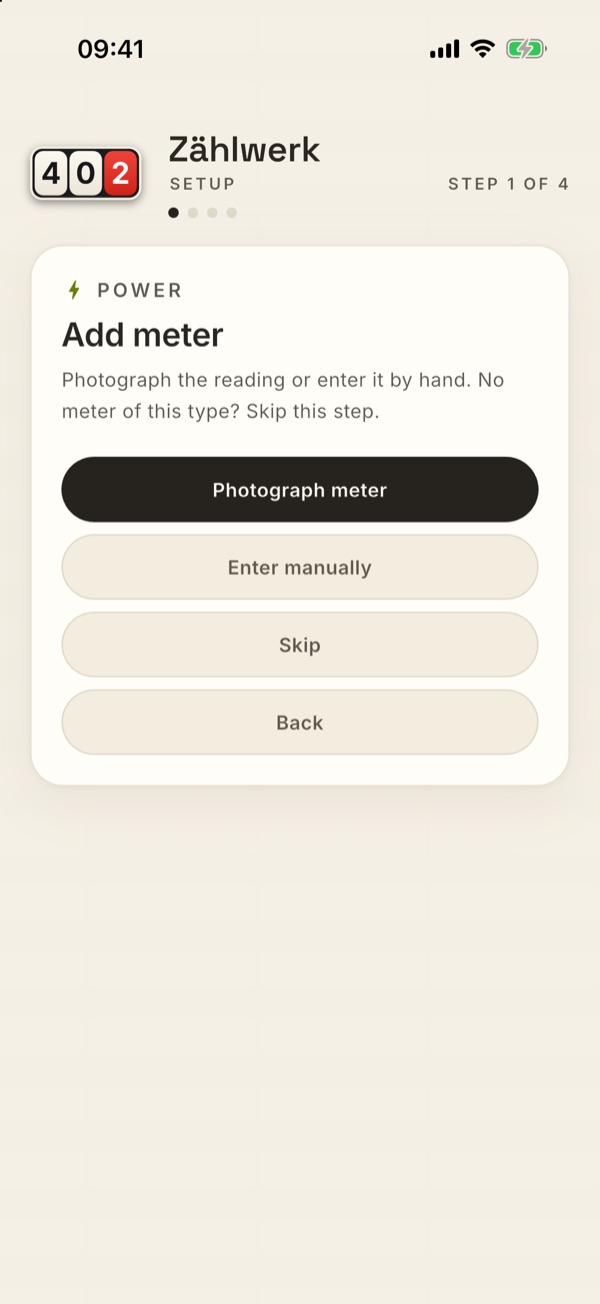
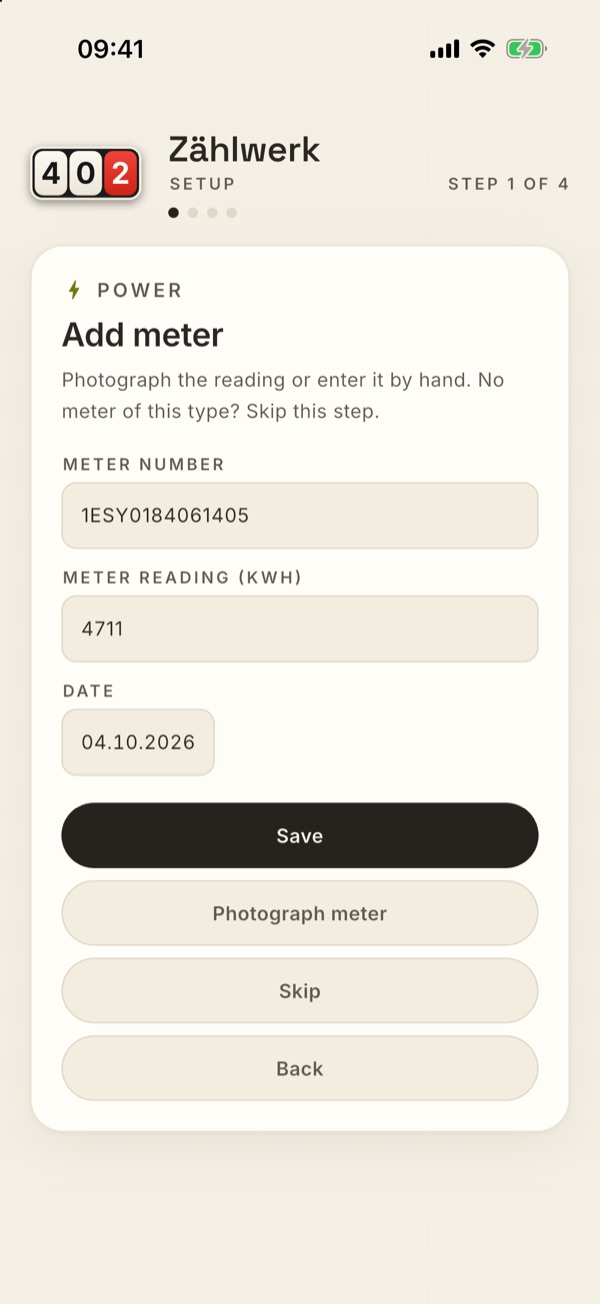
For each meter type the assistant asks in turn for the meter number, the meter reading and the date. There are three ways to go:
- Photograph meter — photo recognition reads the number and the reading and enters them; you check them and correct them if necessary. If the photo carries a capture date, the assistant takes it over.
- Enter manually — the form, without a photo.
- Skip — for everything you do not have. No gas meter? Then simply move on.
If recognition does not work, the app tells you and leaves the form open — you are never at a dead end.
Step 4: the address
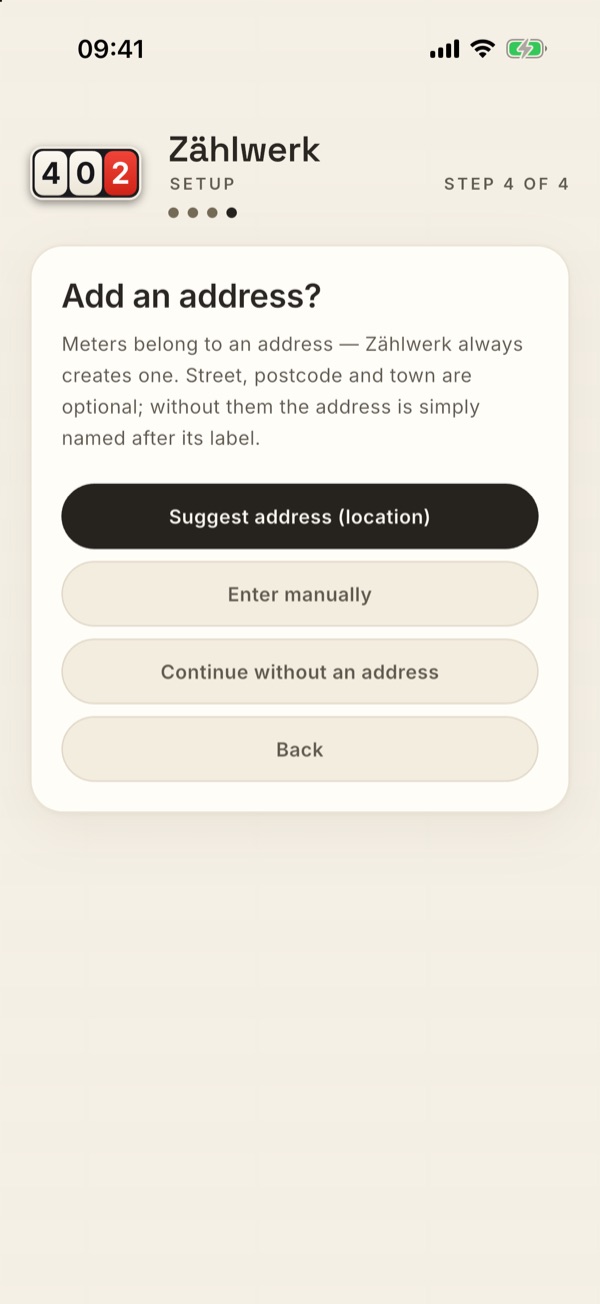
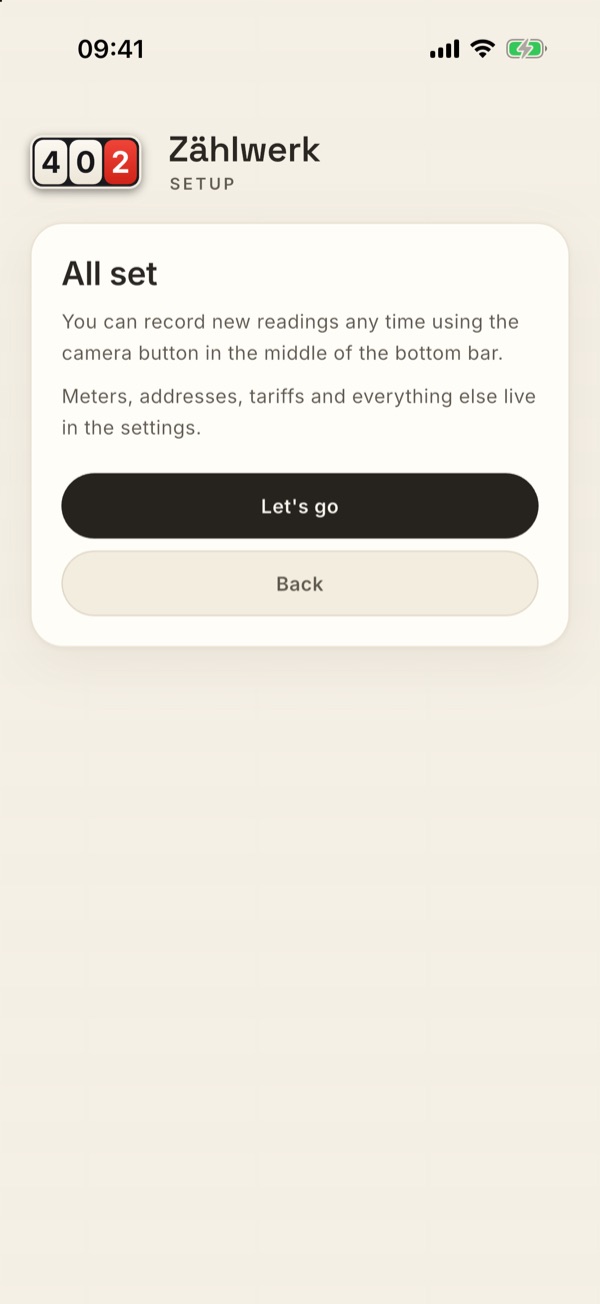
Meter readings belong to an address, which is why Zählwerk always creates one and assigns all the meters just recorded to it. Three ways again:
- Suggest address (location) — the app determines your location once and enters street, postcode, town and country into the form. You check it and change whatever is not right.
- Enter manually — the same form, empty.
- Continue without an address — then an address is created that carries only its label (“My home” is suggested), without street, postcode and town.
In both cases the label sits above the fields and can be changed freely (“Flat, 1st floor”, “Holiday home” …). Street, postcode and town are optional. The address created this way automatically becomes your default address — the one that Overview and Usage show when you open them.
The country, in contrast, is required, because it determines the currency of your amounts (see Addresses). It is pre-filled with the country of your app language: Deutsch → Germany, Français → France, English → United Kingdom. The location suggestion overwrites it, and in the form you can pick a different one at any time. The plain address from “Continue without an address” gets this country too — its name, by the way, is the translated text at the moment it is created (“Mein Zuhause”, “My home”, “Mon domicile”); if you later switch the app to another language, the name once saved stays as it is, because it belongs to your data.
Why does the app ask for your location?
Only because of this one suggestion. Permission is not requested until you tap “Suggest address (location)” — not at launch, not in the background, and nowhere else in the app. If you never tap that button, Zählwerk never asks for your location.
Your location is not stored and goes to no Zählwerk server. Turning the coordinates into an address is done by the operating system (Apple's geocoder on the iPhone, usually Google's on Android) — the same function your phone's maps app uses. In the end, only what is in the form and what you confirm gets saved.
If you say no, or if the device cannot find a location just then, the message appears above the open form and you enter the address by hand. That way the assistant never runs into a dead end.
Trial, purchase and cloud recognition (subscription)
You buy Zählwerk once — after that it is yours, with no account and no running costs. Before that you try it out in full for a week. The only thing with running costs is the subscription for photo recognition in the cloud, and that is optional.
The trial: seven days
It begins with the first launch of the app and runs for seven days. During that time everything is open: as many addresses and meters as you like, the setup assistant, all the analyses. That includes 50 cloud photos — that is how many meter photos Zählwerk recognition reads for you during the trial.
You see where you stand at the very top of Overview, right under the Zählwerk head: a Trial card with the date it expires, the days left and the cloud photos used (“Runs until 30 September 2026 · 5 days left · 12 of 50 cloud photos”) and the line “Tap here for purchase details”. Tapping the card opens the purchase page. No window appears at launch urging you to buy.
The purchase ends the trial. From then on the limits of your package apply, and cloud recognition runs through the subscription (first month free). Whatever you created during the trial stays.
When the trial is over, nothing disappears. Your readings, meters, contracts and photos stay, and you can go on viewing, editing, deleting, exporting and backing them up to the cloud. The only thing locked is adding: a new meter reading, a new meter, a new address, a CSV import with new rows. For that you need one of the packages.
The four packages
You do not buy “the app”, but as much of it as you need. The packages build on one another:
| Package | Addresses | Meters in service in total |
|---|---|---|
| Starter | 1 | 4 |
| Two addresses | 2 | 8 |
| Three addresses | 3 | 12 |
| Unlimited | any number | any number |
The figure in the right-hand column applies across all addresses together — how you distribute them is up to you: with “Two addresses” you may have eight meters in service, say six at home and two in the garden.
“Meters in service” means the meters that are currently running. A superseded generation from a meter replacement does not count — its history is kept and still takes up no space. The wallbox never counts; it is not a meter of its own.
The CSV import sticks to this too: before reading the file it counts how many meters and addresses in your table would be new. If together they do not fit into your package, the app tells you the figures — and nothing is imported. A table is one unit; reading half of it would be worse than leaving it alone entirely.
What a package costs is shown to you by your store on the purchase page. If you already have a package, the larger ones only show the difference — the price of the building blocks you are still missing. One exception: Unlimited builds directly on Starter; the “Second address” and “Third address” blocks are not credited there.
The purchase page
Every path to the purchase leads to one page: the trial card at the top of Overview, the View packages and subscription button in the settings card Buy Zählwerk / licence, and the notices that appear once a limit applies. It lies over the content; head and dock stay, and “‹” at the top left, the back button (Android) or a tap in the dock close it again.
From top to bottom you find there:
- where you stand — how long the trial still runs and until when, how many cloud photos are used, or, after the purchase, your package and whether cloud recognition is running;
- Packages · one-time purchase — the four packages with their scope and the price from your store, each with a Buy button. If you already have one, the larger ones only show the difference, the button says Upgrade, and the ones you have reached carry “Purchased”;
- Cloud recognition · subscription — a table that shows for every package which subscription belongs to it, what it costs per month and how many photos it carries; after the purchase your row is marked. Below it the Start subscription button with the free month and the price that follows (greyed out before the purchase). If the subscription is running, it says “Active” there, plus the link Manage subscription;
- Restore purchases and the links Privacy and Terms of use.
How the purchase works
Tap Buy next to the package (or Upgrade if you already have one). Because the packages consist of individual building blocks, your store may show several payment windows one after another — one per block. That is normal. If you cancel halfway through, it has no consequences: whatever has already been bought stays yours, and the rest is offered again afterwards as a smaller package.
Payment goes through your App Store or Google Play, with the account and the payment method stored there. Zählwerk does not see your payment details.
Second device, new phone: purchases belong to your store account, not to the device. Sign in there with the same account and tap Restore purchases on the purchase page — then everything is back, and a dialog tells you what was restored: your package and whether cloud recognition is running. A purchase does not expire.
Cloud recognition: the subscription
Your meter photos are read by an AI image model in the cloud, and every photo costs computing time. That is why it is the only thing with a subscription — monthly, cancellable in the store at any time, the first month free. It requires the purchase and follows your package:
| Package | Cloud photos per month |
|---|---|
| Starter | 20 |
| Two addresses | 40 |
| Three addresses | 60 |
| Unlimited | 5 per meter in service |
Exactly this scale is what the purchase page shows in the Cloud recognition · subscription section — with the monthly price from your store, even before the purchase, so you know what to expect.
If you buy while the trial is still running, it ends with the purchase — including the 50 cloud photos. From then on you need the subscription for photo recognition in the cloud; the first month is free.
When it gets tight, the card at the top of Overview tells you (“Cloud recognition · 33 of 40 photos this month”). Once the quota is used up, the app says so with the next photo: the photo is kept as a record, the form stays open, and you enter the reading by hand. Next month it carries on.
Without a subscription everything keeps working — only photo recognition in the cloud does not. Entering by hand, recognition on the device, your own AI access and the Local source keep working (see Cloud recognition).
You can only cancel where you subscribed: in the subscription settings of your store. For that the purchase page has the link Manage subscription — on iPhone and iPad it opens Apple's subscription sheet right inside the app, on Android the Google Play subscription page. If you do not cancel, the subscription renews automatically every month.
What Zählwerk learns about you
Nothing that has anything to do with you. The purchase runs entirely through Apple or Google — Zählwerk gets to see neither your name nor your payment details. While a subscription is running, the app sends a pseudonymous licence key along when a photo is read: a short string calculated from the transaction number of your subscription. It makes sure that your iPhone and your iPad are counted as one subscription, and it cannot be traced back to you or to your store account. During the trial it is not sent at all, and without a subscription no photo at all leaves your device after the trial.
The layout: five areas
Along the bottom edge you will find the dock with five areas. Four of them show an icon and a name; in the middle sits the round camera button for recording:
| Area | Icon | Purpose |
|---|---|---|
| Overview | Speedometer | Current reading and trend per meter |
| Usage | Bars | Analyses: months, years, costs |
| Record | Camera button | Enter a new meter reading (with photo recognition) |
| History | Clock | All readings — filter, edit, delete |
| Settings | Sliders | Addresses, meters, contracts, design options, data and much more |
Every area carries the Zählwerk header with the name of the page at the top. It stays put while you scroll — so you always see where you are.
If you tap the area you are already in, nothing happens on purpose: filters you have set, expanded cards and the scroll position stay as they are. One single exception: if the address comparison is running under Usage, a tap on “Usage” takes you back to the familiar analysis of the address you last chose.
Overview
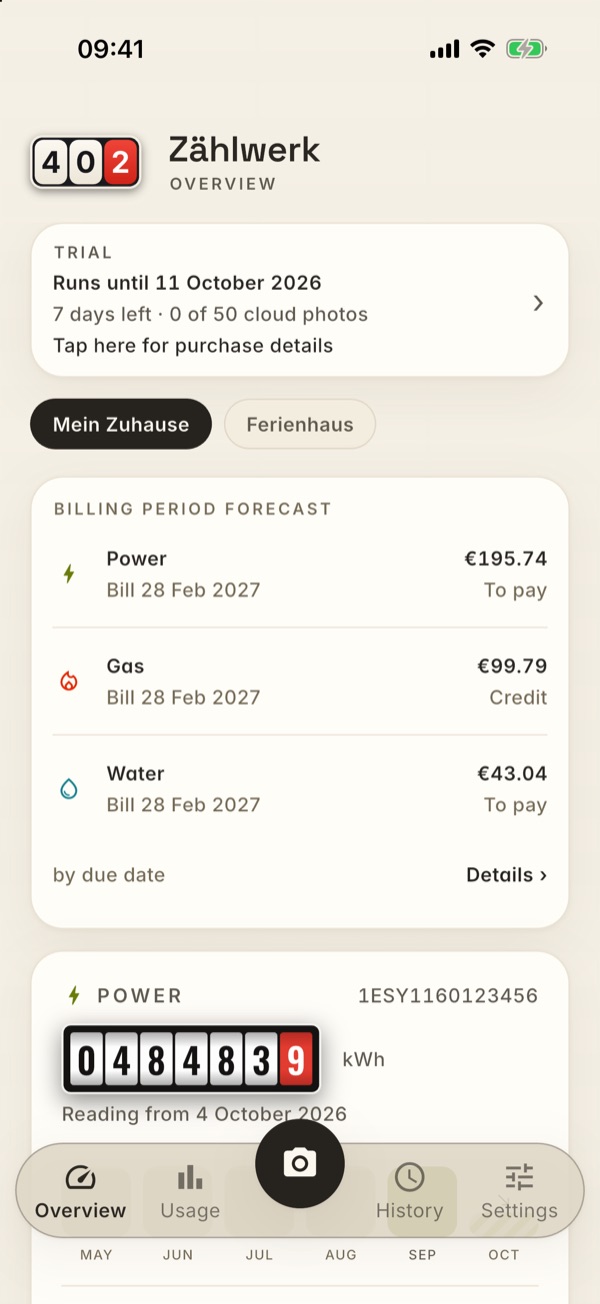
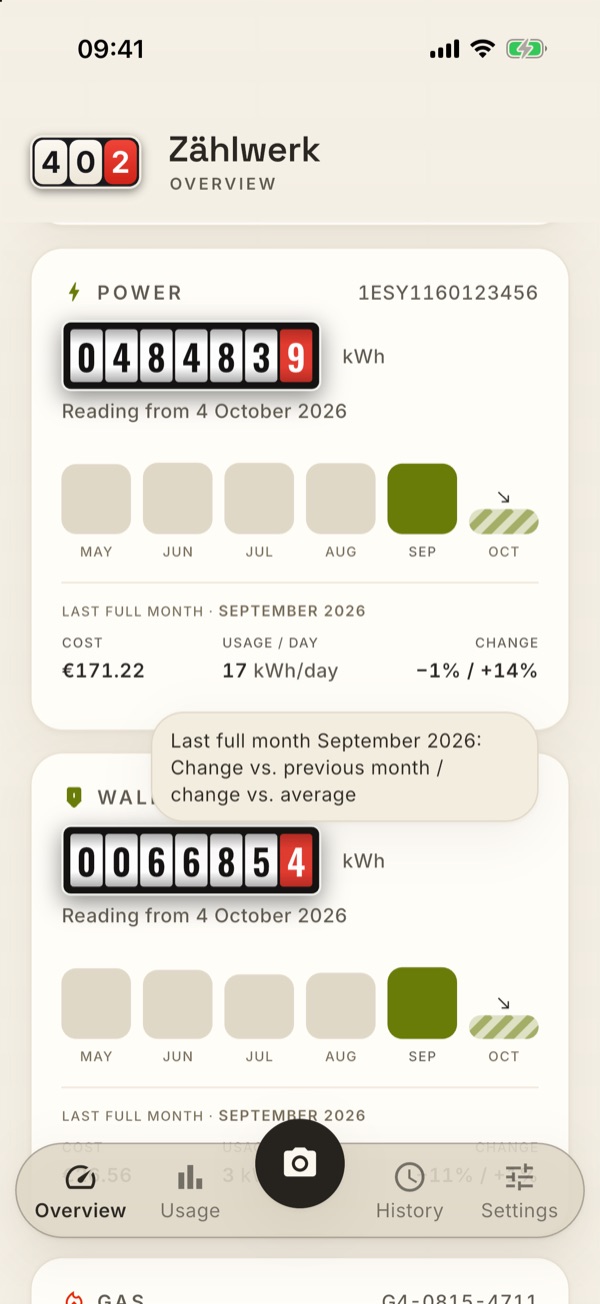
The Overview shows one card per meter — sorted by electricity, gas, water. Each card carries the matching symbol in the colour of its meter type in the top left: a lightning bolt for electricity, a flame for gas, a droplet for water — so you can tell the types apart out of the corner of your eye. To the right of it stands the meter number, and below it — if you have given one — the label of the meter. That pays off as soon as you have two meters of the same type: “Cold water” and “Hot water” can be told apart at a glance, two cards reading “WATER” cannot. You give the label in Settings under Meters; without one the card looks just as it did before.
On every card you see:
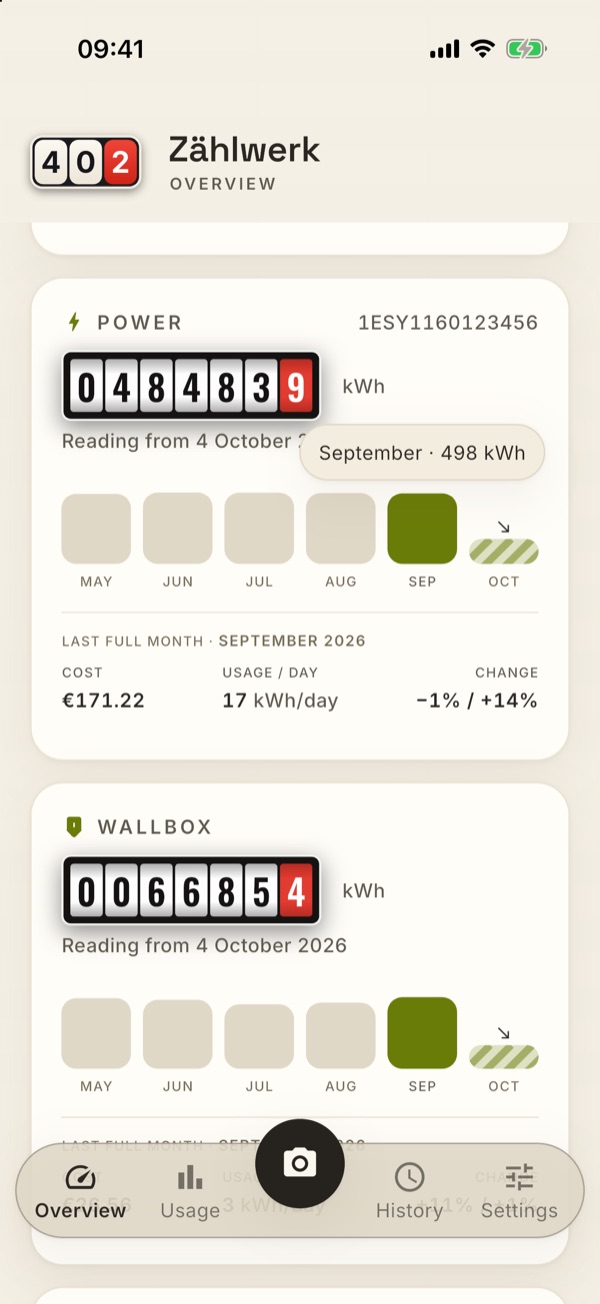
- the latest meter reading with its date (rounded to whole units, as in the History — the exact values including decimals are there when you edit a reading), shown as a roller counter with the same drums as on the real meter,
- on a bidirectional meter, two more lines directly below it: “Feed-in 12,062 kWh” and its own “Reading from …”. That is the reading of the second register (code 2.8.0, see Bidirectional meters (feed-in)). It is deliberately set smaller than the roller counter above it: consumption is what gets billed, and the card should show at a glance which figure that is. If you have never photographed the feed-in register, it says “Feed-in: no readings yet.” — so the line appears as soon as the app keeps the meter as a bidirectional meter, not only with the first photo. All the other figures on the card — usage per day, change, cost, month bars and the forecast — still work on consumption alone,
- the usage per day — the daily usage of the last full calendar month, that is its total usage divided by the number of its days (rounded to whole units; rates below 1 keep one decimal place). So it works on the same month and the same total as the change next to it. If there is no full month yet, the current one counts up to the day of your last reading,
- the change as two percentages side by side: first against the previous month, behind it against the average of the same calendar month in earlier years (example: “+52% / +19%”). The sign shows the direction, the figures deliberately stay without a red/green judgement. If you tap the column, a small bubble explains which value is which (“Change vs. previous month / change vs. average”) — and in its first line, which month both refer to (“Last full month February 2026:”). It opens below the card so that it does not cover the meter reading and the month bars; if there is no room left at the bottom of the screen, it flips upwards. It disappears by itself or as soon as you touch the screen again — including when you swipe: the bubble goes away and the page scrolls on perfectly normally. It stays up roughly twice as long as the app's other explanations, because it carries more text. As long as there is no full month yet, the bubble only names the two comparisons. If one of the two comparisons is missing, a dash stands in its place (“– / +19%”). Both values always work with the last full calendar month: the current month and interim readings within it change nothing about that — half a month would otherwise make usage collapse artificially. As long as there is no full month yet, the column stays empty (“–”),
- month bars for the last six months. Their colours tell the same
story as the figures below them:
- strong in the colour of the meter type stands the last full calendar month — the month that change and comparisons refer to; its month abbreviation is set darker as well,
- pale and diagonally striped — in the same colour — stands the current, not yet finished month. The stripes say: the bar is not finished yet, it keeps growing until the end of the month,
- grey all the other months stay. In the striped bar (or just above it, if it is still flat) sits a small arrow: it points up if in the current month you use more per day than in the last full month, and down if it is less. If the two are level — or if a full month is missing as a comparison — there is no arrow. It, too, judges nothing, it only shows the direction. If you took a reading on the last day of the month, the month is finished: then there is no striped bar and no arrow. If you tap a bar, a small bubble names its usage — “May · 412 kWh”. That goes for every one of the six months, including the grey ones and months without usage (“February · 0 kWh”). Only for the current month does it add a “so far” (“June so far · 78 kWh”), because its value is still growing. The bubble disappears after a few seconds or as soon as you touch the screen again; if you tap another bar while doing so, it shows that bar's usage. More than one is never open — and with a bubble open the page stays perfectly normally scrollable.
- with a contract stored, the cost for that same month: the usage of the last full calendar month times the unit price that applied in that month, plus its base price. All three figures in the row therefore speak of exactly one month — and which one that is stands as a small header above the row: “Last full month · July 2026”. The column is then simply called Cost (instead of “Cost / month”), while Usage / day and Change stay as they are. A later price change therefore no longer alters the figure retrospectively. Two cases stay open: if there is no full month yet, an estimate from your monthly average and the contract valid today stands there as before; and if you have entered a “Valid from” date for your contract that lies after the reference month, the column shows a dash — for that month the app simply does not know a price. If you leave “Valid from” empty (the normal case), your contract applies to every month.
You only see the base price on one card. If one contract applies to several meters — say a water contract for cold and hot water or one you have stored for a whole address or for a meter type —, you still only pay its base price once. So Zählwerk counts it on the card of the meter you added first; all the other cards show pure usage times unit price. Added together, the cards therefore give exactly the amount that the cost chart under Usage names for the same month. If a meter has a contract of its own, its base price of course stands on its card.
If you have several addresses, you switch between them at the top: up to three addresses sit side by side as buttons, from four on it becomes a selection field with the name of the current address — tap it, and you get all addresses as a list, the active one with a tick. That keeps the row clear even with many addresses. Your default address (the star in Settings) always sits in first place — as the first button or as the top entry of the list; all the others follow alphabetically. The app does not remind you to take a reading here, but as a notification on your device (see Reading reminder).
The licence line. Below the address selection there is, where needed, a plain grey line — not a warning, just a piece of information. It appears in three cases: during the trial (“Trial · 5 days left · 12 of 50 cloud photos”), afterwards without a purchase (“Trial over — buy Zählwerk to add anything ›”) and when your photo allowance runs low (“Cloud recognition: 33 of 40 photos this month”). A tap on it leads straight to the purchase card. If there is nothing to say, nothing stands there — for instance when you have bought and do not need a subscription. Details under Trial, purchase and cloud recognition (subscription).
Billing period forecast
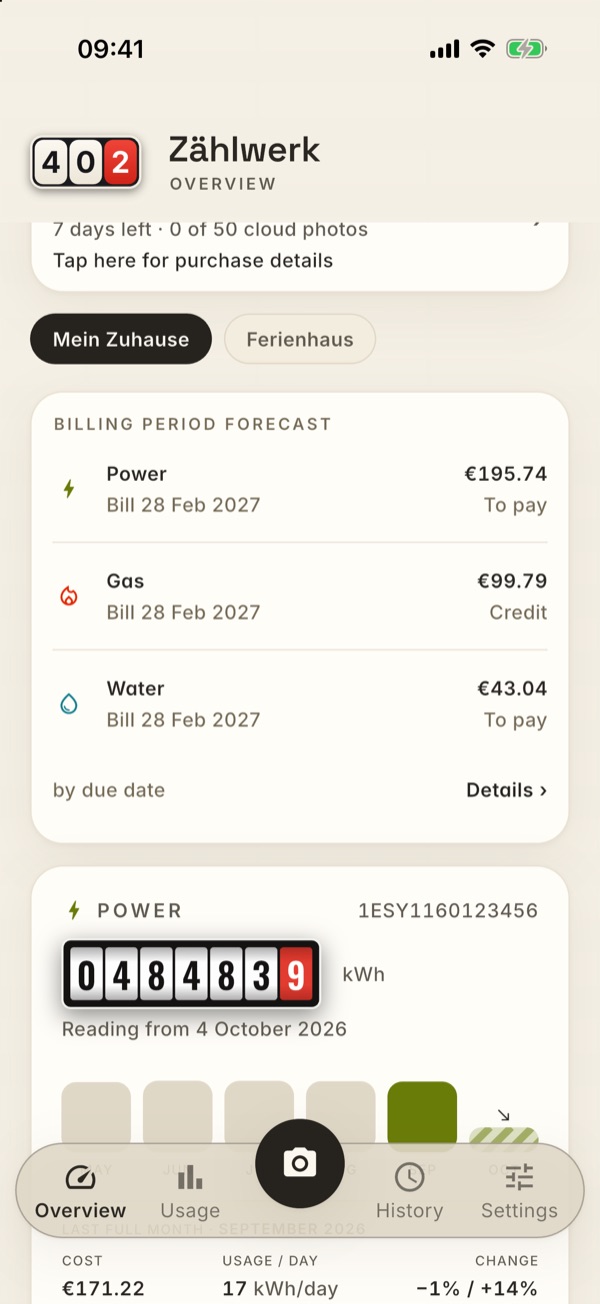
If you have entered the monthly instalment for at least one contract (see Contracts), the card “Billing period forecast” stands at the very top of the Overview: one line per contract, sorted by the next bill (bottom left it says “by due date”).
Each line shows the icon of the meter type on the left, next to it the name and below it when the bill is due: up to a month beforehand the remaining time (“Bill in 13 days”), otherwise the date (“Bill 22 Feb 2027”). On the right stands the amount and below it the word for it — “Credit”, “To pay” or “balanced”. For a feed-in contract the line is called Feed-in, and the words there are “Payout” (the grid operator transfers the balance to you at the end of the year) or “Repayment” (you have received more instalment than you are entitled to) — the money flows the other way, after all. If your reading history does not yet reach back a full year, the forecast is only an order of magnitude: then an “≈” stands before the amount, the figure is set paler, and the line adds “· only 4 months of data”. At the very bottom the link Details › leads to the forecast page; a tap on a line leads there as well.
A total across all contracts is deliberately not shown on the card: the amounts fall due on different dates, and the question “am I getting money back?” is always answered by a single bill.
This is how it calculates, per contract:
- Ø usage per day — your measured usage over the last twelve months, divided by the days in between. That way every season counts exactly once, and a rise in usage (say since an electric car has been charging at the wallbox) comes through in full instead of being watered down by old, cheaper years. If you have not been measuring for a whole year yet, the app works with everything there is. You can change the period — see Forecast settings.
- × days of the billing year — that gives the expected yearly usage.
- × unit price + base prices — the expected yearly cost. Both apply per month: if your contract has a price change within the billing year (including one already announced), each month works with the price that applies then.
- − the twelve instalments — these month by month as well: if the instalment changes over the course of the year (say €146 until September, €183 after that), the amount valid at each due date counts. If something is left over, it is a payment due; if the amount is negative, you will probably get money back.
The calculation deliberately runs against all twelve instalments of the billing year, not only against those already paid — otherwise it would always say “To pay” in spring and always “Credit” in December, without anything having changed about your usage. How much you have transferred to date is still in the details.
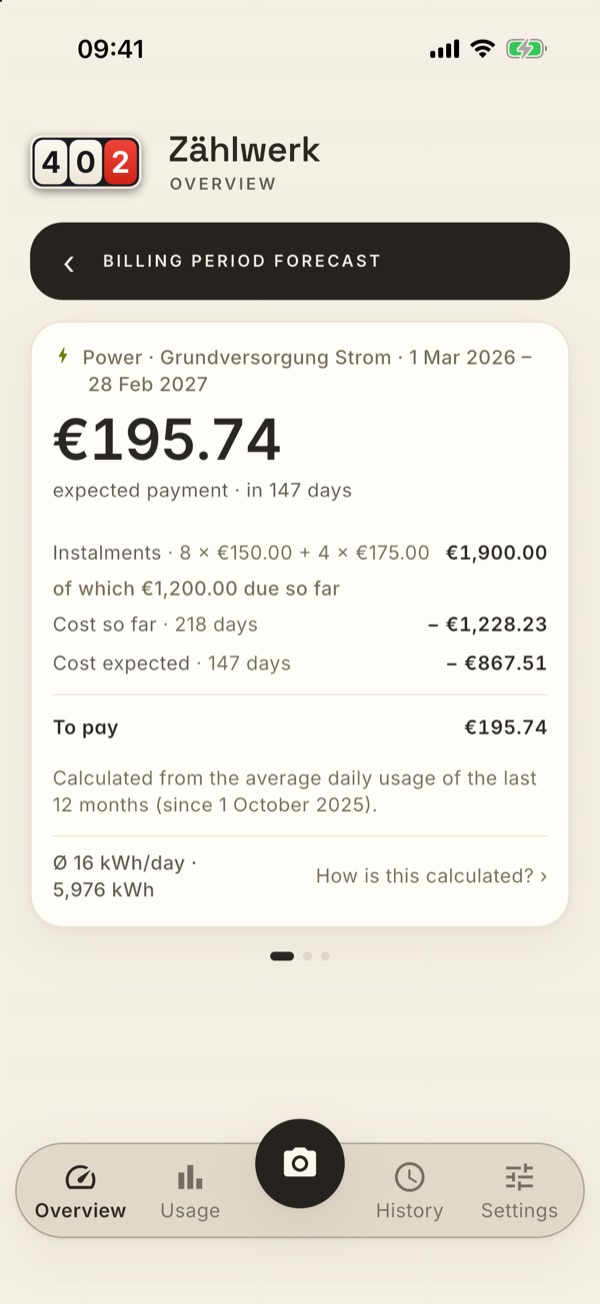
Details › opens the forecast page: one contract per screen. If you have several, you swipe sideways from one to the next — the dots under the card show where you are. If you tap a line of the Overview card, the page opens straight at that contract.
At the top of the card, one line says what this is about: meter type, contract (without a name it says what it applies to) and the billing period — “Gas · Octopus · 2 Mar 2026 – 17 Sep 2026”. Below it the amount in large type and the word for it together with the deadline: “expected credit · in 13 days”.
Then the calculation, line by line — the same calculation as above, only written out:
| Instalments · 12 × €146.00 | €1,752.00 |
| of which €1,168.00 due so far | |
| Cost so far · 187 days | − €1,070.35 |
| Cost expected · 178 days | − €471.53 |
| Credit | €210.12 |
The first line names all twelve instalments of the billing period (how much of that was already due stands in small type below it); if the instalment changes over the course of the year, the staggering “6 × €146.00 + 6 × €183.00” stands there. The two cost lines split the expected yearly cost by days: what falls on the days gone by and what is still to come by the end. Both are estimates — “Cost so far” is not a bill from your supplier either, but the share of this forecast that falls on the days gone by.
For a feed-in contract the same calculation runs the other way round — the payment is what you are owed, the instalments are what the grid operator has already transferred to you:
| Feed-in payment · 0.082 € / kWh | €188.32 |
| of which €127.45 so far · 247 days | |
| Instalments · 12 × €20.00 | − €240.00 |
| of which €160.00 due so far | |
| Repayment | €51.68 |
If the grid operator has not paid any instalments at all yet, the sentence “No instalments yet — that is normal in the first year.” stands instead of the instalment line, and the amount is the whole expected yearly payment. If the feed-in rate changes within the period, the staggering stands next to “Feed-in payment” (“184 days × 0.082 € / kWh + 181 days × 0.090 € / kWh”). At the very bottom the footer names the Ø feed-in per day and the expected yearly feed-in.
Below that it says since when the calculation runs — and if your reading history does not yet cover a full year, the note “Only 4 months of readings — the forecast is still uncertain.”. At the very bottom left the Ø usage per day and the forecast usage (“Ø 2 m³/day · 841 m³”); with gas, the value in kilowatt-hours stands behind it. To the right of it, How is this calculated? › leads to a short text that explains the calculation in words — including which gas factor the kilowatt-hours are calculated with: with the factor of your gas contract (state number × calorific value, see Contracts) or, if none is entered, with the standard value of 11.05 kWh/m³.
You go back with the “‹” at the top left, with a tap on Overview in the Dock, on Android also with the back button.
A few things that are good to know:
- One contract, one line. If the same contract applies to several meters (cold and hot water, house and garden), the line counts both together. If two meters of the same type have different contracts, each contract gets its own line — they are not added together, because they are billed on different dates. So that you can tell the two apart, the contract then stands behind the meter type as well (“Gas · Octopus”).
- Feed-in. If you have stored a feed-in contract, it gets its own line — it is never offset against your electricity contract: they are two contracts with two partners and two dates. The calculation works just as it does for consumption, only the other way round: Ø feed-in per day × days of the billing year × feed-in rate = expected yearly payment, minus the grid operator's instalments. There is no base price there. This line appears even without an instalment — in the first year of operation the grid operator usually does not pay one yet, and the question “what will I get this year?” can still be answered; the amount is then the whole yearly payment. The limit with photovoltaics: a solar system feeds in many times more in summer than in winter. If you are not measuring a full year yet, the yearly figure is only a rough estimate — the detail page says so.
- Wallbox. The charging current runs through the electricity contract and is in the usage of your electricity meter anyway — it is included in the electricity line.
- No billing period in the contract? Then the forecast works with the calendar year; the details say so explicitly. If your contracts run to different dates, each line works on its own period.
- No instalment, no line — for consumption. Without the monthly amount there is nothing to compare there. For a feed-in contract the feed-in rate is enough (see above).
- The limit, honestly: as long as you are not measuring a full year yet, the average runs over everything there is — if you have only been measuring for a few winter months, the yearly figure comes out too high with gas; after a full year it becomes reliable. And the twelve-month window starts at a reading: if there happens to be none a year ago, it reaches back to the next older one. It remains an estimate — what your supplier bills is decided by its own invoice.
- The period is adjustable. Twelve months is the default; under Forecast settings you can also choose 24 or 36 months or your entire history.
Previous meters
If a meter has been replaced, the old one does not disappear — it slips to the end of the Overview, into a line “Previous meters (2)”. It is collapsed every time the app starts; if you tap it, it opens up and shows a small card per superseded meter with the type, meter number, label and its latest meter reading together with the date. That keeps it traceable which reading a meter left the house with — for the final bill, for instance.
Month bars and figures are deliberately missing there: a removed meter does not use anything any more, and its usage is not lost anyway — the card of its successor counts the old history in, so that the month of the change and the months before it are correct.
When does a meter count as superseded? Whenever another meter of the same type at the same address started on or after its last reading day and went on being read beyond that — or when you have stored the replacement via the meter replacement assistant. Two meters running side by side (cold and hot water, house and garden), by contrast, both stay as full cards: neither of the two started after the other. You see the same split in Settings under Meters.
The Wallbox card
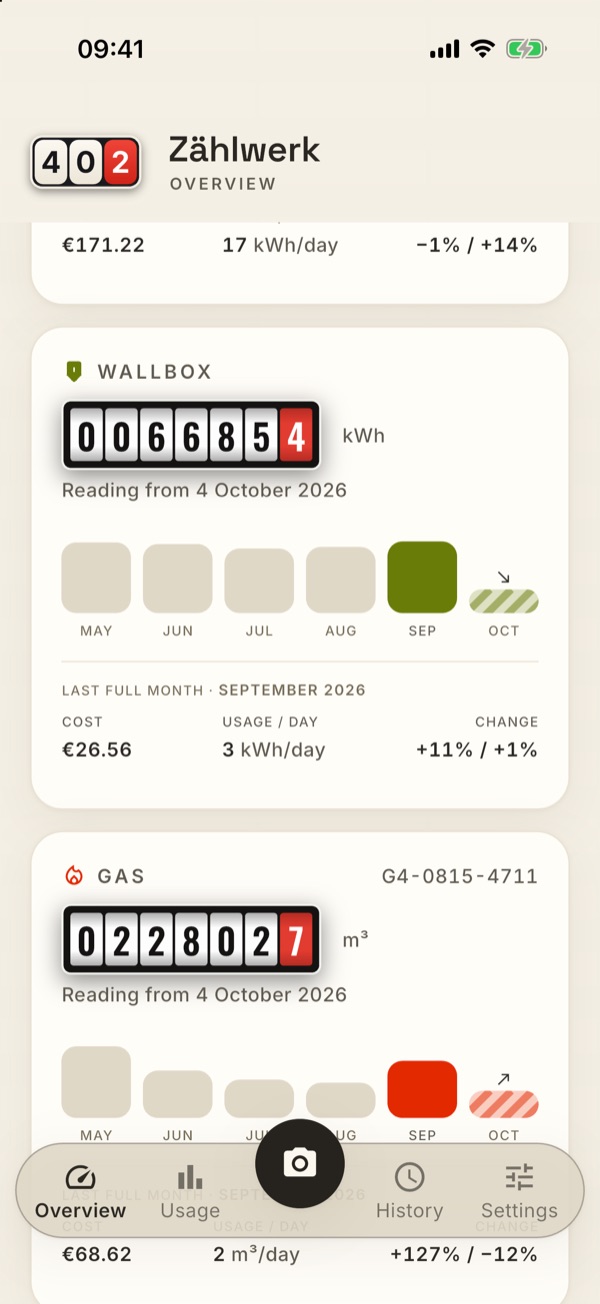
If you have connected an Easee wallbox (see Wallbox), a card of its own for the wallbox stands between the electricity and the gas cards — recognisable by the symbol of the charging station, which is in the same blue colour as the wallbox in the chart under “Usage”; so are its month bars. Its border is in the electricity colour like the power card — after all, the wallbox charges electricity. It is built just like a meter card: meter reading, month bars, usage per day, change and — with an electricity contract stored — the estimated cost. With the cost, the base price is deliberately left out: it belongs to your house connection and is already in the cost of the electricity meter.
The month bars, too, follow the same rule as with a meter — what is a reading there is a month in which charging took place here. The row therefore ends at the last month with charging: if you have not charged in the current month yet, it does not even show up as an empty bar, and the last month with charging stands strong in the meter-type colour. If you do charge in the current month, it stands pale and striped at the right edge as usual and carries the trend arrow. Months without charging between two charging months stay as flat grey bars — they belong to the story.
The meter reading of the wallbox comes automatically from the charging station itself — that is its lifetime counter, the same figure you also find in the Easee app. You do not have to read or photograph anything for it: the app fetches it with every retrieval of the charging values. If you have only just connected the wallbox or freshly updated the app, it still says “The reading will arrive with the next wallbox sync.” — with the next retrieval it is there.
The card only appears if charging values are available, and only at the address where your wallbox hangs. If there is no electricity meter at the address, it stands at the end of the list.
The wallbox does not count as a meter of its own. For everything that goes by the number of your meters, it stays out of it — it has its own card, but it does not take up a meter slot.
Whether the figures of the Wallbox card are additionally contained in your power card depends on the switch “Include wallbox usage” (see Wallbox): if it is off, the power card shows the household without charging current and the Wallbox card shows the charging current — together your entire electricity usage. If it is on (factory setting), the power card shows everything together and the Wallbox card shows which part of it was charged.
Replaced meters (e.g. after a meter replacement) disappear automatically from the Overview — their history is kept in full in the History and in the analyses. What is more: the card of the successor carries it on. Bars and figures work across the change, the month of the change carries the usage of both meters together; only the meter reading shown is that of the new meter (see meter replacement assistant).
Usage
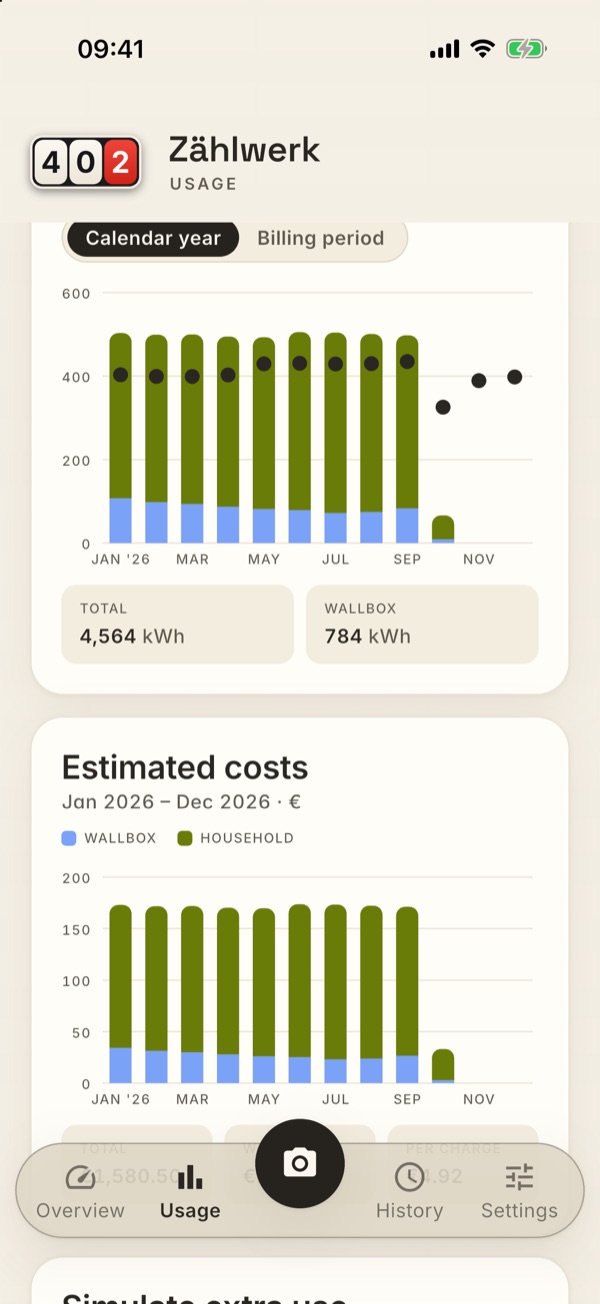
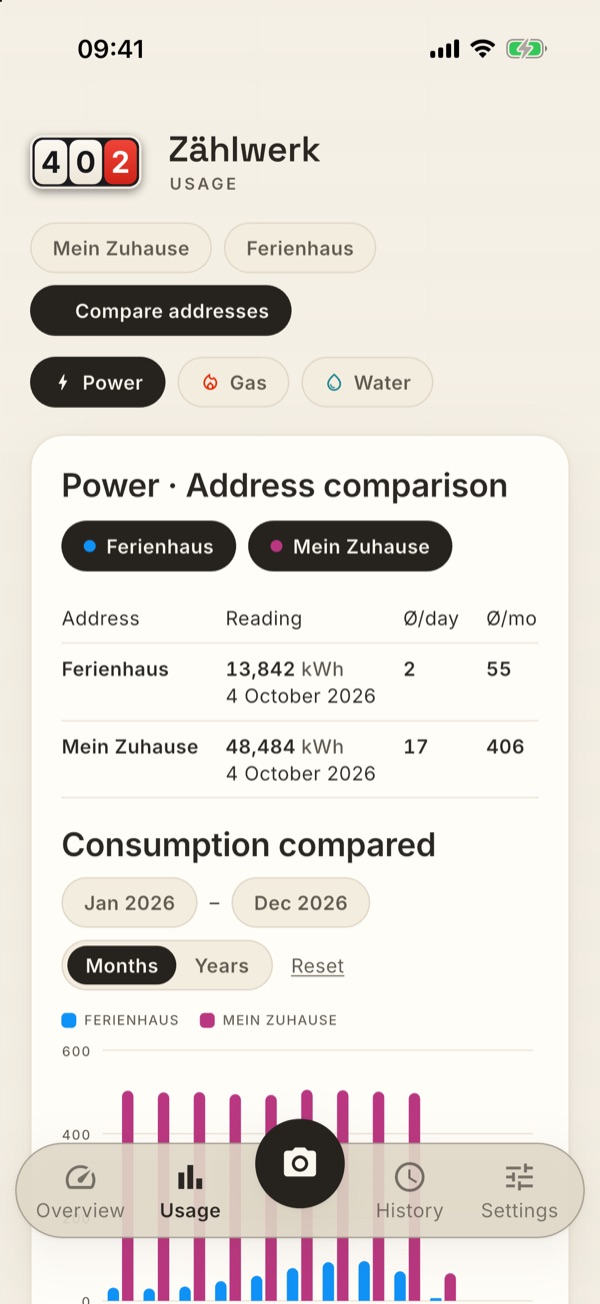
The Usage area analyses your data by meter type. At the very top you pick the meter type using three buttons with the same symbol as on the overview cards (lightning bolt, flame, drop). With several addresses the address selection sits above them — as on the overview, up to three buttons side by side, from four addresses onwards a selection field with a list, and here too the default address comes first. The Compare addresses button stays beside them in both cases; while the comparison is running, the individual address is shown faded, and as soon as you pick an address from the list, the comparison ends.
Like those on the overview, the cards in this area have no coloured border; which meter type is currently selected is shown by the type selection at the top, by the card header and by the colours of the bars.
Consumption and costs each have their own card. Both are built the same way: at the top the title (“Consumption per month” or “Estimated costs”) and below it, smaller, the period shown along with the unit (“Jan 2026 – Dec 2026 · kWh”); next to it — on narrow devices below it — the legend of the chart. Then the chart, and below it the key-figure tiles, which show the most important numbers of the period at a glance (see below). The period is set once, in the consumption card: the costs card follows every change immediately — whether you change From/To, switch between months and years or move between calendar year and billing period. So both cards always show the same section. If you have a bidirectional meter, a third card is added — “Feed-in per month” (see below); it follows the same setting too.
- At the very top one meter reading card per meter that is in service — if you have two water meters for the same address (cold and hot, or house and garden), two cards appear one below the other, each with its own reading and its own key figures. Meters that have been replaced do not get a card of their own: their consumption keeps counting on the card of their successor, so that the series is correct across a meter replacement — exactly as on the overview. Every card has the same header as on the overview — meter type on the left, meter number on the right, below it the label of the meter if you have given it one —, then the current reading as a large rolling counter with the date and directly below it the same three key figures as on the overview cards: Cost, Usage / day and the Change (previous month / average, with the same explanation on tap). Here too the reference month appears as a header above the row (“Last full month · July 2026”): all three refer to the last full calendar month, the costs to the contract valid at that time. If several meters share one contract, its base price appears only on the card of the meter that was created first (see Overview) — otherwise it would appear on every card although you only pay it once. Anything you have not stored for a meter (e.g. no contract) shows a dash. The charts below, by contrast, combine all meters of that type at the address — there you want to know how much water the house used altogether. You can still see how it is distributed across your meters: the bars are then broken down into their shares (see below).
- The shares of your meters within the bar — if you have several meters in service for one type (cold and hot water, house and garden, house and workshop power), every bar shows the same overall height as before, but is divided into one segment per meter. The meter created first keeps the colour of its meter type, every further one gets its own, clearly distinguishable colour. Which segment belongs to which meter is shown in the legend above the chart — it shows the label of the meter, and if you have not given it one, its meter number. If you tap a bar, the detail panel names every meter with its value and below that the total: “House: 14 m³ · Garden: 14 m³ · Total: 28 m³”. This applies to the consumption and the costs chart; everything else stays as it was — the “Total” tile and the average points keep calculating on the total. If you have only one meter in service for a type, nothing changes: the bar stays a single one in the colour of the meter type. Meters you have replaced do not get a segment of their own — their consumption counts within the segment of their successor, just as its card continues the story. Consumption that cannot be assigned to any of your current meters — for example from earlier meter generations without a replacement link — appears as its own grey segment “Previous meters”, so that the bar is always as high as the total below it; in periods where these meters contribute nothing, the segment and its legend entry are absent.
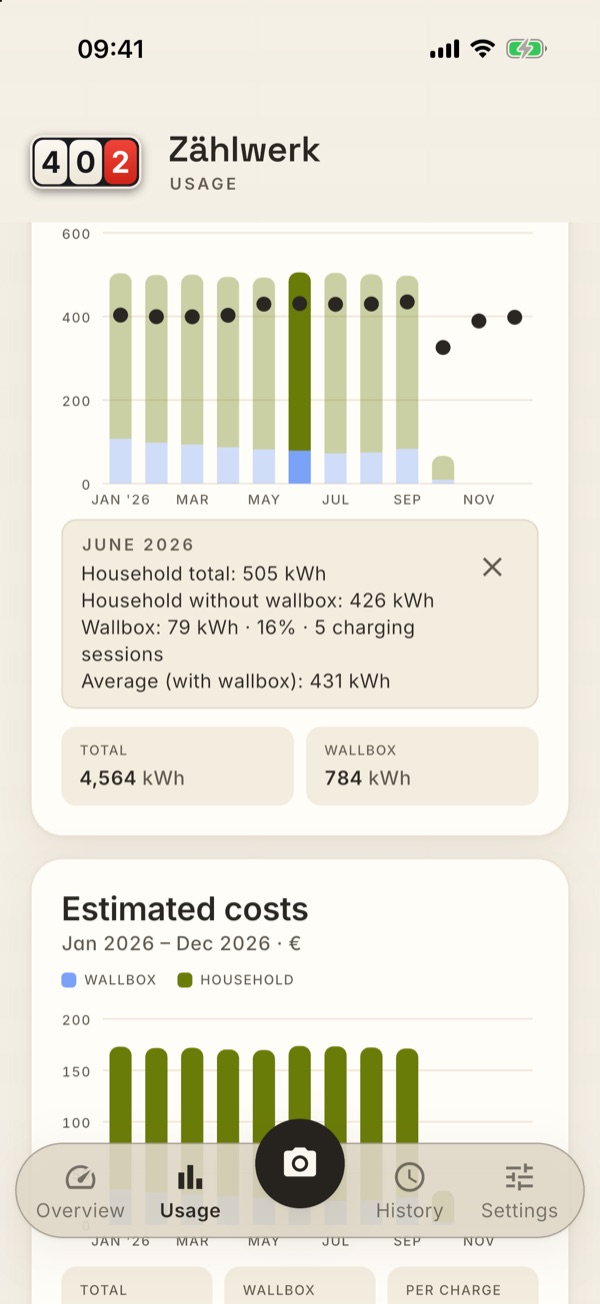
- Monthly consumption per year as a bar chart — year selectable at the top, next to it as a dot the average per calendar month across all years — above a month that has been read it only appears once this month exists in at least one further year (with only one year the “average” would be the bar itself); in months without a bar a single previous year is enough (see “What you can still expect”). If you have switched off “Include wallbox usage” (see Wallbox), this average is calculated without the charging current too — the bars themselves still show household plus wallbox. If there is a wallbox at this address, the detail panel tells you explicitly what was used for the calculation: it reads “Average (without wallbox)” or “Average (with wallbox)”, depending on the switch — the legend above the chart carries the same information. Tap a bar to see the exact values; months without a bar have nothing to show and therefore do not open a detail panel — tapping one closes an open panel again, like a tap next to the chart. The detail panel names both month and year in its header (“OCTOBER 2025”), so that with periods spanning several years it is clear which month is meant. You clear the selection by tapping the same bar again, tapping next to the chart (left axis column), or tapping the detail panel or its cross.
- What you can still expect — for months you have not read yet, there is no bar, only the average dot: the value this month had in your previous years. That way you can already see in January where the year is likely to end up, instead of looking at ten empty columns — and because nothing was measured there, nothing is shown that looks like a measurement. A single previous year is enough for this: if you have read this month only once, it is simply the value from back then; with several years it is their average. Above a month that has been read, the stricter rule still applies — there the dot only appears from the second year on, because an “average” from a single year would be the bar itself. If you have switched off “Include wallbox usage”, these dots are calculated without the charging current too. They do not count towards the “Total” tile below — that remains the balance of what was actually read. Dots only exist in the monthly resolution; as soon as you read the month, its bar joins them.
- Costs per month in a card of their own, as soon as a contract is stored (price changes are taken into account to the month) — the same calculation the cost figure on the cards comes from. Without a contract the card disappears entirely; if you calculate in a different currency at one address than at your default address and currencies are therefore mixed, the chart is replaced by a note saying that costs cannot be compared in that case.
- Feed-in per month in a card of its own, as soon as there is a bidirectional meter with at least two feed-in readings at the selected address (see Bidirectional meters). It shows in kilowatt-hours how much power you fed into the grid — in the same layout as the two cards above: title, period with unit, the chart and below it the Total tile for the period set. If you have stored a feed-in contract, a second tile Feed-in payment appears next to it: what your grid operator is likely to pay you for this period — per month the kilowatt-hours fed in times the rate that applied in that month. So a rate change takes effect to the month. Without a feed-in contract the tile is absent. If you tap a bar, the bubble names the amount alongside the kilowatt-hours (“Feed-in payment €26.40”). It has no period bar of its own: From/To, Months/Years and calendar year/billing period are still set in the consumption card, and the feed-in card follows immediately. Its bars have their own colour, which matches neither the meter type nor the wallbox — feed-in is not a subset of your consumption, but the opposite direction; that is why it also does not appear as a second series in the consumption chart. What it deliberately does not show: no average dots and no breakdown by individual meters. There is no separate costs chart for it either — kilowatt-hours times a fixed rate would only produce the same curve a second time. If the address combines several meters, the card is their total — like the charts above it. A meter replacement is included: the series of the old meter continues in that of the new one.
- Wallbox power as its own series if you have connected an Easee wallbox — that way you can see what share of your power goes into the car. The wallbox belongs to one address: its series only appears in the power chart of that address, not in those of your others. Which one it is you set in the settings under “Wallbox”; without your own setting it is your default address (the one with the star). If you have several power meters in service at this address, the bars show the shares of those meters instead (see above): in that case it cannot be said behind which meter the car was charged. How much charging current is in the period is still shown by the “Wallbox” tile below.
- The tiles below each chart — they summarise the period you have set. Below the consumption chart: Total (the sum of all bars) and Wallbox (how much of it went into the car). Below the costs chart: Total, Wallbox and per charge — what one charge cost you on average (wallbox costs of the period divided by the charging sessions in it); you will find the same figure per month if you tap a bar in the costs chart: “Wallbox: €28.50 · 21% · €5.70 per charge”. If there was no charging at all in the period, “per charge” is absent. The wallbox tile only appears if charging data is available and you are at the address the wallbox belongs to — that is, exactly when the stacked bars show it too. It is a share of the “Total” next to it and is unaffected by whether you have excluded the wallbox from your key figures. All the details about the wallbox — meter reading, monthly bars, usage per day, change and costs — are on its own card in the Overview (see The Wallbox card).
- Address comparison, if you manage several addresses. Each address gets a fixed colour of its own — the same in the button, in the legend and in the chart. The colours are deliberately different from those of the meter types, and they stay attached to the address: if you remove an address from the display, the others keep their colour. At most six addresses are drawn at the same time — more would no longer be distinguishable as bars. If you have more, a note below the chart tells you so; the further addresses stay visible in the comparison table. You leave the comparison via the same button, by picking a single address — or with a tap on Usage in the dock, even if you are already there. If the addresses being compared use different currencies, the table shows every row in its own, and below it reads “Costs in different currencies cannot be compared.” — consumption itself remains comparable.
Period: calendar year or billing period
Above the charts is a bar with which you set the period shown: From and To (a month picker each), the Months | Years switch for the resolution, the Calendar year | Billing period switch and Reset.
The Calendar year | Billing period switch determines which period is preset:
- Calendar year (the default) shows January to December of the most recent year for which you have readings.
- Billing period shows your current billing year instead — if it starts on 1 March, you see March 2026 to February 2027. Both charts, their total rows and the estimated costs then run across exactly this period.
Where the period comes from: from the contract that applies today to the meters shown — the “Billing from” and “Billing to” fields (see Contracts). They contain only day and month, no year; the app works out which year they fall into. If your billing year starts on 1 March, you see the period March 2026 – February 2027 until the end of February and, from 1 March, March 2027 – February 2028 automatically. You do not have to maintain anything for that as long as the contract runs.
The same order of precedence applies as for the costs: a contract for this meter beats one for this address, and that one beats one for the whole meter type. If you have entered only ONE end, the app adds the other — a billing year does last a year, after all: “from 1 March” becomes “until 28 February”. If the contract contains nothing at all, the calendar year remains, and below the bar it reads: “No billing period is stored in the contract — showing the calendar year.” Your choice is still saved — the meter type next to it may well have a period.
The setting is saved and applies again the next time you open the app — it is your default, not just for this visit. You can change From and To by hand at any time afterwards; Reset takes you back to the default of the mode currently selected (i.e. to the calendar year or the billing period), not to a fixed value.
In the address comparison this switch does not exist: there you compare several addresses, and therefore several contracts — there is no common billing period for that, and the comparison stays with the calendar year.
Depending on the design you have chosen, the usage area starts with a large dial gauge (British Racing Green) or a rolling counter (Zählwerk and Classic) that puts your current consumption into context. The dial gauge shows the three key figures as small round instruments, the rolling counter as a row below it — the same numbers, only presented differently.
The consumption between two readings is distributed across the months to the day — so you do not have to take your reading on the first of the month for the monthly figures to be correct.
Simulate extra use
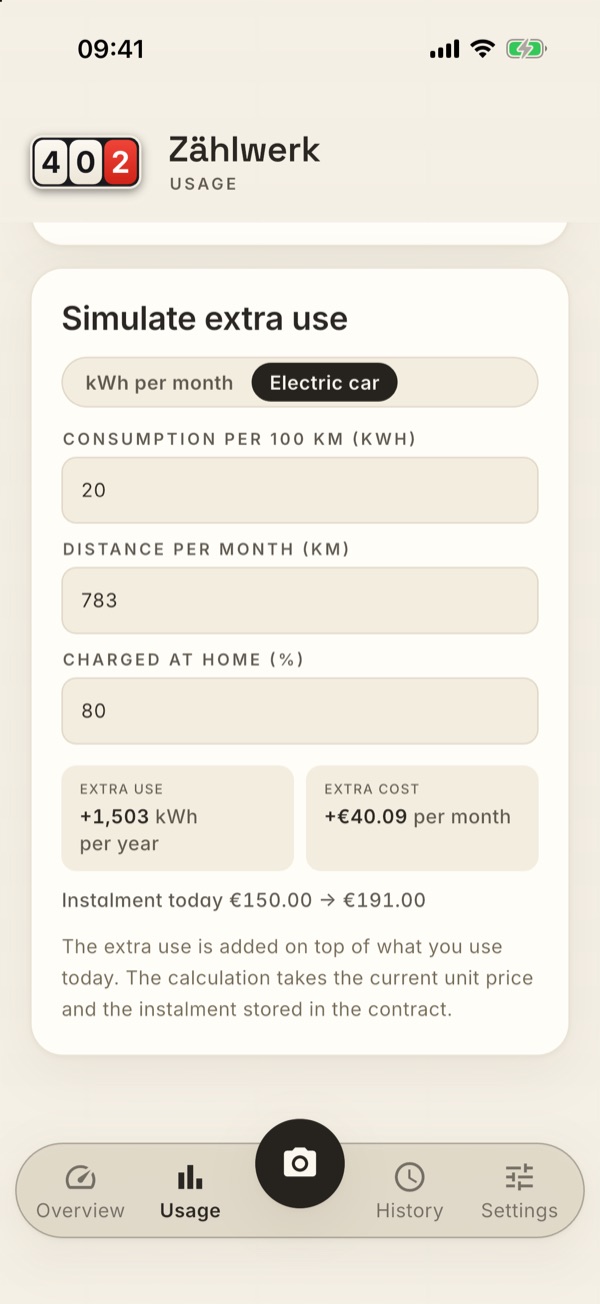
At the very bottom of the usage page is the simulator. It answers a question the forecast on the overview cannot answer: what happens if something is added in future — an electric car, a pool, an air conditioner, a tumble dryer?
You enter how much extra use you expect, and the app calculates it immediately — no button, no saving:
- Extra use — what is added over a year (12 × your monthly figure).
- Extra cost — what that costs per month: extra use × the unit price of your contract. The base price is not added — your connection exists anyway, and extra use does not change that.
- Instalment today … → … — your current instalment from the contract plus the extra cost, rounded up to the whole euro. This line only appears if an instalment is stored in the contract.
Two routes, the same result. With power you can switch at the top:
- kWh per month — you know yourself what is being added and enter it directly.
- Electric car — you only know the car. Then the app asks three things: Consumption per 100 km (preset with 20 kWh — a typical value), Distance per month (empty, only you know that) and Charged at home (preset with 80%). The last value matters more than it looks: what you charge at work or at a public charging point you do not pay for through your household power. If you only charge at home, enter 100%.
With gas and water there is only the direct route — there you get a single field, “Extra use per month (m³)”.
As long as the distance is empty (or the extra use field), only the input fields are shown and no result yet. That is intentional: a preset number of kilometres would produce a figure you never meant.
What you should know:
- The simulator calculates on top. If you already charge an electric car at this address, what you see here is the consumption of a second one.
- The new instalment is a recommendation, not a bill from your supplier. Whether they divide by 12 or 11, round up or add a buffer, the app does not know.
- The reference point is the instalment currently stored in the contract. Whether it still fits today is told to you by the Billing period forecast on the overview.
- The calculation uses today's unit price. In reality a considerably higher consumption can also change the tariff (heat-pump or car-charging tariffs) — the app knows nothing about that.
- The entries are not saved. If you leave the page and come back, the presets are there again. A simulation is an action, not a state.
- Without a stored contract the card does not appear at all — without a unit price there would only be “12 × your entry”, and you can work that out yourself. It does not exist in the address comparison either: there, several contracts are involved.
Record
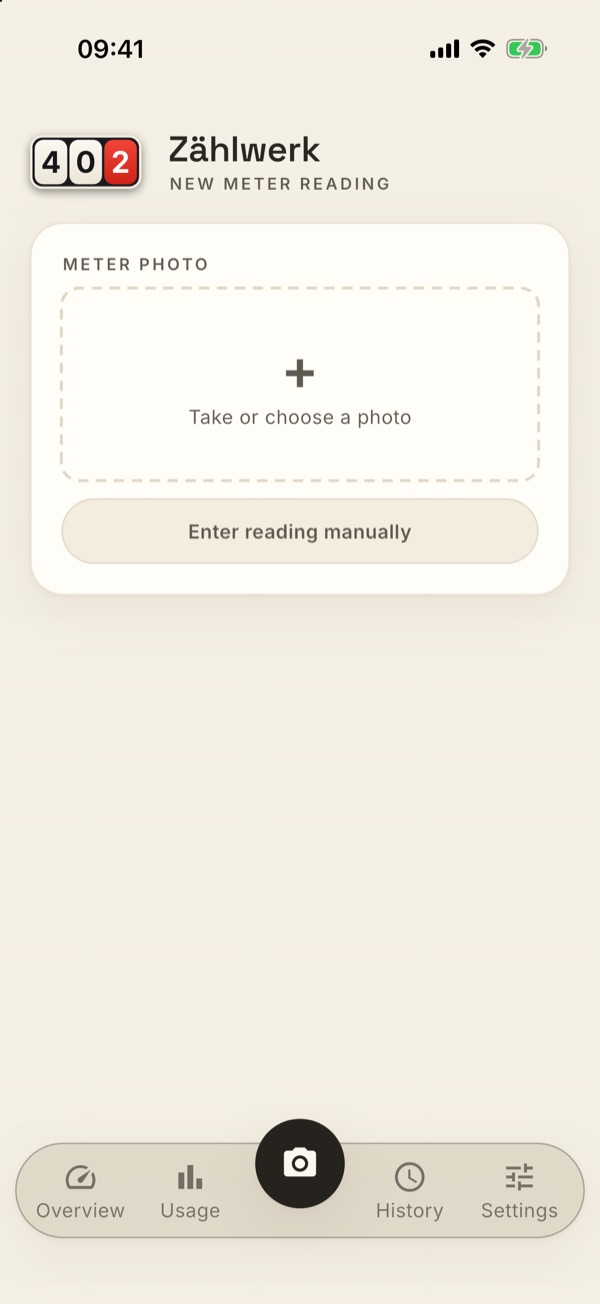
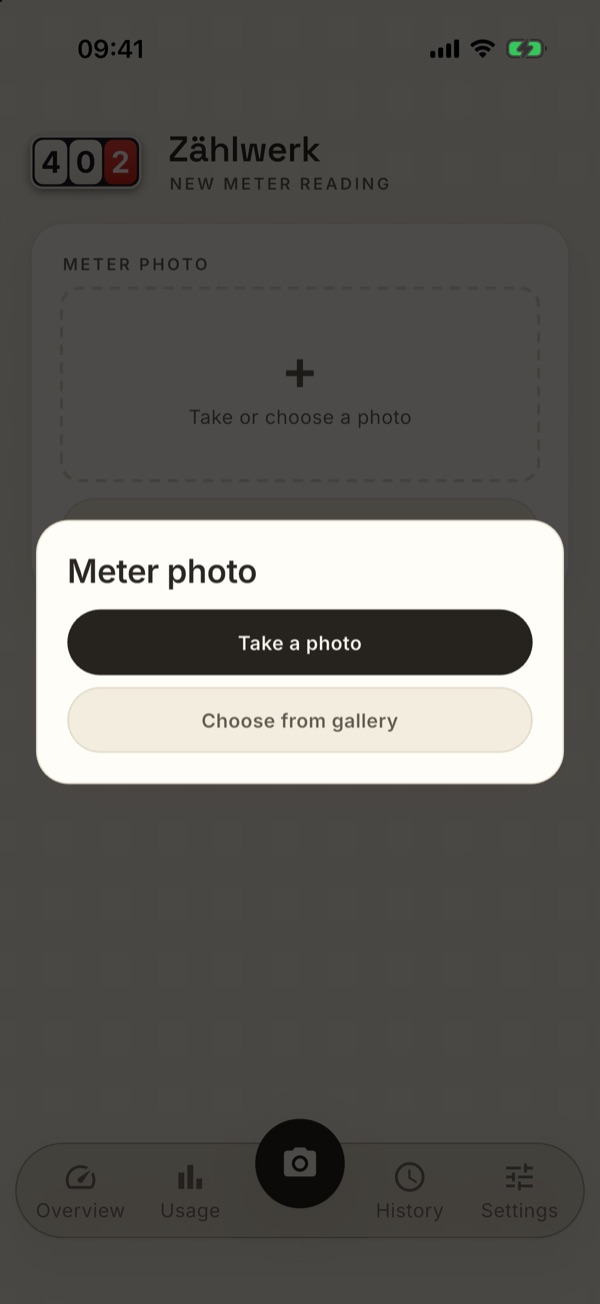
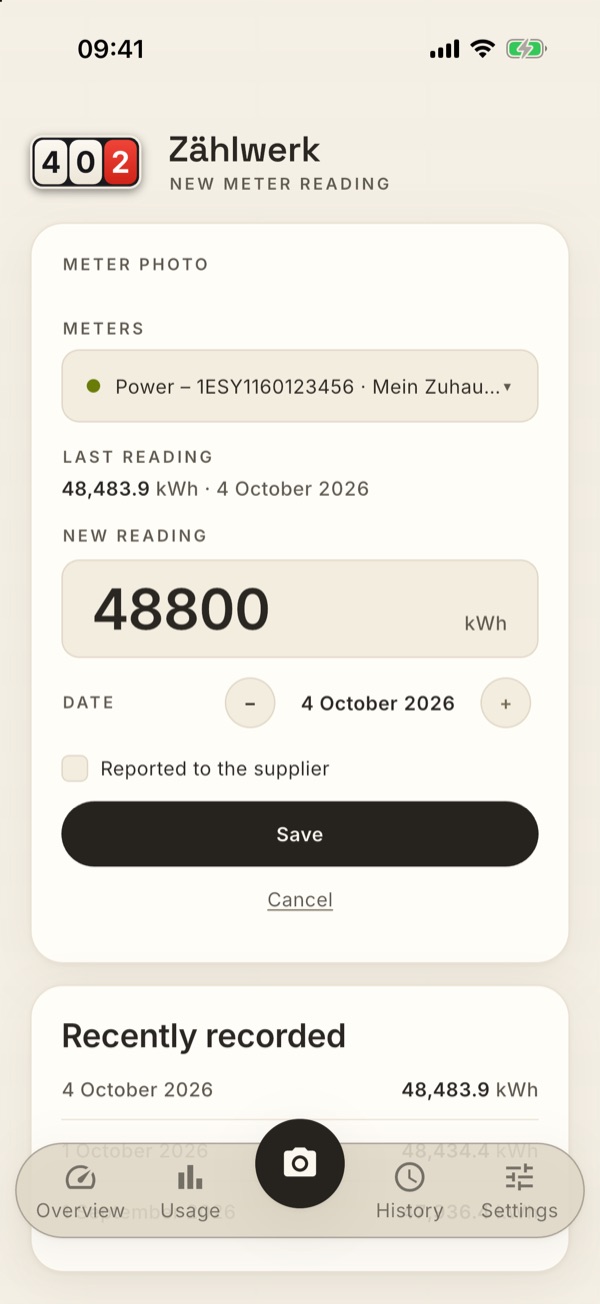
This is how you enter a new meter reading:
- Take a photo (or pick one from the gallery). By default the reading is handled by Zählwerk recognition: the photo is read by an image model and then discarded — it is not stored. You do not have to set anything up for this — no account, no key. The note under the pill tells you what currently applies — the trial photos, the running subscription or the missing subscription with the button to the purchase page; without a usable subscription the card's badge shows “no subscription” or “used up” instead of the green dot, and the status line says what happens with a photo: “Zählwerk selected — without a subscription no photo recognition runs; the reading is entered by hand.” The choice stays saved so that everything runs right away once you subscribe. During the trial, 50 photos are included; after that the recognition is part of the recognition subscription with a quota per month (see Trial, purchase and cloud recognition (subscription)). If your quota is used up, the app tells you as soon as you have taken the photo: the photo stays where it is, the form stays open, and you enter the reading by hand — or you tap “Subscribe to cloud recognition”. In addition, a daily photo limit applies. When you save the reading, all the app reports back to Zählwerk recognition is whether the recognised value was right — as a class (“taken over”, “decimal point slipped”, “number read incorrectly”, corrected by the app or by you), never the reading, the number or the photo; that is how we measure the recognition. In the settings under Cloud recognition you can instead store your own AI access (Google/Mistral/OpenAI or your own Ollama server) or switch cloud recognition off entirely — then the app analyses the image on the device only again (for details and trade-offs see the FAQ). With the first photo your device asks you whether Zählwerk may use the camera — if you decline, entering by hand stays available (and you can grant the permission later in the system settings at any time). An image from the gallery comes via the system picker of your phone: the app only sees the one photo you select, not your whole photo library — which is why it does not ask for a permission for it either.
- The text recognition automatically suggests the matching meter and the reading it read. It knows your meters by their number and checks the value for plausibility against the last known reading (also for meters with decimal dials); if it is not sure, it prefers to suggest no reading at all rather than guessing a wrong one. The date is taken by the app from the time the photo was taken, provided the photo carries that information — handy when adding older photos from the gallery; without that information (e.g. a screenshot) it stays at today's date.
- Check and adjust: you can change meter, reading and date at any time; for control, the meter's most recent readings are shown. With the date, − and + move one day back or forward; a tap on the date opens the calendar, in which you page through month and year — handy for older photos without a capture date or when adding old readings. The future is blocked (a reading from tomorrow does not exist). Without a photo it works just the same — simply pick a meter and type in the reading. The photo you took appears as a small preview tile next to the message, so that the form and “Save” fit on the screen without scrolling — tap the tile and the photo appears at full size; there you can zoom in to read the digits. At the bottom sits the Save to Photos button (see History). A tap anywhere (or on the ✕) closes the view again.
- Reported to the supplier? Directly above “Save” is a checkbox “Reported to the supplier”. Tick it if you have passed exactly this reading on to your supplier or grid operator for billing — depending on who asks you for meter readings. The typical moment is exactly this one: read, photograph, pass it on. For this the app remembers today's date as the reporting date — even if the reading itself is older (with an old photo the capture date counts for the reading, not for the report). Without the tick nothing happens; you can add it later in the history at any time. The marking is only for you — the app sends nothing.
- Save. The photo is stored as proof for the reading. If you decide not to save after all, tap “Cancel” directly below the button: photo and entries are discarded, and you are back on the empty record page. If a photo or a reading is already there, the app asks first (“Discard entries?” — “Keep editing” leaves everything as it is).
Back on Android. The back button (or the back gesture) of your Android device works its way outwards in stages, always one per tap: in the record form it discards the form (with the same confirmation as “Cancel”); in the address comparison of Usage it ends the comparison; in the contract form it closes the form (with a confirmation, if you have entered something); on the page of a contract it takes you back to the contracts list; in every other area it takes you to the overview; and only from the overview does it leave the app. An open dialog always closes first.
Sometimes the recognition reads the meter number almost correctly — one digit too many, an I instead of the 1. If the reading that was read then fits as the next reading of exactly one of your meters, the app assigns the reading to that meter without asking and says so in the message: “read number 4444003-5163414, matched to meter 444003-5163414 using the reading. Please check.” Two notes on that: the reading is then marked as “corrected” (the number was corrected, after all) — in the history you can have this explained to you (see below). And if several meters fit, the app does not decide anything on its own but asks.
Typos happen: with the “corrected” marking you can mark a reading as having been corrected afterwards (also later in the history).
Digital meters
If you have a digital electricity meter (the “modern metering device” with an LCD display instead of number dials), you photograph it just like an old one — it is the same route, you do not have to change anything.
One difference is worth looking at: digital meters label every value with a code. The value that matters for your reading is the one with the code 1.8.0 — that is the meter reading for the power you have drawn. Alongside it the devices show further values, usually in rotation: 2.8.0 is the power fed in (for example from a photovoltaic system), values such as 16.7.0 are instantaneous values, i.e. the power right now. An instantaneous value is never a meter reading — if the app finds only such values in the image, it deliberately suggests no reading at all, so just take another photo. So take the photo at the moment when 1.8.0 is shown.
The feed-in (2.8.0) is something else: it is a real meter reading, just the one of the second register — more on that shortly.
Some models only show the decimal places after a PIN has been entered at the meter. You get the PIN from your metering point operator (usually the grid operator). For Zählwerk it is optional: without decimal places you simply record whole kilowatt-hours, and all analyses work just the same.
Bidirectional meters (feed-in)
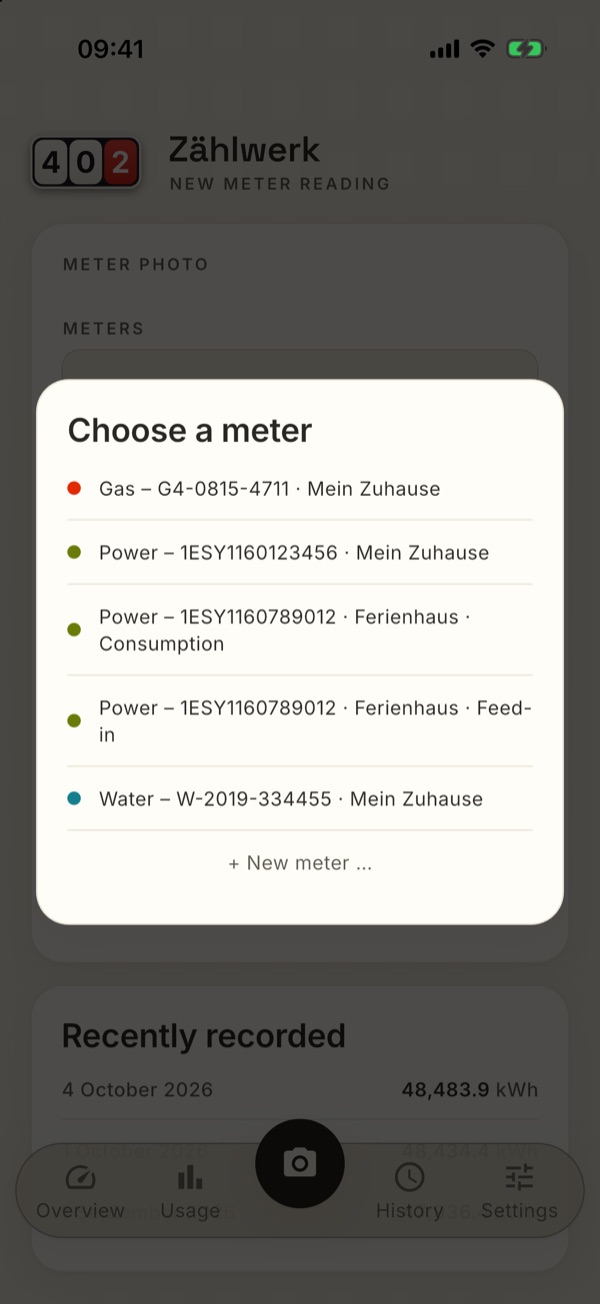
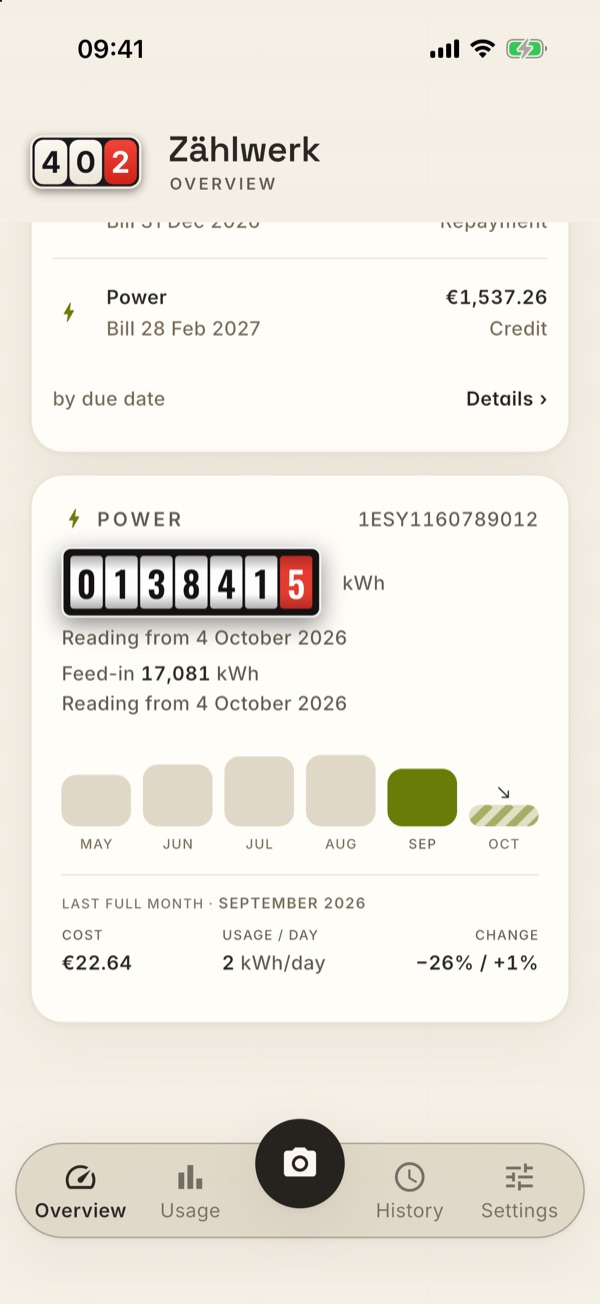
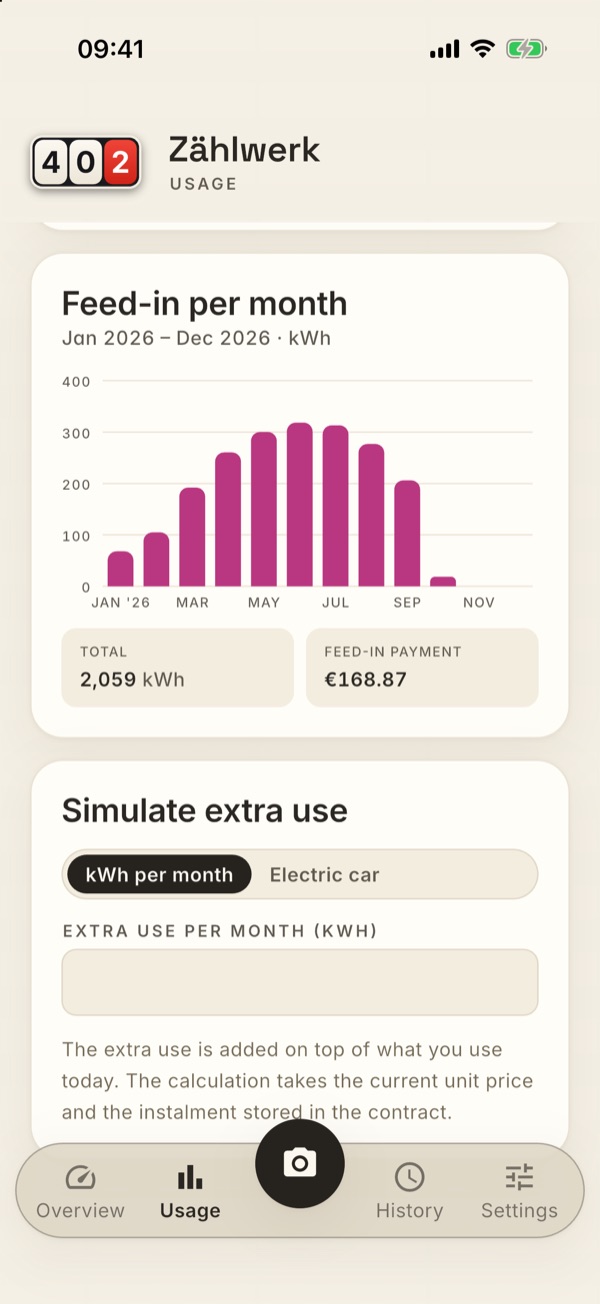
Anyone with a photovoltaic system gets a bidirectional meter from their grid operator. It counts two things separately:
- 1.8.0 — Consumption: the power you have drawn from the grid.
- 2.8.0 — Feed-in: the power you have fed into the grid.
One device, one meter number, two registers. At the meter you page through the display with the buttons and photograph both one after the other — one photo each, one reading each. Zählwerk keeps the two series separate: two readings on the same day are the normal case here and trigger neither a warning nor a duplicate message.
The app recognises by itself which register you have photographed (it reads the code next to the value) and sets the meter selection accordingly. The “Meters” field then reads “… · Feed-in”; there you can also switch by hand — a bidirectional meter appears in the selection list with two entries, “… · Consumption” and “… · Feed-in”. All other meters have exactly one entry as before; nothing changes for them.
The first time you save a feed-in reading, the app keeps the meter as a bidirectional meter from then on — you do not have to set anything up beforehand. The app tells you so in the green message after the recognition. If you prefer to set it beforehand: in the settings under “Meters” there is the switch “Bidirectional meter (with feed-in register 2.8.0)” when editing (power only).
The “Last reading” above the input field always belongs to the register selected — and all the app's checks are based on it: a feed-in reading is never compared with the consumption. With a PV system the feed-in is often far above the consumption; without this separation there would be a warning below every feed-in photo.
What the meter does NOT know: consumption and feed-in are both statements about your grid connection. How much your system generated altogether and how much of it you used yourself (self-consumption, self-sufficiency) is on neither of the two registers — only your inverter or a separate generation meter knows that. Zählwerk shows what is on the meter.
In the setup assistant only the consumption is recorded: if you photograph the feed-in register there, the app says “That is the feed-in register (2.8.0) — please photograph the consumption register (1.8.0).” You add the feed-in afterwards in the record area.
Where to find the feed-in again: in the History as its own rows (with the word “Feed-in” after the meter type and the addition “fed in” on the consumption value), on the Overview as a line below the rolling counter of the power card, and under Usage as its own card “Feed-in per month”. What your grid operator pays you for it you enter as a feed-in contract — then Zählwerk also works out the payment and tells you on the overview what the next bill will come to. It still does not enter into your power costs — the payment comes from your grid operator and not from your electricity supplier, so it is never offset against your costs. Key figures, the costs chart and the power row of the forecast still calculate on the consumption alone.
Unknown meter in the photo
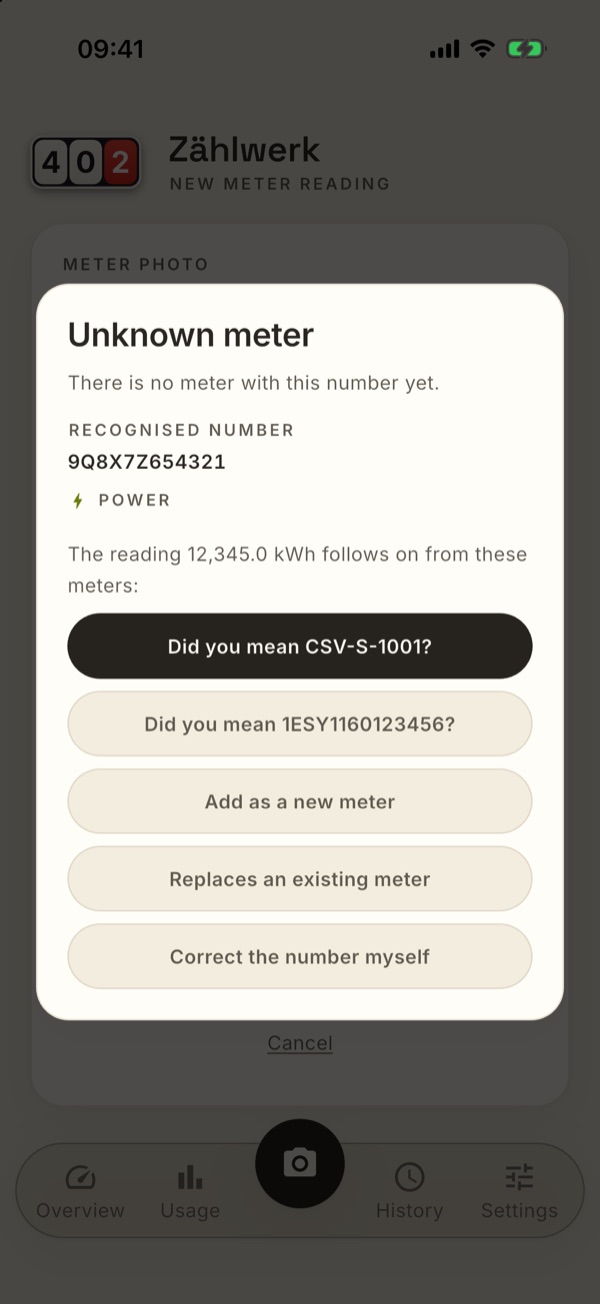
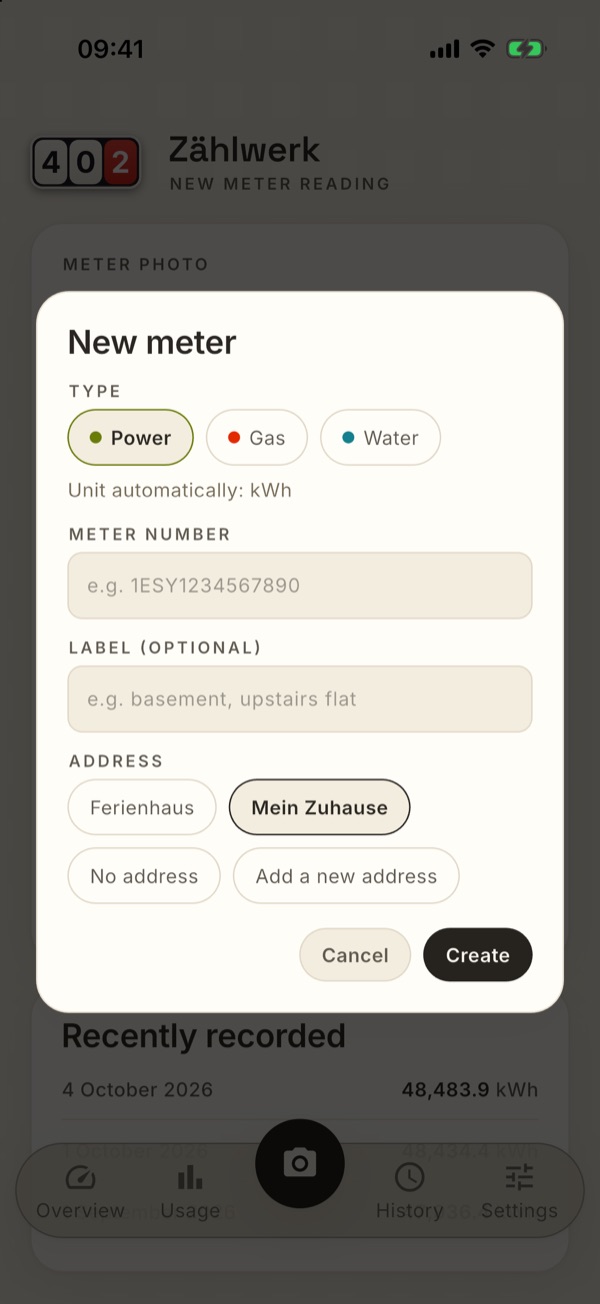
If the recognition reads a meter number for which no meter exists yet, the app asks — you do not have to switch to the settings for it. The “Unknown meter” dialog shows the number and the type that were recognised and offers you the routes one below the other:
- “Did you mean …?” — appears at the very top if one of your existing numbers is very similar to the one recognised. Meter numbers are not always read perfectly (an I instead of the 1, an O instead of the 0 is enough), and without this confirmation every slip would create a duplicate meter. A tap on it picks the existing meter — nothing more happens. The same question also comes up when a completely unfamiliar number appears in the photo: many meters carry two of them on the nameplate — the meter number of your grid operator (usually the one with the barcode) and the manufacturer's serial number —, and sometimes the recognition reads the wrong one. Then the app suggests the meter that the reading fits as the next reading of, and tells you why (“The reading 90,983.1 kWh follows on from this meter”); if several fit, you get both to choose from — nothing is ever chosen automatically.
- “Add as a new meter” — a short form: type (preset from the recognition), meter number (changeable), optional label and the address (preset with the address of the selected meter, otherwise your default address). There you can pick an existing address, choose “No address” — then Zählwerk asks when creating it, because a meter without an address does not appear in the overview and in Usage — or create a new address, either by hand or via “Suggest address (location)”, which fills in street, postcode, town and country from your current location (the app only asks for the location permission on this tap and never by itself). Once created, the new meter appears in the form, the reading that was recognised stays in the field — you save quite normally with “Save”.
- “Replaces an existing meter” — the meter replacement case: the meter photographed is the successor of a meter you already have. This route only appears if there is a candidate for it at all (active meters of the same type). You first pick which meter is being replaced, and then land in the familiar meter replacement assistant — only already filled in: the new meter number, the installation initial reading and the change date come from the recognition, and the photo you took is attached as proof to the installation reading. The removal final reading of the old meter and the carrying over of contracts are asked by the assistant as always. After “Replace” everything is saved: the old meter is closed with its final reading, the new one takes over — and the reading you took is already recorded as the installation reading. That is why the reading field is empty afterwards; you do not have to (and should not) save again.
- “Correct the number myself” — closes the dialog and leaves everything as it was before: you pick the meter yourself below in the form.
Cancelling at any point writes nothing — no meter, no address, no reading.
Two readings on the same day? If there is already a reading for the same meter on the date selected, the app speaks up when you save: “Already a reading on this day” — with the reading already stored. Background: two readings on the same day distort the consumption calculation (the period between them is zero days long). A typical case: the same meter was photographed twice and the recognition read slightly different values.
- Cancel (the preselected option) takes you back to the form — there you can change the date or discard the entry. If you want to correct the value of the existing reading, do that in the history via “Edit” instead of creating a second reading.
- Save anyway creates the second reading — the decision stays with you.
If the reading is exactly the same as the one already stored, that is simply a double tap: the app reports “Already recorded” and does not save again.
Reading lower than the last one? A meter does not run backwards. If the reading you want to save is below the previous reading of the same meter, the app speaks up when you save: “Reading below the previous reading” — with the date and reading of that reading. Background: such a value is almost always a reading error — a digit has slipped or the decimal point is in the wrong place (90,983.4 then becomes 9,098.3, for example). With a photo you can see this right after the recognition: instead of the green message “Recognized … please check” there is a red note with the previous reading above the form, before you even save. With a decimal point that has slipped, the app corrects the value itself using your last reading (9,098.3 becomes 90,983 again) and tells you so in the message: “decimal point corrected from the last reading”. Check the value against the photo anyway — the decimal place can get lost in the process.
- Cancel (the preselected option) takes you back to the form — there you can correct the reading.
- Save anyway creates the reading exactly as it was entered — the decision stays with you (for example after a meter replacement you did not record via the assistant).
The check is against the neighbours by date, not against the most recent reading: a back-dated reading — for example an old photo whose capture date is before your last reading — may of course be below the most recent reading. It only has to fit between the reading before and the one after; if it is ABOVE the following one, the app asks accordingly, “Reading above the next reading”, and asks you to check reading and date.
History
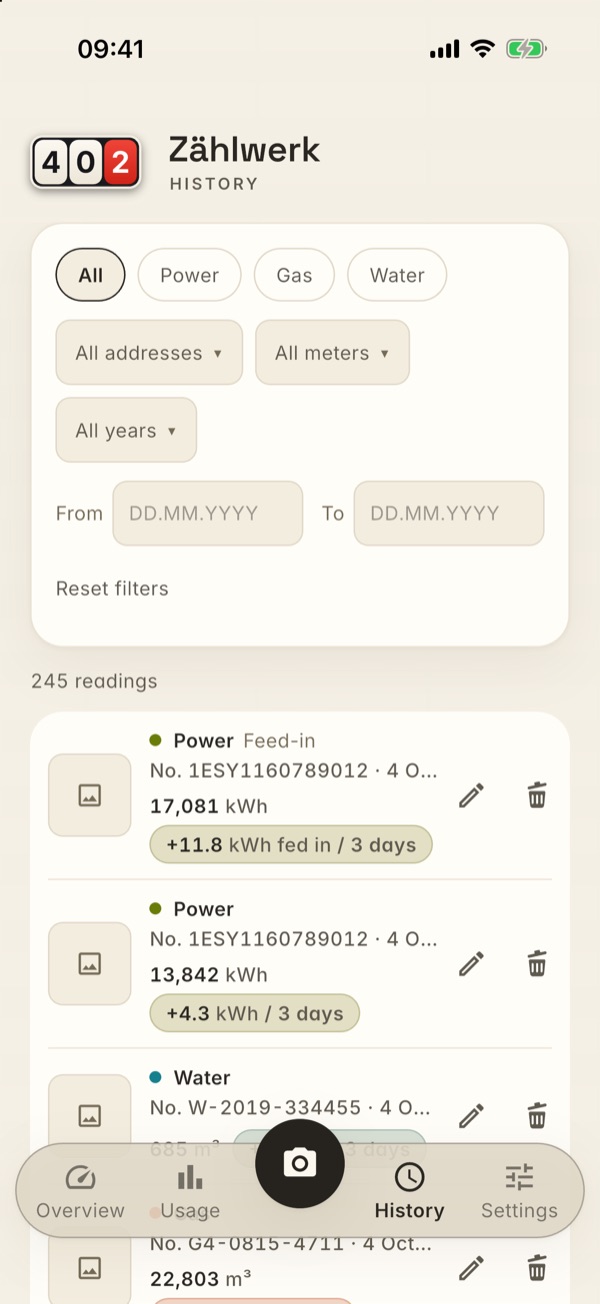
The history lists all readings, newest first. Every row shows the date, the meter, the reading, the calculated usage since the previous reading and — if there is one — the photo as a thumbnail (tap it to open it large, with zoom).
In the full-size view there is a Save to Photos button at the bottom: it puts a copy of the photo into your library — on iPhone and iPad into Apple Photos, on Android into the Gallery (album “Zählwerk”). The first time, the app asks for permission to add photos; it never sees your other pictures. The original stays in the app, and the copy keeps the photo's capture date. If you declined the permission, the view tells you — you can grant it later in your device settings.
You can filter by meter type, address, individual meter, year and a freely chosen from/to date; “Reset” clears all filters. You tap date fields and pick the day in the calendar — ‹ and › page through the months, “No date” removes that limit again. This works everywhere in the app where there is a date (editing, replacing a meter, contracts).
If a reading belongs to the feed-in register of a bidirectional meter, the row carries the word “Feed-in”, and the usage badge there reads “+512 kWh fed in” instead of “+512 kWh”. Consumption and feed-in are calculated separately — the value on a feed-in row is always the difference to the previous feed-in reading.
If the app fetched the reading from your home network itself, the row carries the word “automatic” (see Local source). Apart from that it is a perfectly ordinary reading — you can edit and delete it like any other.
If you have reported a reading to your supplier for billing, the row carries the word “reported”. When that was, the edit form will tell you.
If a reading is marked as “corrected”, the word appears in the row. If the app matched the meter itself at the time (because the number it read was slightly off but the reading fitted), a small Ⓘ follows it — tap it and you see the reason: “Matched automatically: the recognition read the number …, and the reading fits this meter.” The bubble stays for about eight seconds and then disappears on its own — or at the next touch.
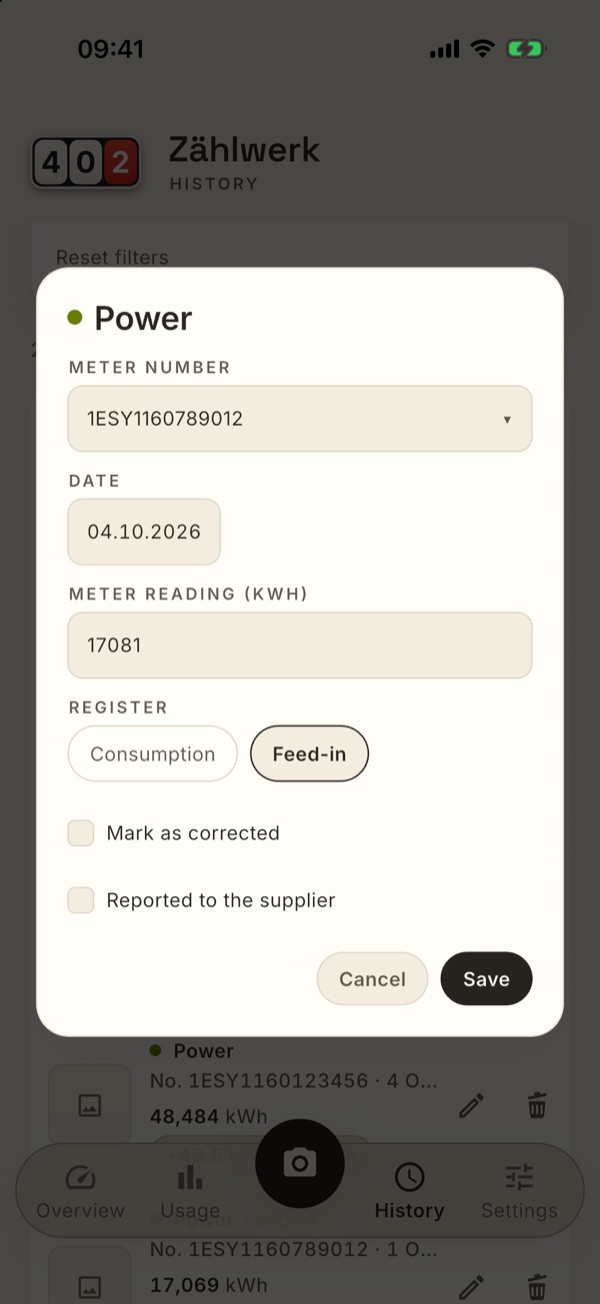
Editing: date, reading, meter number, the corrected mark and the report to the supplier can all be changed. If there was an explanation for the corrected mark, it appears under the checkbox — if you clear the checkbox and save, the explanation disappears along with the mark.
The second checkbox is called “Reported to the supplier”. If you tick it here, the app enters today as the report date; if one is already there, it stays unchanged when you save again — you reported on the day you reported, not on the day you last edited something. Under the checkbox it then says “Reported on 3 August 2026”. Clear the checkbox and save, and the report is deleted again.
With a bidirectional meter the form also offers the choice “Consumption | Feed-in” — this lets you move a wrongly assigned reading to the right register. If you enter a new, unknown meter number, the app creates the meter automatically. If a change dates the reading to a day on which the same meter already has another reading, the app asks in exactly the same way as when recording (“Already a reading on this day”) — “Save anyway” applies the change; the same goes for a changed reading that falls below the previous or above the following reading of the meter (“Reading below the previous reading” or “Reading above the next reading”).
Delete removes the reading from the database; an existing photo stays on the device.
Settings
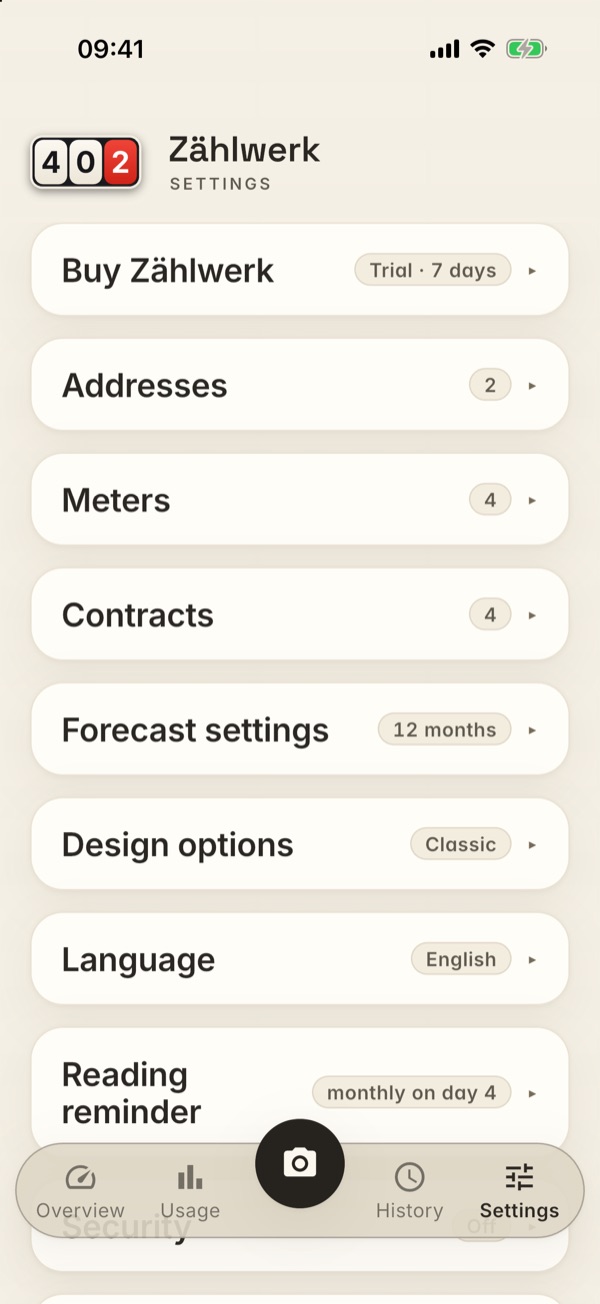
The settings are organised as expandable cards — one card open at a time. The head of each card shows a short summary (e.g. the number of meters) without you having to open it.
Buy Zählwerk / licence
This card moves: as long as you have not bought anything, it sits at the very top and is called “Buy Zählwerk”; afterwards it moves behind the forecast settings and is called “License”. Its head tells you in two words where you stand — “Trial · 5 days”, “Trial period over”, “Starter”, “Unlimited”.
Its body is short: where you stand in one sentence — how long the trial still runs and until when, or, after the purchase, your package and the state of cloud recognition — and the button View packages and subscription ›, which opens the purchase page. Buying, subscribing and restoring happen only there.
What the packages mean and how the purchase works is described in Trial, purchase and cloud recognition (subscription).
Addresses
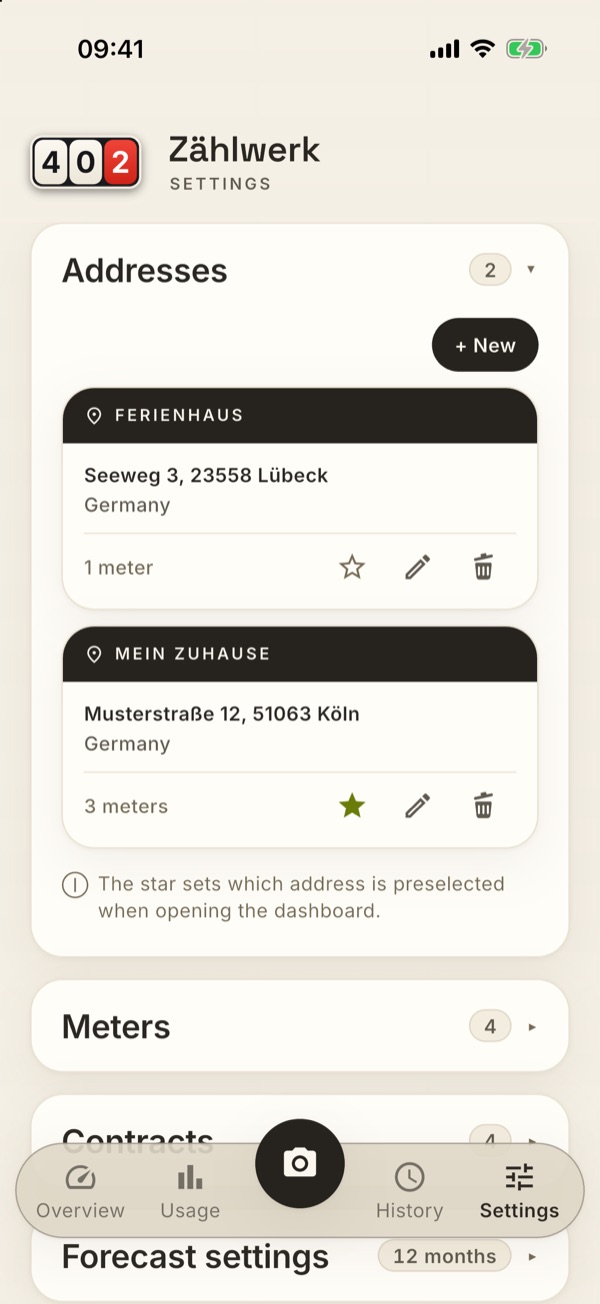
Every address has its own card here: at the top, in the dark band, its short form (the part before the first comma, usually the label), below it the street address and the country, and under a fine line the number of meters attached to this address. The star marks the default address that Overview and Usage start with — it also always comes first in the address selection there; a tap on the star sets it, another one clears it again. In this list here the order stays alphabetical.
Creating and changing open a page of their own (the “‹” at the top left brings you back, as does the back button of your Android device). To create one you tap + New: label (optional), street, postcode, town and country — or you let Suggest address (location) propose the street address from your current location and check it. From these details Zählwerk assembles ONE name (“1st floor flat, 5 High Street, SW1A 1AA London”).
If you create your first address and already have meters that are not attached to any address, they are assigned to it automatically — the page tells you so beforehand in one line. Without this assignment they would be invisible in Overview and Usage from that moment on (see Meters). A second address takes nothing over by itself; there the assignment is your choice.
How many addresses you can create depends on your package (see Trial, purchase and cloud recognition (subscription)). Once the limit is reached, the app tells you when you save and offers you the next larger package; your entries stay put in the meantime. During the trial there is no limit.
To change one you tap the card or the pencil. The same fields are there as when creating, filled with what is contained in your name — including the location suggestion, in case you want to add a street address later.
One note, because you might notice it: Zählwerk only stores the ONE assembled name, not street, postcode and town separately. When opening, the app therefore reads it back into the fields — and that is a well-founded guess, not a science. With an address that does not follow the usual form, a part can end up in the neighbouring field (with a Dutch postcode, for instance, the letter part in the town). Nothing is lost in the process: if you change nothing and save, exactly the same name is there afterwards as before. And unlike when creating, street, postcode and town may stay empty here — otherwise you could never get out of an address like “My home” without inventing a street address.
If you have changed something in the form and tap “Cancel” (or Back), Zählwerk asks before your entries are lost. If you have not touched anything, it closes the page silently.
Every address has a country — chosen from the complete list of countries, shown in your app language. It is a required field: the country determines the currency in which Zählwerk shows the costs of this address (Germany → €, United Kingdom → £, Switzerland → CHF, Poland → zł …). It is preset with the region of your device, otherwise with the country of your app language; you can change it at any time.
The country only changes the currency — not the language of the app and not its date or number formats. Those still come from the Language setting.
If you have several addresses in different countries, every card, every contract and every comparison row shows its own currency. Zählwerk never adds up amounts in different currencies — in the address comparison the note “Costs in different currencies cannot be compared.” then appears under the table; usage in kWh and m³ can of course still be compared.
Addresses from a CSV import arrive in the app without a country (the table has no country column). They calculate in the currency of your default address until then — add the country here if you need to.
Meters
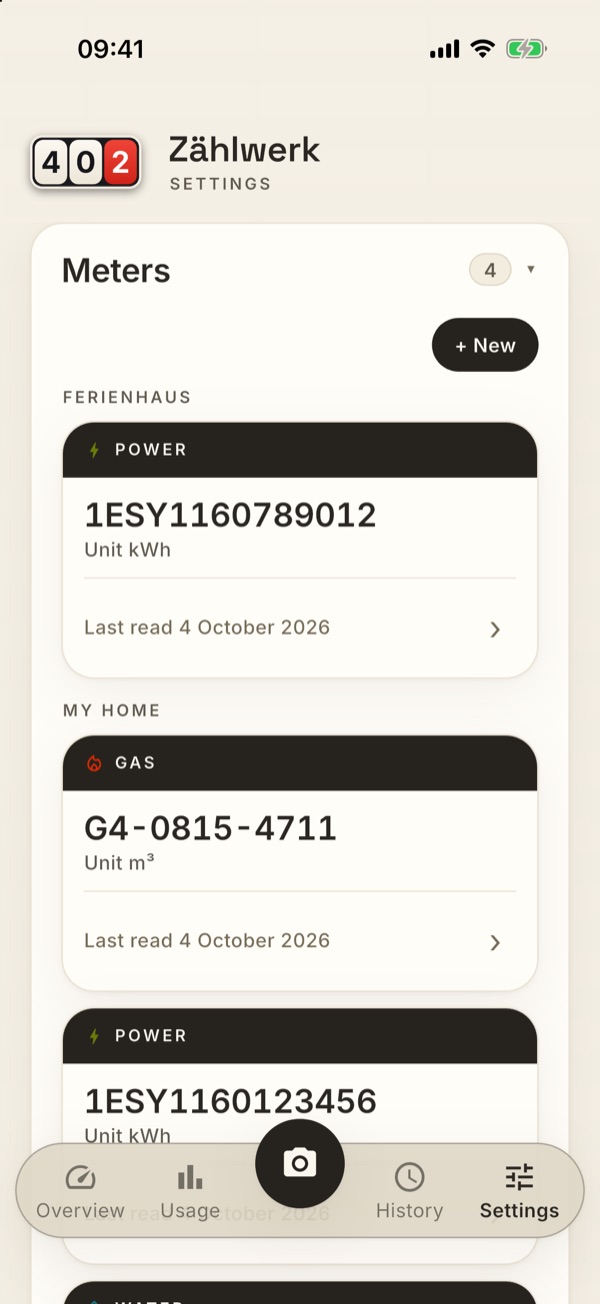
Every meter has its own card here: at the top, in the dark band, the symbol of its meter type and next to it “POWER · BASEMENT” — the type and, if you have given one, the label. Below that, in large type, the meter number, then the unit and, under a fine line, when the meter was last read. From two addresses on, the list is grouped by address; the address then appears in the subheading and not again on every card.
The label is especially worthwhile with two meters of the same type — it also appears on the card in the overview.
Why the date of the last reading is shown here and not the meter reading: the reading is the statement of the Overview, which shows it large in the odometer. Here it is about administration, and there the question is “is this meter still running, does it have any data at all?” — that is exactly what the date answers, and at the same time it explains why a meter has ended up under “Previous meters”.
The head of the “Meters” card shows how many there are. If there are superseded generations, the number is split up — “3 active · 3 previous”; if there are none, it simply shows the number of meters in service.
To create one you tap + New. A page of its own opens (the “‹” at the top left brings you back, as does the back button of your Android device): type, meter number, label (optional) and address. The unit follows from the type — kWh for electricity, m³ for gas and water. For electricity there is a switch below it, “Bidirectional meter (with feed-in register 2.8.0)” — for meters with photovoltaics that count feed-in alongside consumption (see Bidirectional meters). You do not have to set it: the first time you save a feed-in reading, the app does it by itself. Gas and water meters do not have it. The address is preset — with your default address, otherwise with the first one. That matters more than it looks: Overview and Usage always show the meters of one address, and a meter without an address does not appear there as long as there are any addresses at all (it remains visible only in the settings and in the history). If you set the address to “No address” anyway, Zählwerk asks when you save and offers you the assignment with one tap. If you have entered something and tap “Cancel” (or Back), Zählwerk asks before your entries are lost; an untouched form closes silently.
How many meters in service you may keep in total — across all addresses together — depends on your package (see Trial, purchase and cloud recognition (subscription)). Once the limit is reached, the app tells you when you save and offers you the next larger package; your entries stay put in the meantime. Earlier generations do not count, and during the trial there is no limit.
Previous meters (superseded generations) are filed away collapsed below and appear as the same cards when expanded. A meter counts as superseded if another meter of the same type at the same address started on or after its last reading day and was read beyond that — or if you recorded the exchange via the meter replacement assistant. Two meters running in parallel (cold/hot water, house/garden) both stay active. The Overview shows the same split at the bottom of the page.
The meter page
A tap on a card opens the meter. At the top of the band are the type (“ELECTRICITY METER”) and the name of the meter — its label, otherwise its number. Below that the master data: meter number, unit and the address it belongs to. If it is a bidirectional meter, it also says “REGISTER — Consumption and feed-in” there.
Then come the three things you can do with a meter: Edit, Replace meter and Delete. They deliberately sit here and not in the list — both interventions have consequences, and nobody should delete a meter by accident while scrolling. “Replace meter” only exists for a meter in service: a superseded generation cannot be replaced a second time.
Careful when deleting: deleting a meter also removes all of its readings. Zählwerk asks first.
The largest part of the page is taken up by the generations: the chain of meters that have run one after another in this place — today's at the top (with the badge “IN SERVICE”), its predecessors below, each with number, label and the period over which it was read. A small timeline runs down the left; it only appears once there really is more than one generation. If your meter does not have a predecessor yet, there is simply one row with its reading period.
The readings themselves deliberately do not appear here — that is what the History is for, and there you can edit them too. Usage and costs are in Overview and Usage.
Meter replacement assistant
If a meter is physically exchanged (e.g. by the grid operator), use Replace meter on the meter page instead of deleting and creating anew. The assistant is a page of its own; right at the top it says which meter you are replacing, and below that it takes you through everything in three groups:
- Old meter: removal final reading (preset with the last reading), change date and, optionally, a photo of the old meter as evidence. On the day you enter here, the final reading of the old meter and the initial reading of the new one are saved.
- New meter: new meter number, optional label, installation initial reading (usually 0). Type, unit and address are carried over automatically — they appear at the top of the group so you can check them. With a bidirectional meter another field is added in both groups: Final feed-in reading at removal and Initial feed-in reading at installation. Both are optional, but only together — if you enter just one, the app says “Please enter both feed-in readings — or neither.” If you leave both empty, the feed-in series is missing the stretch up to the removal; the new meter is still kept as a bidirectional meter.
- Carry over contracts (optional): if the old meter has a contract of its own, you can copy it to the new meter with a checkbox — it applies there from the change date onwards, and the cost history of the old meter stays correct.
At the bottom you finish with Replace. Cancel — or the “‹” at the top left, or the back gesture — cancels without saving; if you have already entered something, Zählwerk asks first. Afterwards you are back where you started: on the meter page or in the recording form.
After that the new meter takes over immediately: the old one moves under “Previous meters”, and usage and analyses continue without a gap across the change. If you delete the new meter by mistake, the old one becomes active again.
The card of the new meter continues the story of the old one. In the overview you only see one card after the change — and it still shows your complete history: the monthly bars reach back beyond the change, the month of the change carries the whole monthly usage (that is, the rest of the old plus the start of the new meter), and usage/day as well as change are calculated across the boundary in just the same way. Only the meter reading at the top of the card belongs to the new meter — it starts afresh at its installation reading, after all. Meter number and colour are those of the new meter as well.
Directly when recording, too: if you photograph the new meter without having entered the change here first, the app offers you the same assistant right away — via “Replaces an existing meter” in the dialog Unknown meter in the photo. It is then already filled in with number, reading and date from the photo, and the photo ends up attached to the installation reading of the new meter. After the change the recording form is there again — with the new meter and an empty reading field: your reading has already been saved as the installation reading, after all.
Contracts
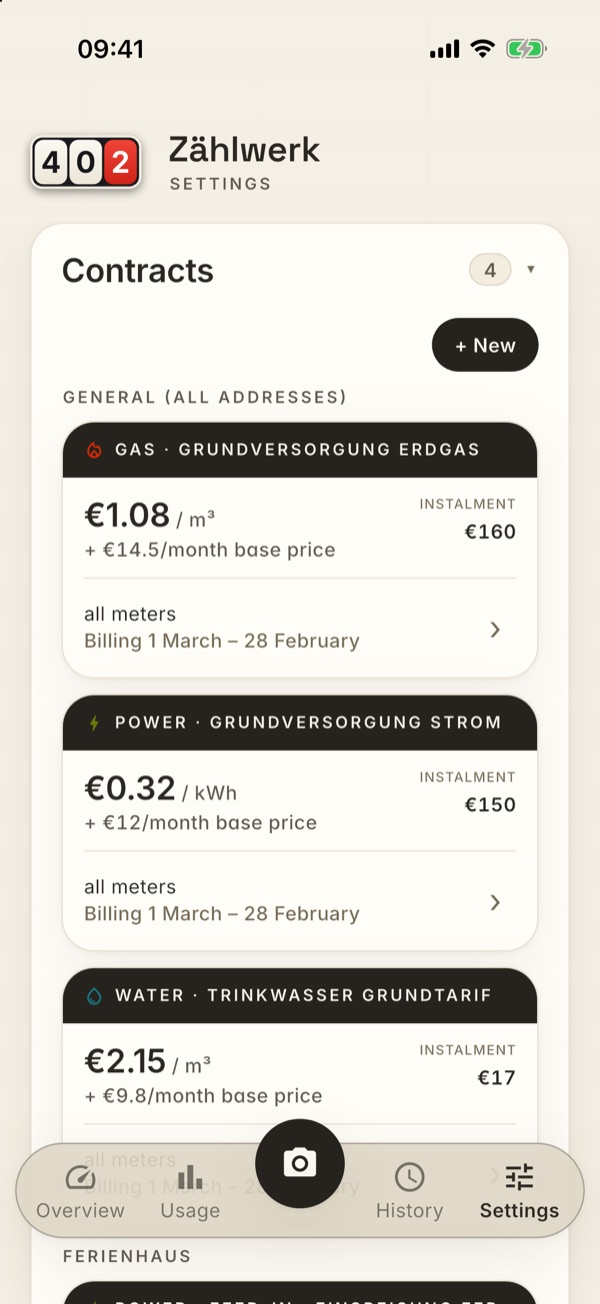
Store your tariff per meter type: price per unit, optionally base price per month and valid from.
Every contract has its own card. At the top a set-off band with the symbol of the meter type and, if you have entered a description, your provider: “POWER · RHEINENERGIE”. In the light theme the band is dark, in the dark themes a little lighter than the card — so it always stands out. Below that, in large type, the unit price with its unit, under it the base price (“+ €16.01/month base price” — or “no base price” if you have not entered one). To the right of it stands the monthly instalment, if you have stored one. Under a fine line comes whom the contract applies to (“Meter 444003-5163414” or “all meters · House A”) and, if stored, your customer and contract number as well as the billing period.
A tap on the card takes you to the page of this contract — everything else is there, and that is also where editing happens.
One contract, several periods. If your supplier changes the price or the instalment, you do not create a new contract for it but another period. The card always shows the one valid today — from when it applies and which others there are is shown on the contract page. If you have stored a contract that only starts in the future, PLANNED appears at the top of the card head: the price below it does not apply yet.
The contract page
Tap anywhere on the card or on the › at the right edge — and you are on the page of this contract. It shows its master data and its whole history. You come back via the ‹ at the top left (on Android also with the back button).
At the top a band with the meter type (“ELECTRICITY CONTRACT”) and the name of the contract — that is your description, and if you have not entered one, it says instead whom the contract applies to. Below that a tile with the master data: applies to, customer number, contract number and billing period — each item only if you have stored it. If you have stored none of them and no description either, the tile is omitted: it would only repeat what is already in the band above.
Below that the history: every price period with its span (“1 Sep – 31 Dec 2026”), the unit price and, if stored, base price and instalment. The newest one is at the top — the list reads from now backwards, like a bank statement. The one currently valid carries a small NOW in front, one that has not started yet a PLANNED. Every row can be tapped and edited, or deleted individually with the bin symbol.
If you have stored a billing period in the contract, the history is structured by billing years — “BILLING YEAR 2026 / 27”, the current one additionally with the word “current”. A price period that runs across the turn of the year appears in every year it touches, with exactly the section that applies there. Shown are the current year and every year in which a period begins; years in which nothing changed are left out by the page — they would look like the year above. Without a stored billing period the periods simply appear one below the other, the most recent at the top, and the page tells you so in one line.
A timeline runs down the left — a fine vertical line with one dot per billing year; the dot of the current year is in the colour of the meter type, the others are muted. That way you can see at a glance where in the history you are.
To the right of “HISTORY” is “+ Record a change”: the form comes prefilled with all the values of the contract — you only enter the valid-from date (from when the new values apply; it is in the notification letter) and the changed figures. You can also store announced changes in the future today already. The cost analysis and the forecast calculate month by month with the price and instalment valid at the time.
The page deliberately shows no billing — no costs, no usage, no balance. What your contracts cost you and whether an additional payment is looming is shown in Usage and on the forecast card of the overview.
Creating and changing a contract
Creating and editing happen on a page of their own, no longer in a narrow dialog window. Three routes lead there: “+ New” above the list, a tap on a period on the contract page and the pill “+ Record a change” in the same place. To edit, you therefore always go to the contract page first and choose the period you want to change there — that way you never hit the wrong one by accident.
At the top there is a band with what you are currently doing — “NEW CONTRACT”, “EDIT CONTRACT” or “RECORD A CHANGE” — and, as soon as the contract has a name or a scope, that below it. On the left the ‹: it takes you back to exactly where you came from — to the contract page if you came from there, otherwise to the list. Right at the bottom are “Save” (or “Add”) and below it “Cancel”.
If you have entered something and go back, the app asks (“Discard entries?” — “Keep editing” leaves everything as it is). If you have not touched anything, the page closes without comment; a contract you have only looked at does not hold you up.
The fields come in three groups: whom the contract applies to including the description, the prices including valid-from, and the contract details (optional).
Under “Applies to” you decide which meters the contract applies to — there are three levels, from the widest to the narrowest:
- All {type} meters — generally for the whole meter type, across all addresses.
- All {type} meters · {address} — for all meters of this type at exactly one address. That is the case when a house has several meters of the same type that share one contract: cold and hot water, house and garden meters.
- A single meter — only this one.
The narrower statement wins: a contract for a single meter takes precedence over a contract for the address, and that one over a contract for the whole meter type. Only then does the valid-from date decide. An example: you store “All water meters · House A” at €3.15/m³ — cold and hot water of this house are calculated with it. For the garden meter with its own connection you additionally create a contract on exactly this meter; it then applies only there, and the other two stay with the house contract.
Address contracts appear in the list under their address and show “all meters · {address}” as their target. If you delete an address, its contract does not disappear — it then applies generally to the meter type, so you can reassign or delete it.
All amounts appear in the currency of the address the contract belongs to (for an address contract: that of its address, for a general one: that of your default address) — the field labels change with it, “Unit price (€/kWh)” then becomes “Unit price (£/kWh)”, for instance.
For gas you also enter the Factor (kWh/m³) — volume correction × calorific value, both of which are on your gas bill; it is preset to 11.05. It stays stored in the contract and travels with the cloud sync: the forecast uses it to convert your gas usage into kilowatt-hours, and the built-in converter converts the unit price in ct/kWh into €/m³, to match the meter, which counts m³. In other currencies the small unit is named accordingly (p/kWh, ¢/kWh, Rp./kWh); if a currency has no common subunit, the price conversion is omitted and you enter the unit price directly — the factor is still there.
When saving, the app looks at the order of magnitude. A slipped decimal point happens quickly, and a unit price of 32 instead of €0.32/kWh silently multiplies every cost estimate and every forecast by a hundred afterwards. If a value is far outside what contracts of this meter type usually have, Zählwerk therefore asks: the note gives the usual range — and if it is only the decimal point that slipped, the guess straight away (“Did you mean €0.32 / kWh?”) together with the button “Save with €0.32 / kWh”. One tap, and the value is in the field correctly.
“Save anyway” is always there. The check never holds you up: a commercial tariff, an old feed-in rate of more than 50 ct/kWh or a gas price from the expensive winter of 2022 is legitimately outside, and then your value is right, not the range. What is checked is the unit price (with a feed-in contract the feed-in rate) and the base price, each on its own — if both are unusual, two queries come one after the other. The instalment is not checked: how high it is depends on your usage, not on a usual order of magnitude. And the check calculates in euros, francs, pounds, dollars and the common European currencies; if Zählwerk does not know a currency, it would rather say nothing than unsettle you with a wrong range.
Under Contract details (optional) you can record what otherwise only appears on the bill: the monthly instalment, the billing period (from–to), your customer number and the contract number.
You enter the billing period without a year — only day and month, for example 1 March to 28 February. It applies to every year, after all, as long as the contract runs; which year is currently the one is worked out by the app itself. The picker therefore shows no year, only month and day, and the field reads “01.03.”. That the “to” lies before the “from” is the normal case here and not an error. An end may also stay open: the app then completes it (“from 1 March” becomes “to 28 February”). In the list the period appears as “Billing 1 March – 28 February”.
You find these details again on the contract card: the instalment at the top right under the heading “INSTALMENT”, and billing period, customer and contract number in a small line under the scope.
Customer and contract number are optional and purely informational. The ongoing cost estimate on the cards does not use them; it still calculates with the unit and base price alone. Two items do have an effect, though: the billing period feeds the switch Calendar year | Billing period in Usage (see Usage) — and, together with the instalment, the Billing period forecast on the overview: as soon as an instalment is entered, the app shows right at the top of the overview whether an additional payment or a credit is to be expected. Whatever you fill in appears afterwards as an extra line under the contract in the list.
One note if you sync several devices: contracts are taken over as a whole during the sync — a contract newly created on the iPhone appears with all its details on the iPad too. If you later change something on a contract that already exists on both devices (instalment, customer number — just as with the price), that change does not travel across by itself; enter it on both devices in that case.
Feed-in contract
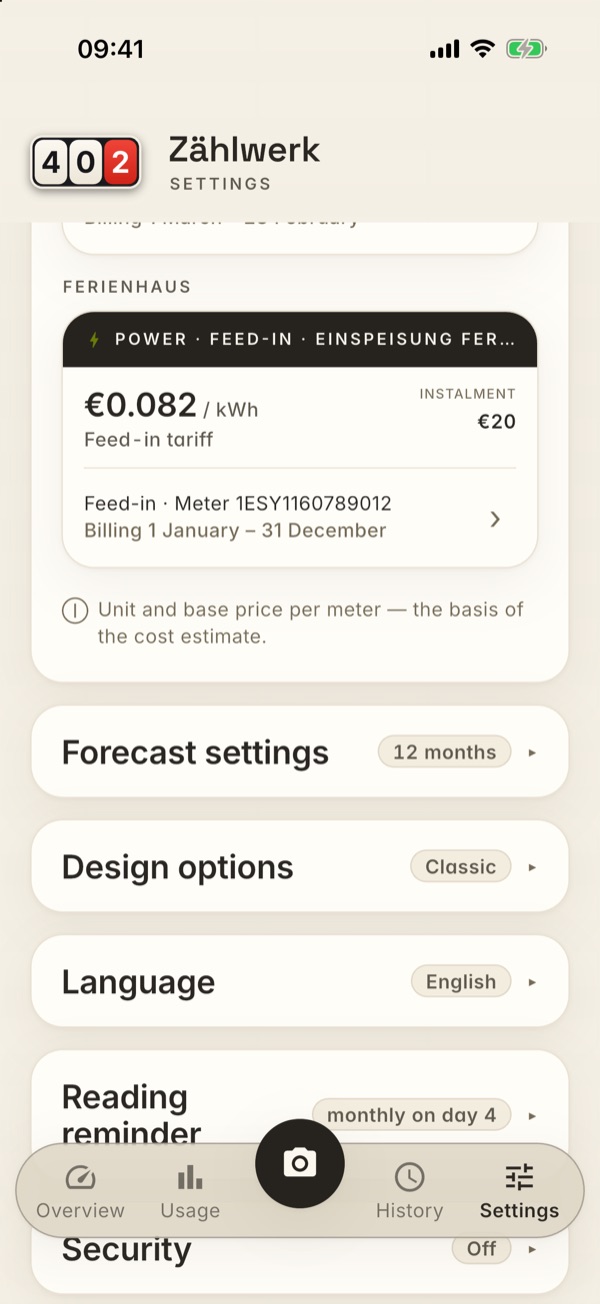
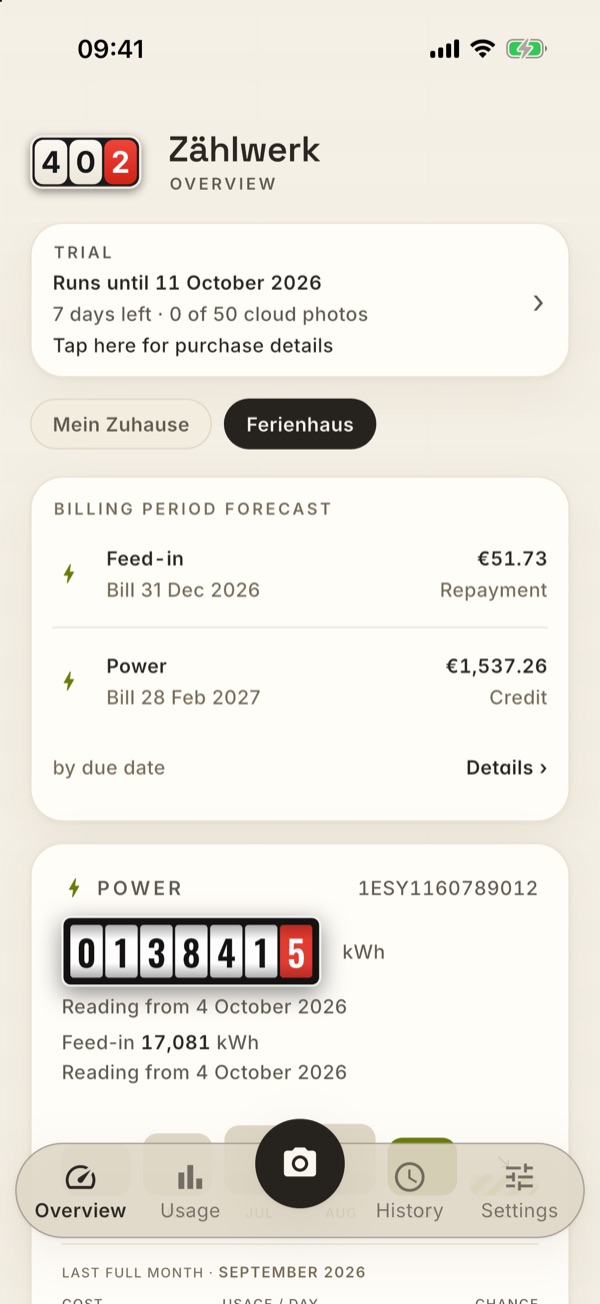
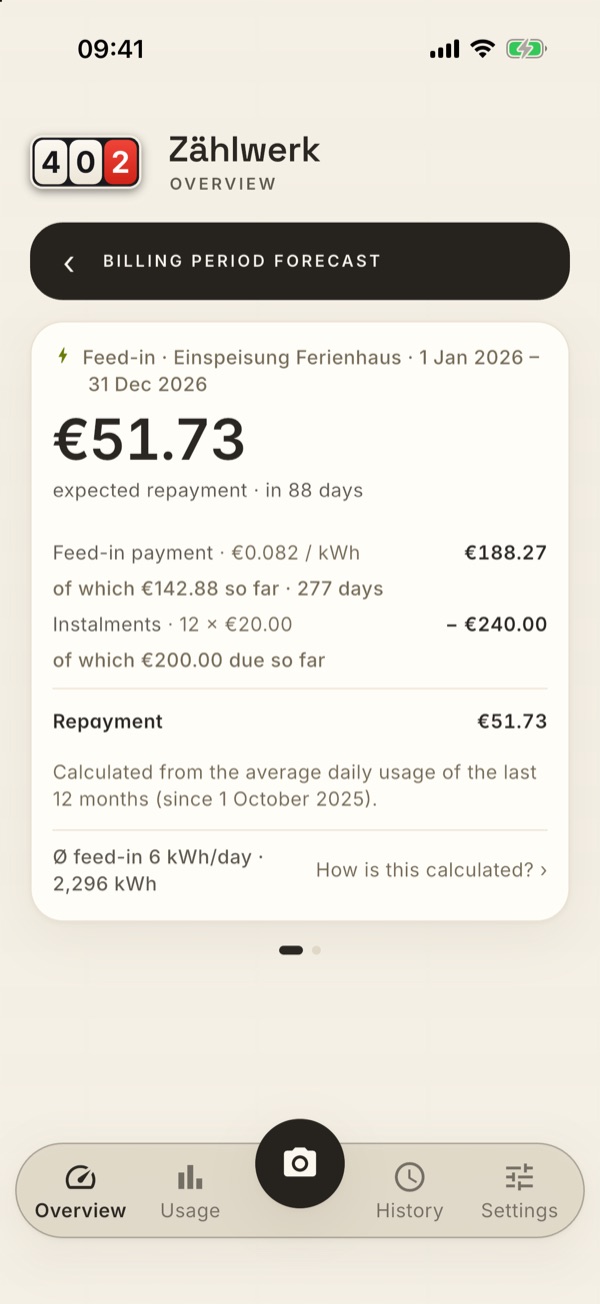
If you feed electricity into the grid, you have a second contract for it — with your grid operator, not with your electricity supplier. It pays you a fixed rate per kilowatt-hour fed in. In Zählwerk you create it like any other contract; only the scope is a different one.
The prerequisite is a bidirectional meter. If one is stored, the selection “Applies to” has a fourth section, Feed-in — there you choose “Feed-in · Meter 1ESY…”. If there are several bidirectional meters at one address, there is additionally “Feed-in · all meters · {address}”. Without a bidirectional meter the section is missing entirely.
With this choice the fields change: instead of “Unit price” it says “Feed-in rate €/kWh” — the rate your grid operator pays you; it is on your feed-in statement. There is no base price, the field is omitted (it is charged for your connection, after all, and you pay for that in the electricity contract). Instalment €/month is here what the grid operator transfers to you every month. You enter the billing period, customer and contract number as usual — feed-in is mostly billed by calendar year, while your electricity contract often follows a different cycle.
In the first year the grid operator usually pays no instalment at all. The monthly instalments under § 26 EEG only begin in March of the year after commissioning; until then the operator settles once at the end of the year. In that case simply leave the field empty — Zählwerk still shows you what you can expect.
In the list you recognise the contract by the head band “POWER · FEED-IN”; where the electricity contract has the base price, the word Feed-in tariff appears here. On its page the meter type is called “FEED-IN CONTRACT”, and in the history every period shows “Feed-in rate €0.082 / kWh”.
The feed-in contract is never offset against your electricity contract. It applies to a different register, has a different partner and its own billing date. Your electricity costs do not change because of it — it appears in no cost calculation. It becomes visible in two places: as the tile Feed-in payment in the card “Feed-in per month” in Usage and as a row of its own, Feed-in, in the Billing period forecast on the overview.
Forecast settings
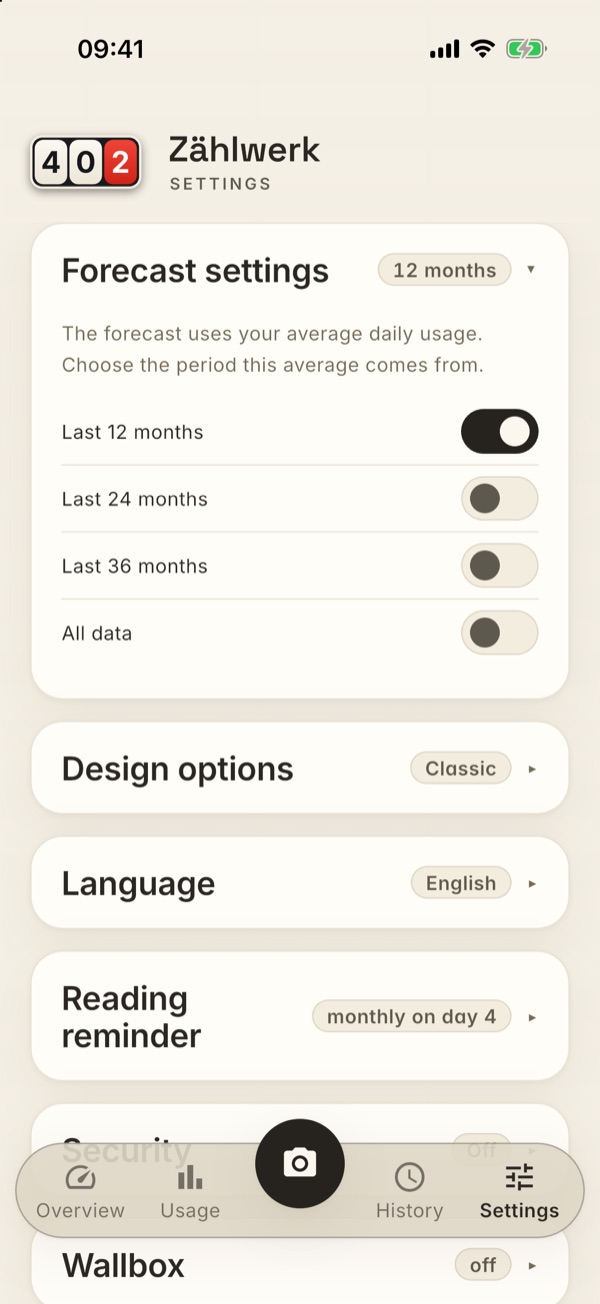
Here you set which period the average daily usage comes from that the Billing period forecast extrapolates with. Four rows with a switch, one of them always active (as with the themes); the short summary in the card head shows the active choice.
- Last 12 months (default): every season counts exactly once, and a change comes through quickly — an electric car that has been charging at the wallbox since spring shows up in the forecast after a few months. This is also the period your supplier uses to size the instalment.
- Last 24 months and Last 36 months: calmer. An unusually cold winter or a single month with guests in the house carries less weight, because it is spread over two or three years. In return, a real change takes longer to come through.
- All data: the whole history, from the first meter reading onwards. Calmest of all — but if your usage has risen for good, it calculates too low, because the cheap old years are averaged in. (That is exactly what Zählwerk calculated with at first, and it therefore showed a credit where the real bill brought an additional payment.)
Two things apply to every choice: the period always begins at a reading — if there is none exactly on the cut-off date, it reaches back to the next older one. And if your history is shorter than the chosen period, the app simply calculates with everything that is there. The footnote on the forecast page says in each case what was used as the basis. The setting applies to this device and is saved; the overview calculates with it the next time you open it.
Design options
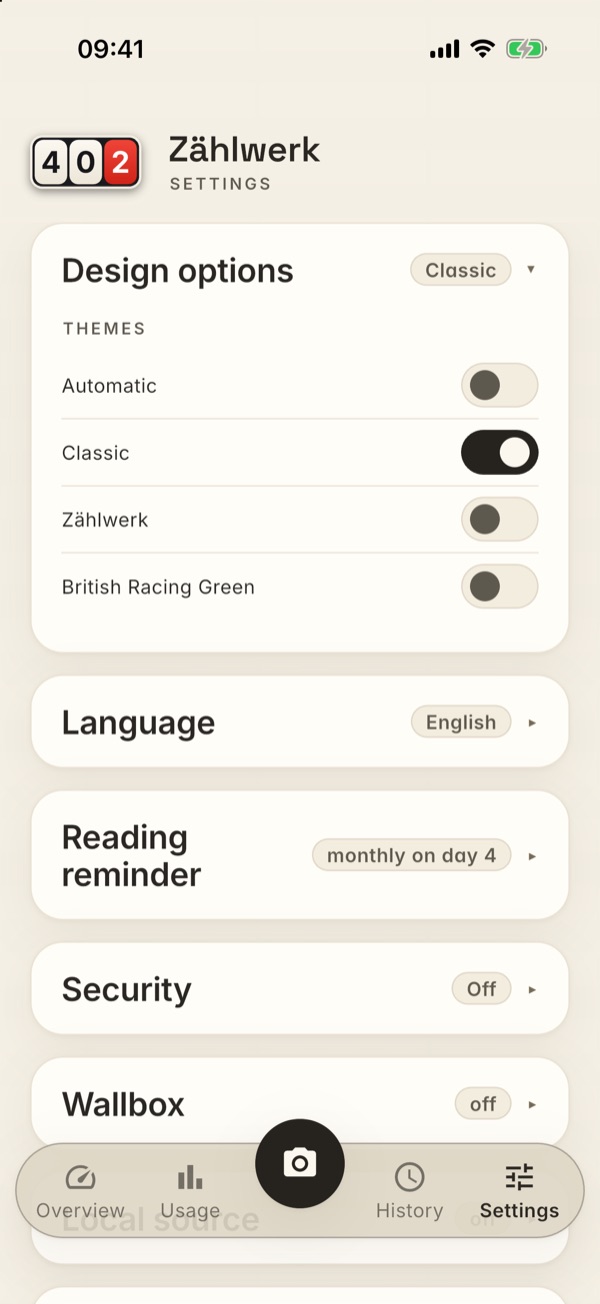
Here you choose the colour world of the app under Themes.
There are four options. Each has its own row with a switch: you switch on the one you want, and the previous one switches off automatically — one is always active. You can tap the whole row, not just the switch.
- Automatic (default): follows the light/dark setting of your device — light shows Classic, dark shows Zählwerk. The change happens immediately when your device switches over (e.g. at sunset).
- Classic: light and warm, cream-coloured with a dark accent — under “Usage” the same animated odometer runs as with the Zählwerk theme.
- Zählwerk: dark with a lime accent and an animated odometer under “Usage”.
- British Racing Green: dark green with a gold accent and a large dial under “Usage”.
The choice applies immediately and stays saved. “Classic”, “Zählwerk” and “British Racing Green” are fixed themes; “Automatic” leaves the decision to the device.
Language
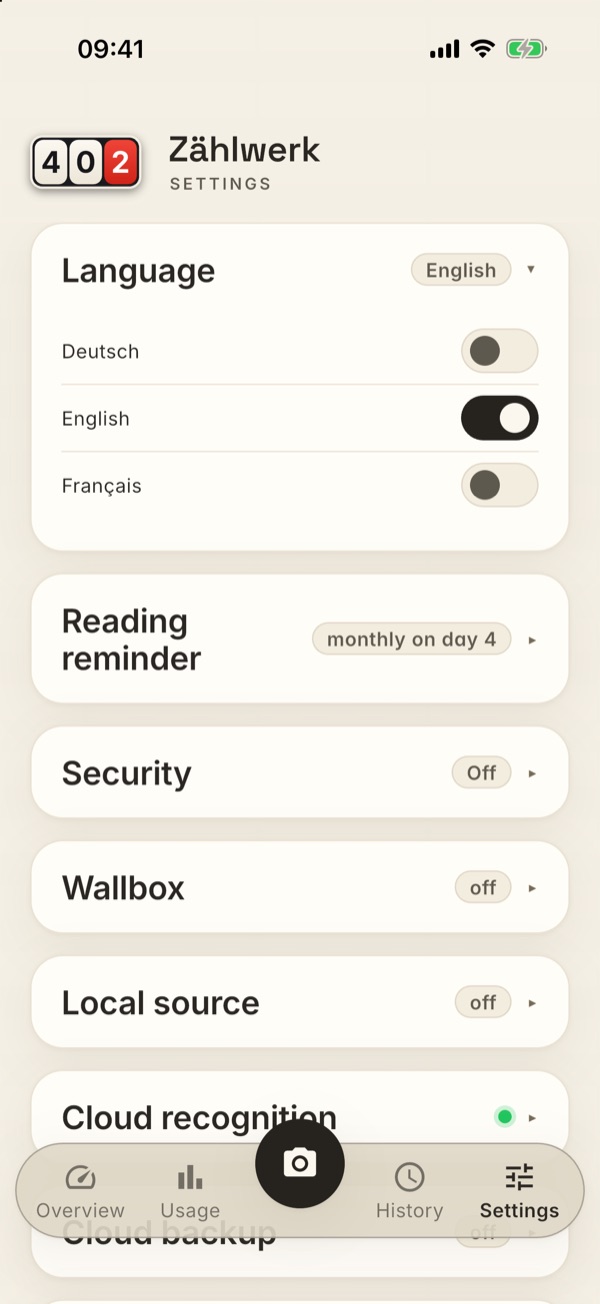
The app speaks German, English and French — the three languages appear
one below the other, each with its own switch; the chosen one is on. Without
a choice of your own, the app follows the system language of your device.
Number and date formats change with the language too (e.g. 1.234,5 ↔
1,234.5).
Reading reminder
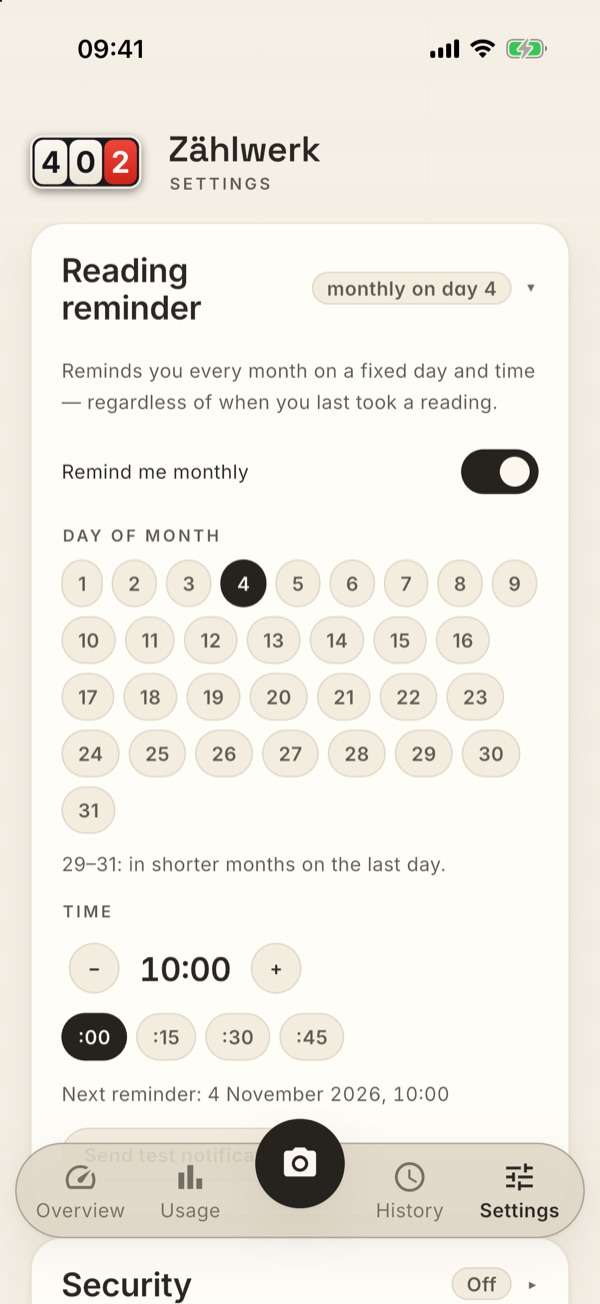
So that you do not forget to take readings, the app reports in as a notification on your device. The setting is deliberately simple:
- One switch, “Remind me monthly” — there is nothing more to decide.
- If it is switched on, the app reminds you monthly on a fixed day (day 1–31) at a fixed time (default 10:00).
- If the chosen day does not occur in a month (e.g. the 31st in February), it reminds you on the last day of the month.
The cut-off day applies unconditionally: if you have set “on the 21st”, the reminder comes on the 21st — regardless of when you last took a reading, and regardless of how many meters you have created. What you set is what is carried out.
If you have set up a local source for a meter, the card carries a note: meters whose reading the app fetches itself need no reminder — you can switch it off. The app does not do so by itself; the decision stays with you.
Below the settings it says when the next reminder is due — e.g. “Next reminder: 21 August 2026, 09:00”. That way you see at a glance what is planned. The app always plans a year of appointments in advance; so you keep being reminded even if you do not open the app for a longer stretch.
Was your device switched off on the cut-off day? A switched-off device cannot receive a notification — locked or asleep, on the other hand, is no problem. On Android the app catches up on a reminder missed that way: it appears right after the next time the device is switched on — and, if your device holds the start signal back, at the latest the next time you open the app (if the device was off across several cut-off days, exactly one message comes, not several). Under the line with the next appointment there are therefore two pieces of information on Android: when it last looked (“Last checked: 15 September 2026, 08:05 · App start”) and when something was last really caught up (“Last caught up: 15 September 2026, 06:34 · Device start”, otherwise “No reminder caught up so far.”). The two are separate because the app looks several times a day — the evidence of the catching up would otherwise not stay put. On the iPhone this is technically not possible — iOS discards a missed notification without replacement; there it is best to choose a time at which the iPhone is switched on.
With “Send test notification” you can check at any time whether notifications arrive on your device — the test message appears after about 10 seconds. If it does not come, your device does not allow the app to send notifications; that can be changed in the system settings. If the message cannot be scheduled at all, the card says so explicitly instead of swallowing it without comment — the same goes for the regular reminder when you change a setting. On Android, delivery can be a little later in power-saving mode; with the screen switched on it arrives immediately. The test message is independent of your reminder setting and does not change the planned appointment.
Security
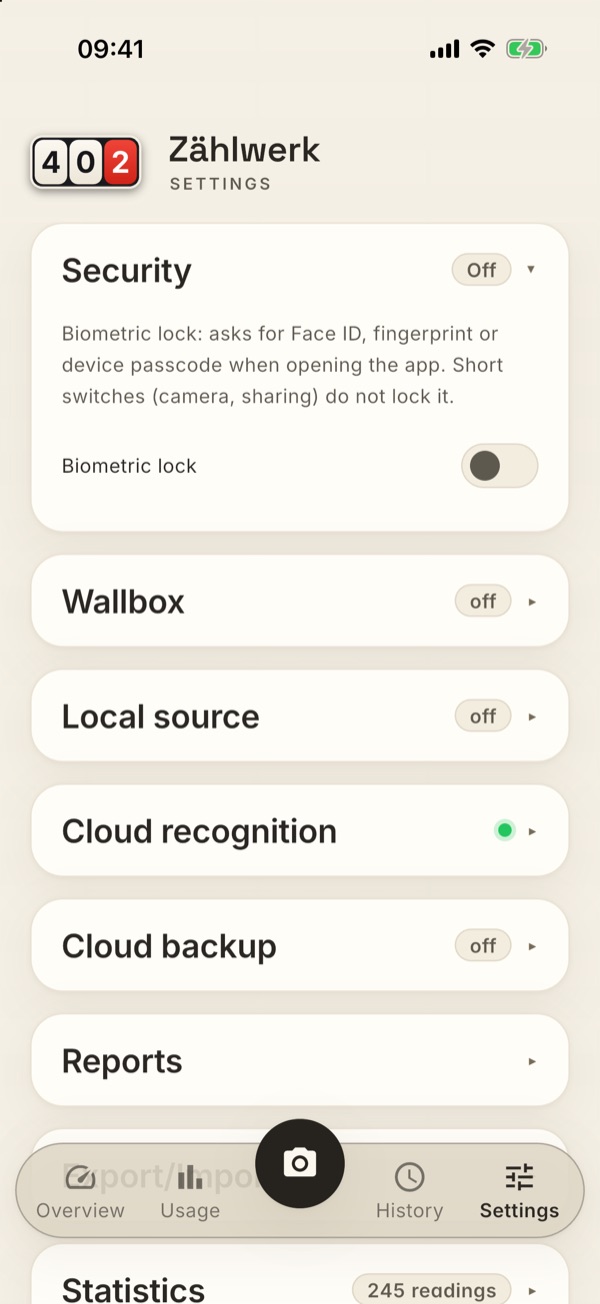
Activate the biometric lock to protect the app with Face ID, Touch ID or fingerprint (with the device passcode as a fallback). The lock takes effect at start-up and when the app has been in the background for more than a minute — short switches (e.g. to the camera) do not lock it.
Wallbox
If you own an Easee wallbox, connect it with your Easee account: the app fetches the monthly charging values and shows them under “Usage” as a power series of its own. Your password is stored exclusively in the device's secure keychain — never in the database and never in exports. The values are updated automatically when the app starts (at most once a day); the first time you connect, the app loads up to three years of history.
Address of the wallbox: if you manage several addresses, choose here which one the wallbox belongs to — its series then only appears in the power chart of that address. As long as you choose nothing, the app takes your default address (the one with the star in the address management); with only one address the choice is omitted, because there is nothing to decide. If you disconnect the Easee account, the values already loaded stay, together with their address.
Count wallbox usage? As soon as charging values are available, there is a switch here: “Include wallbox usage in average, comparison and statistics”. It is on — the key figures therefore calculate with the total electricity, as before. If you switch it off, Usage / day, both Change values, the monthly average, the estimated costs and the dial subtract the charging current month by month and all refer to the household without the wallbox. The point: a month with a lot of driving used to make usage rise sharply, even though hardly anything was different in the household itself. The explanation on tapping “Change” then tells you in a line of its own what the figures are based on (“Figures excluding wallbox usage”).
The switch also takes effect in the Overview: if your wallbox hangs behind the main meter — that is, your address has only one electricity meter — then the key figures of its card, including the monthly bars, also calculate without the charging current. If the wallbox has its own meter, every card stays with its own values: which meter carries the charging current can then no longer be clearly attributed, and the subtraction might be applied twice.
Unaffected in every case are: the meter reading (that is your real reading), the stacked bars in the chart (which still show household plus wallbox), the tile “Wallbox” under the two charts and the Wallbox card of the overview. They always show the charging current in full.
Wallbox and photovoltaics: if you charge your car mainly from your own system, the wallbox may have counted more electricity in sunny months than was drawn through your grid meter — the rest came straight from the roof, after all. If the switch is off then, “Household without wallbox” stands at 0. That is not a malfunction but the honest answer: how much your system generates and how much of it flowed into the wallbox is on neither of the two registers of your meter (see Bidirectional meters) — only your inverter knows that.
The wallbox as a meter of its own: as soon as charging values are available, the wallbox gets a card of its own on the Overview (see The Wallbox card) — with its total meter reading, which the app fetches automatically from the charging station. For the number of your meters it does not count: it gets a card, but not a meter slot.
Local source
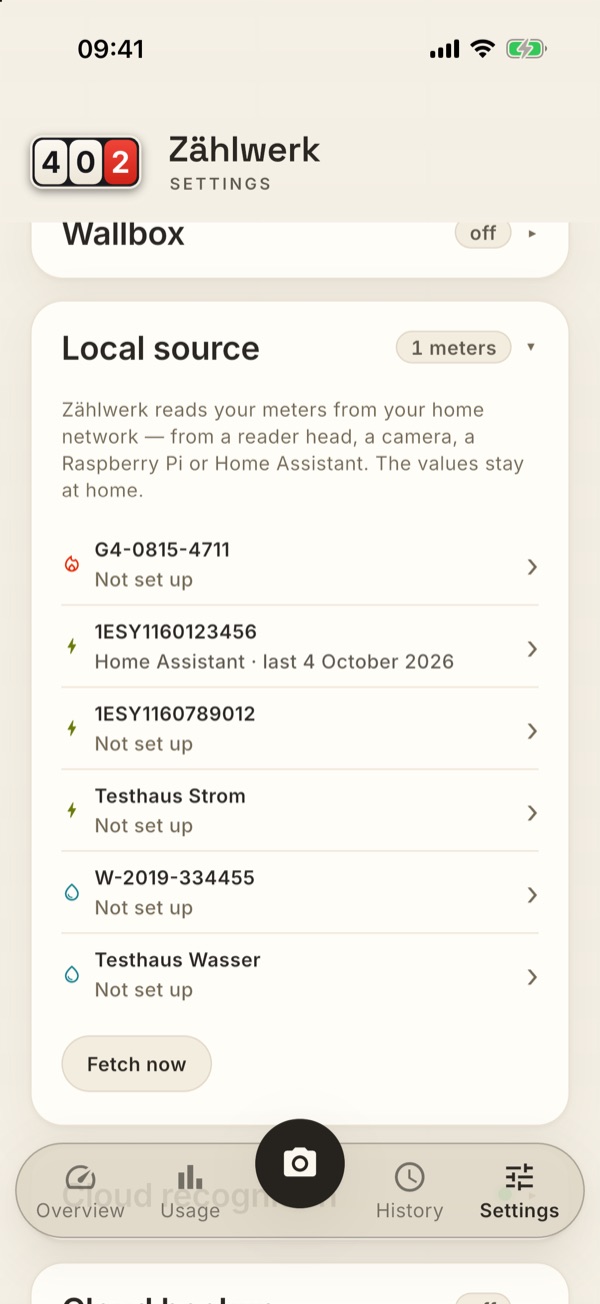
Here you set up Zählwerk to fetch your meter readings itself from your home network — from a reader head on the meter, a small camera, a Raspberry Pi or from Home Assistant. Then you don't have to photograph anything any more: when you open the app, today's reading is already in the history.
The values stay at home while it happens. Zählwerk asks the device on your network directly — nothing goes to any Zählwerk server.
For that you need a device that reads your meter and makes the value available on the network. Zählwerk doesn't sell hardware and doesn't prescribe a make: an address that returns a number is enough.
The five presets
In the card you tap the meter you want to read automatically. At the top you then choose what kind of device you have:
- Tasmota reader head — a small Wi-Fi reader head that sits on the
optical interface of your digital electricity meter (the “Hichi” is a
common one). It costs around €30, is stuck on and joins your Wi-Fi. The
address is its IP, followed by
/cm?cmnd=Status%2010. - AI on the edge — an ESP32 camera that looks at the dials and
recognises the digits itself. It also reads analogue electricity, gas
and water meters, for which there is no interface at all. The address is
its IP, followed by
/json. - vzlogger — a Raspberry Pi with an infrared reader head. vzlogger brings a small web server with it, usually on port 8080; that is exactly what you enter.
- Home Assistant — if your meters already show up there as a sensor, this is the shortest route: Zählwerk asks Home Assistant, and whatever hangs off it doesn't matter.
- Custom address — everything else. Any address on your home network that returns a number works (see below).
The preset only fills in the address field and sets the login to match — it doesn't prescribe anything. If you have already typed an address, it stays.
Step by step
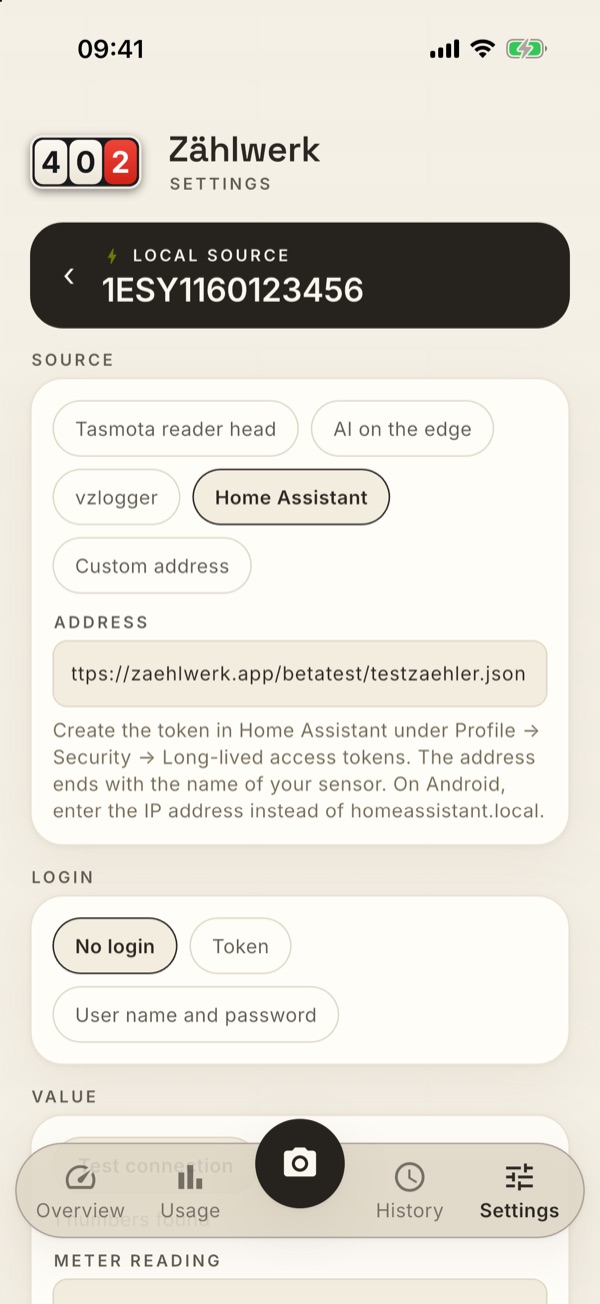
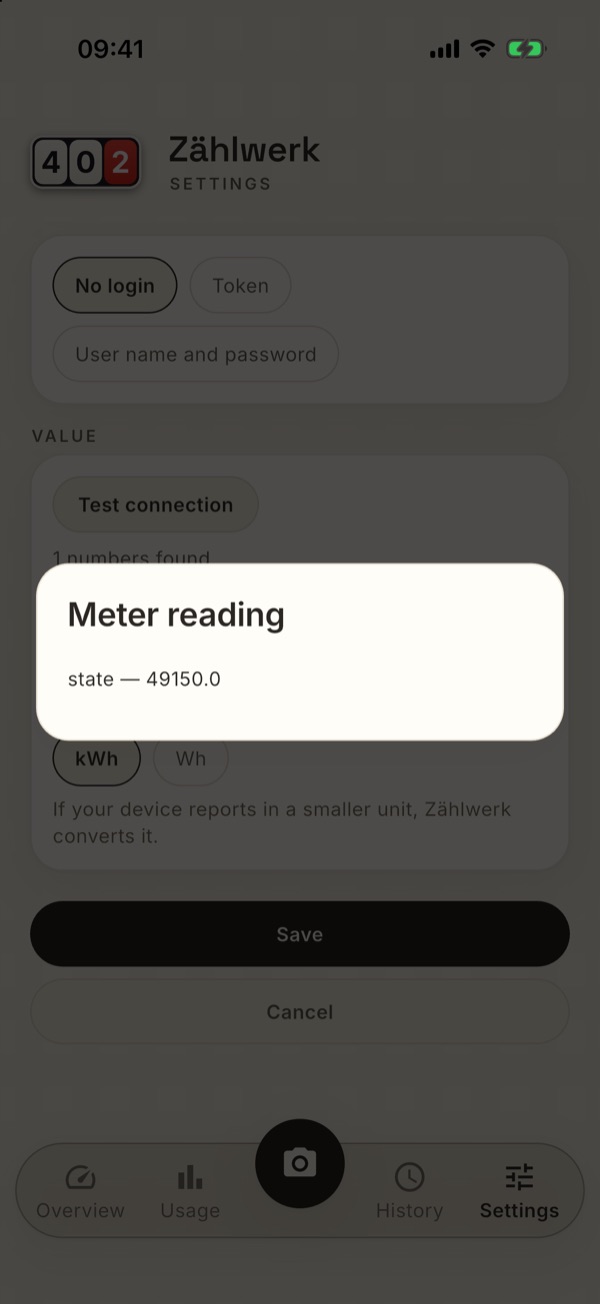
Enter the address — the one of the device on your network.
Login, if the device asks for one. Reader head, camera and vzlogger usually don't need one; Home Assistant wants a token. You create it there under Profile → Security → Long-lived access tokens. Tokens and passwords are kept in your device's keychain — not in the database and not in the backup.
Test connection. Zählwerk asks the device once and shows you how many numbers are in the answer.
Pick the meter reading. In the list, each hit is shown with the value the way the device delivered it — so you recognise your meter reading again without having to understand the answer. If your meter also has a feed-in register, pick its number below (see Bidirectional meters (feed-in)).
Sort out the unit: some devices report watt-hours instead of kilowatt-hours, or litres instead of cubic metres. Zählwerk converts that.
Save. Zählwerk fetches the first reading straight away, enters it as today's reading and tells you in a dialog what it fetched — you see the value right away in the overview and in the history. If you have already read or photographed the meter yourself today, your value stays; Zählwerk says so too and fetches the next reading tomorrow. The card then says “already read today”.
After that the card shows what is set up and when a value last arrived. The “Fetch now” pill fetches a new one at any time — otherwise it happens by itself.
What the app does automatically
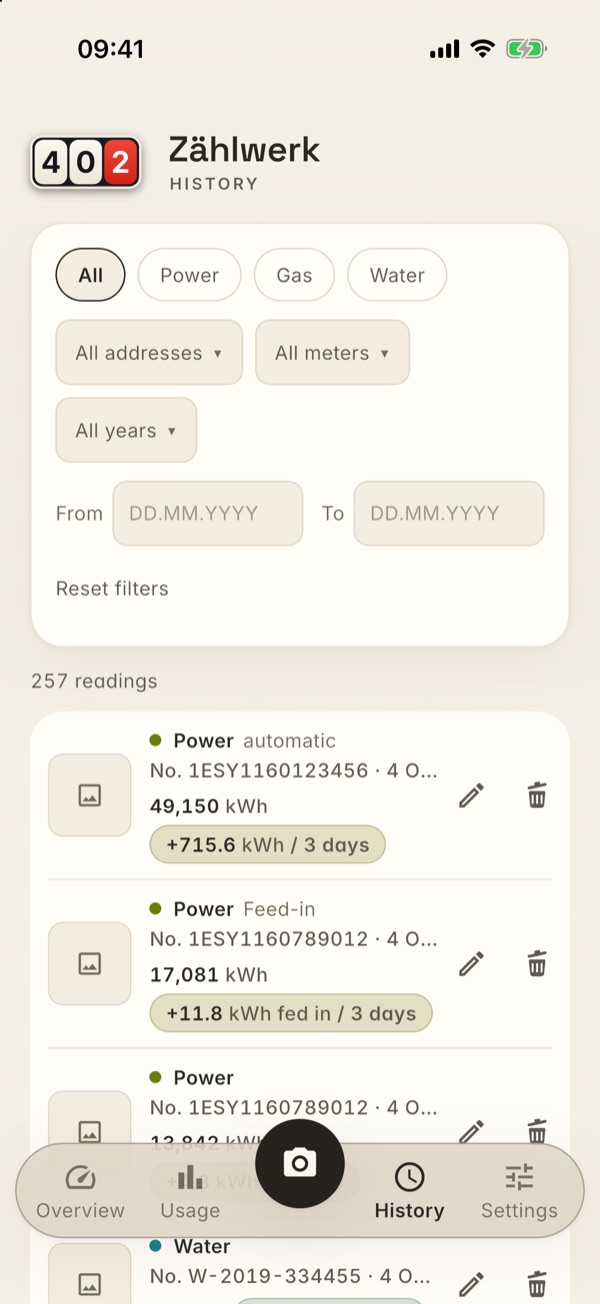
Zählwerk asks your sources by itself — when the app starts and every time you bring it back from the background. Before each fetch the app checks a few things per meter, in this order:
- Already fetched today? Then nothing is repeated. There is at most one reading per day per meter.
- Have you already read the meter yourself today? No matter whether by hand, by photo or through an earlier source: if there is already a reading for today, the app enters nothing — your value wins. The card then says “already read today”. Two readings on one day would distort the consumption calculation.
- Are you on Wi-Fi? That applies as long as the address begins with
http://. On the road nothing is attempted — your home network isn't reachable there anyway. The day stays open, though: the next time you open the app at home, the fetch runs immediately. If the address begins withhttps://, the app doesn't wait for Wi-Fi — whoever enters that has decided on access from outside. - Fetch and check. If the reading doesn't fit your previous readings — the reader head starts at 0 again after a power cut, or the sensor is delivering nonsense right now — Zählwerk saves nothing and tells you so in the card. With a photo you see the value and can decide; here nobody sees it, which is why the app is stricter. A reading exactly equal to one that already exists is skipped silently.
A normal Wi-Fi or LAN connection without a data cap counts as Wi-Fi. A phone hotspot or a connection in data saver mode does not count as Wi-Fi. If the device can't say at all which network it is on, the app assumes Wi-Fi and gives it a try.
A few things you should know about this:
- There is no permanent background fetch — iOS and Android don't allow it. If the phone lies in a corner for a week, nothing is created during that week, and nothing is added afterwards either.
- “Fetch now” in the card overrides checks 1 and 3: it fetches a reading even if one already arrived today or you aren't on Wi-Fi right now. Check 2 applies there too — if you read the meter yourself today, your value stays.
- One device doesn't drag the other down. If the reader head is off, the app still fetches the Home Assistant meter next to it; the error only appears in the row of the affected meter.
- Readings created automatically carry the word “automatic” in the history. Otherwise they are perfectly normal readings: you can edit and delete them like any other.
- If you load the sample data via the test menu, it already contains a reading per meter for today — so the automatic source will only write something there from tomorrow on (check 2).
On Android: IP address instead of name
Android doesn't resolve names like homeassistant.local. Enter the
IP address there — you'll find it in your router or in Home Assistant
under Settings → System → Network.
Building your own source on a Raspberry Pi
You have a Pi but no Home Assistant? Two ways:
With a reader head (real automation): an infrared reader head on the
meter plus vzlogger. In its
vzlogger.conf you switch on the built-in web server:
"local" : { "enabled" : true, "port" : 8080, "index" : true }
Then you enter http://<IP-of-the-Pi>:8080/ as the address and pick the
number in Zählwerk that corresponds to your meter reading.
Without a reader head (your own script): anything that delivers a number as text or JSON will do. Even a text file with one number per line works: the numbers are then called “Number 1”, “Number 2” and so on in the list, in the order they appear in the file. Ten lines of Python are enough:
import http.server, json

STAND = 12345.6  # enter or read your value here

class Handler(http.server.BaseHTTPRequestHandler):
    def do_GET(self):
        self.send_response(200)
        self.send_header("Content-Type", "application/json")
        self.end_headers()
        self.wfile.write(json.dumps({"stand": STAND}).encode())

http.server.HTTPServer(("", 8080), Handler).serve_forever()
Address in Zählwerk: http://<IP-of-the-Pi>:8080/, and as the meter reading
you pick stand.
To try it out without any hardware at all, a file stand.json with the
content {"stand": 12345.6} in a folder where you start
python3 -m http.server 8080 is enough. The address is then
http://<IP-of-your-computer>:8080/stand.json. If you only write 12345.6
into the file, you pick “Number 1” as the meter reading. That way you'll see
in two minutes how the whole thing feels.
The address has to name the file. If it ends without a file name, the Python server delivers the folder listing as a web page — Zählwerk then tells you “The address returns a web page, not a number” and doesn't evaluate it.
What you should know
- The connection belongs to the device, not to your data: it doesn't
travel to your second phone via the cloud backup (the address
192.168.1.50only applies at your home, after all). The readings do travel along, of course. - “Remove source” only stops the fetching. The readings so far stay.
- If you delete the meter, its source goes with it.
- “Access was denied (403)” with Home Assistant almost always means: Home
Assistant has banned your address after a few failed login attempts — even
if the token is correct by now. Look at Home Assistant's notifications; the
ban is in the file
ip_bans.yaml, delete it there and restart Home Assistant.
Cloud recognition
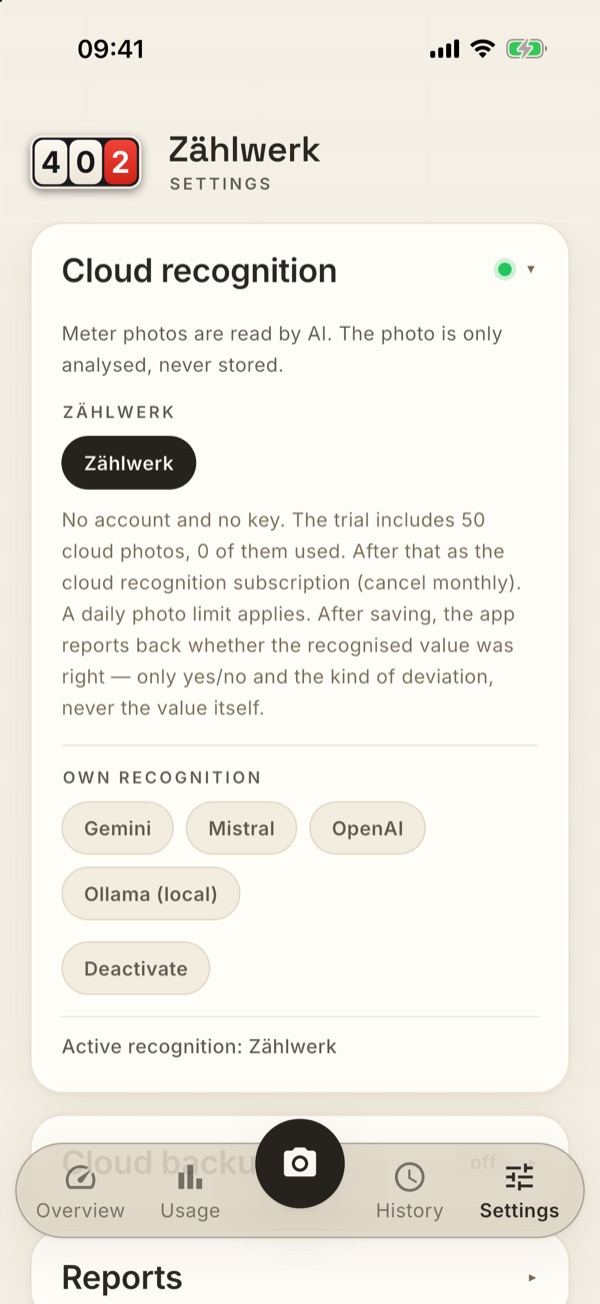
Here you choose who reads your meter photos. The card is deliberately brief: one sentence at the top about the matter (the photo is only analysed, never stored), below it two sections separated by a thin line — Zählwerk (the built-in recognition together with everything worth knowing about it) and Own recognition (the four providers where you have an account yourself). You choose with a pill; the two sections share one selection.
- Zählwerk (default) — the built-in recognition. Nothing to set up: no account, no key. During the trial, 50 photos are included; after that photo recognition is part of the recognition subscription — cancellable monthly, first month free, with a quota per month that depends on your package (see Trial, purchase and cloud recognition (subscription)). Once it is used up, the app says so with the next photo; the photo is kept as proof, and you enter the reading by hand. Without a subscription everything else is fully preserved — entering by hand, the analyses, history, export; only the automatic reading of the photos pauses. On top of that, a daily photo limit applies. Once it is reached, the app says so with the next photo and you enter the reading by hand (or store your own key). The same goes for no internet connection (typically: the meter cabinet in the cellar without reception): the app tells you so in plain words, the photo is kept as proof, and you enter the reading by hand — nothing is lost. Feedback on recognition quality: when you save a reading recognised from a photo, the app reports back whether the recognised value was right — only yes/no and the kind of deviation (such as “decimal point slipped” or “meter number misread”, and whether the app corrected it itself or you did), together with the identifier of that recognition. The meter reading, the meter number and the photo never go with it. This only applies to Zählwerk recognition; with your own provider or with cloud recognition switched off, nothing is reported.
- Own recognition (Gemini, Mistral, OpenAI or your own Ollama server) — for everyone who already has an account there. Choose the provider, then the three fields: API key (optional with Ollama), Model and Base URL (with Ollama the address of your server; empty = the provider's default). The key is kept exclusively in the device's secure keychain, never in the database and never in exports; an empty key field keeps the one already stored. Costs and data protection then follow your contract with that provider.
- Off — via Deactivate. After that no photo leaves your device any more; the app reads the image itself again (which succeeds far less often with mechanical roller meters, see the FAQ). Reversible at any time: choose a provider, save.
Save only appears when there is something to save — you have chosen a different pill or changed a field for your own provider; after saving the button disappears again. The line under the buttons sits behind a thin line and says what currently applies: “Active recognition: Zählwerk”, “Active recognition: Gemini · gemini-2.5-flash” or “Switched off”. If the key for your own provider is still missing, the warning that recognition is inactive appears there instead.
Whatever the setting: a photo is transferred only when you are taking or choosing one right then — never in the background and never afterwards for proofs that have already been saved.
Cloud backup
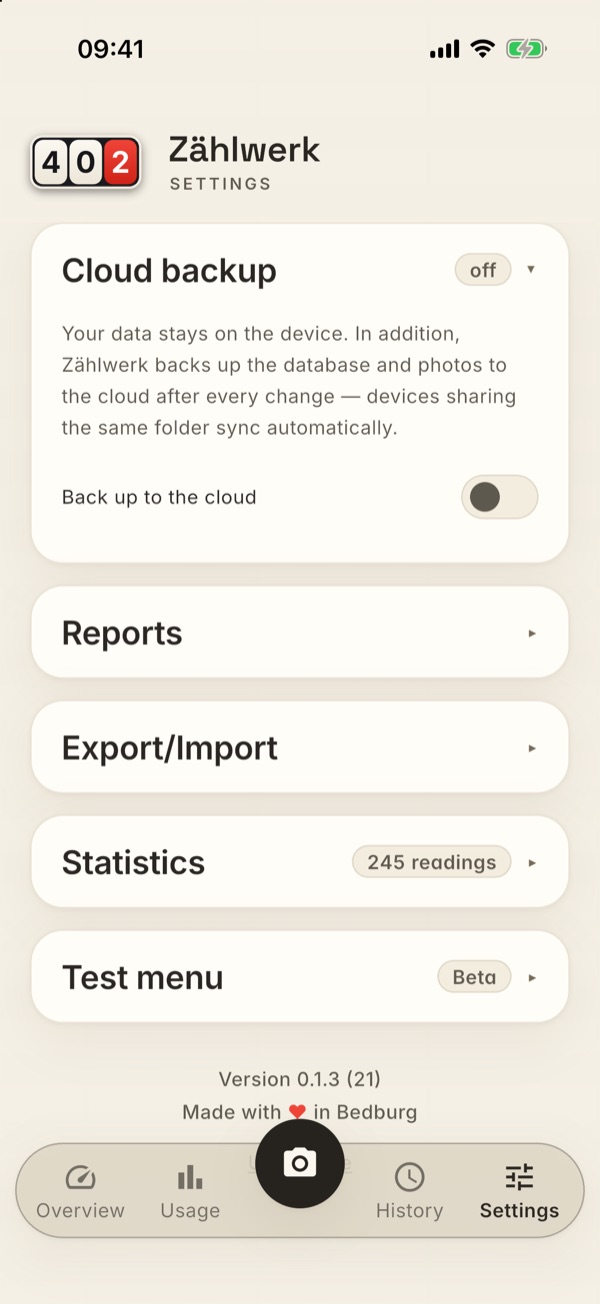
If you like, Zählwerk will additionally put your backup in a cloud folder — automatically, without you having to think about the export.
Your data always stays on the device. The cloud backup is a copy, not a move. It is off out of the box; nothing travels anywhere as long as you don't flip the switch.
This is how you set it up:
On iPhone and iPad: switch on, done. Flip Back up to the cloud — there is nothing more to do. Zählwerk puts its backups in your iCloud Drive, in a folder of its own called “Zählwerk”. You'll find it in the Files app under iCloud Drive; you can look in there at any time to see what has been backed up. If you aren't signed in to iCloud on the device (or iCloud Drive is off), the card says so and offers you a folder of your own instead.
On Android: choose a folder. When you switch it on, your device's folder dialog opens — choose the folder where the backups should go. If you don't set one (cancel), the switch stays off. Any folder your cloud app offers in the system folder dialog is suitable — Google Drive ("My Drive"), Nextcloud or Dropbox, for example, or a folder on the device.
After that it is the same on both systems: Zählwerk writes a first backup right away and after that whenever something has really changed — after a reading, after a correction in the history, after a change to a meter, address or contract, after an import and when you put the app in the background (at most once a minute). If nothing has changed, nothing happens either: a backup is your database together with all proof photos and is quickly several megabytes in size — that shouldn't travel to the cloud afresh every time the app starts. Purely personal settings (design, language, reminder, lock) don't count as a change; they belong to the device anyway.
The card shows under Folder where the backup goes (on iPhone and iPad: “iCloud Drive · Zählwerk in the Files app”), and under Last backup when that last happened — after each run the time there jumps forward. If it says “Changes not backed up yet.” underneath, something is waiting right now; with Sync now you catch it up immediately.
Wi-Fi only (the switch right below it, on out of the box): because a backup takes all the photos with it, Zählwerk normally only uploads it on Wi-Fi — not over mobile data, not over a personal hotspot and not in data saver mode. The switch applies to backups and to the automatic sync with your other devices. Whatever comes up on the road is caught up as soon as you're back on Wi-Fi; until then the card says “Waiting for Wi-Fi — changes are not backed up yet.”. Sync now always runs, even without Wi-Fi — so if you're in a hurry, just tap it. If you have a generous data allowance, switch the switch off; then Zählwerk backs up over any connection.
Prefer a different destination? You aren't tied down:
- Choose your own folder … sends the backups to a folder of your choice instead of the Zählwerk folder — your Nextcloud, say, or a folder you share with the family. (On Android the same button is called Change folder.)
- Switch to the app's iCloud folder is the way back on iPhone/iPad.
- Both only change where future backups go. Backups already stored stay where they are — nothing is moved and nothing is deleted. And: once you have chosen a folder of your own, Zählwerk stays there; it never moves by itself.
Several devices? They sync automatically. Each device writes its own backup file into the folder — they never overwrite one another. If you use the same Apple ID on iPhone and iPad, the two meet in the Zählwerk folder by themselves; for a mixed pair (iPhone + Android) or for the family you choose the same folder of your own on all devices.
After that you don't have to do anything: if you record a reading on the iPhone, it is on the iPad as soon as you open the app there (or bring it back from the background). There is no prompt and no button to accept anything — afterwards the card just says briefly what has been added, for example “3 readings taken from iPad”. With Sync now you can also trigger it by hand — the button first fetches what other devices have stored and then immediately writes your own backup (there is no separate button for that).
What gets merged: Zählwerk unites both states instead of overwriting one. Everything that is new on one device — readings, meters, addresses, contracts, wallbox data and the proof photos — is added on the other. If you delete something, it disappears there too; if you correct a reading, it is replaced and not duplicated. And if you change something about a meter, an address, a contract or afterwards about a reading, the change travels along too — the new instalment, the new price, the new label, the ticked “Reported to the supplier” box or the corrected marking. The card says so afterwards, for example “3 readings, 2 changes taken from iPad”.
Three things you should know about this:
- Settings stay personal. Design, language, reminder, lock and the wallbox assignment belong to the device and never travel — the iPad may have a different design from the iPhone.
- With changes, the one typed last wins. If you change the same contract (or the same reading) on both devices, the newer version prevails — and completely so: individual fields are not mixed. Whoever typed last is right. Two special cases remain: the star on the address (which address is pre-selected when you open the app is decided by each device for itself) and the proof photo — a photo that is on this device is never deleted by a device that doesn't have one.
- Two readings on the same day stay. If two devices photograph the same meter on the same day with different readings, Zählwerk keeps both and points it out (“Heads-up: … two readings on the same day”). Only you can decide which one is right — you delete the wrong one in the history.
Restore from backup … is the emergency route, not an everyday button: it replaces your entire data with the backup of another device — meant for a new device or when everything on this one is lost. There is an explicit prompt before anything happens. For normal operation you don't need it.
If the card says “The cloud folder is no longer reachable”, your device has lost access (folder deleted, sharing revoked, cloud app removed) — just choose the folder again via Change folder. If it says “Not signed in to iCloud”, sign in to iCloud in your device's settings (iCloud Drive must be on) — or choose a folder of your own.
Reports
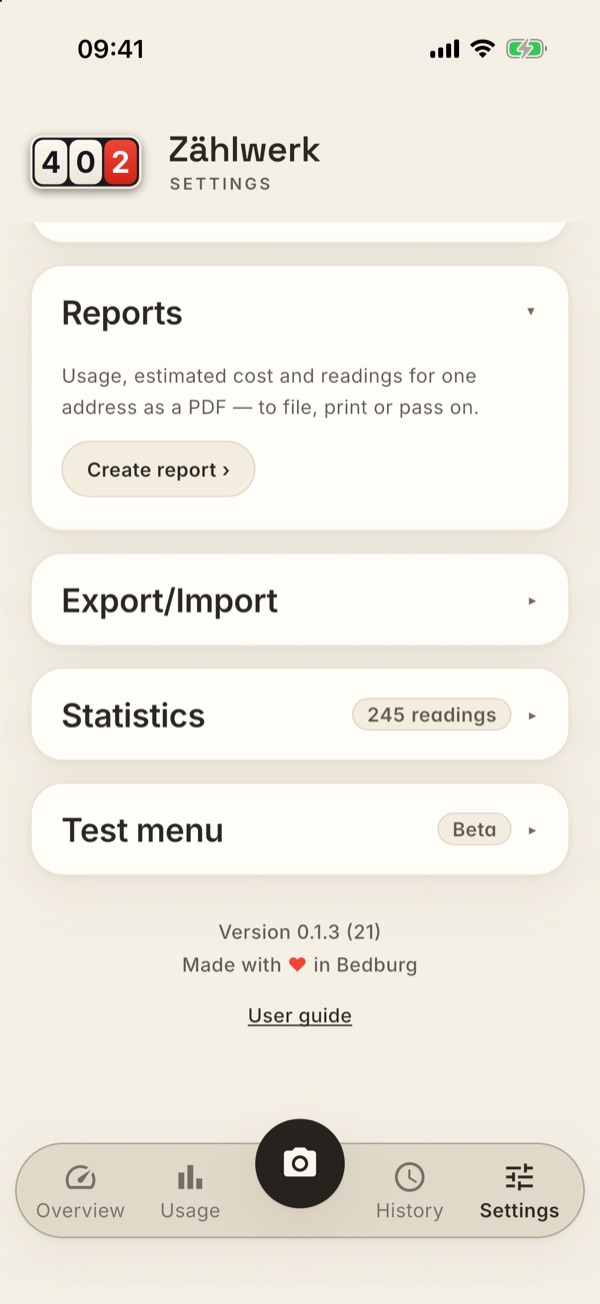
A report sums up what one address used over a period — as a PDF to file, print or pass on, for example to your landlord, your employer or for your own records.
Open the card and tap Create report. On the page you choose three things:
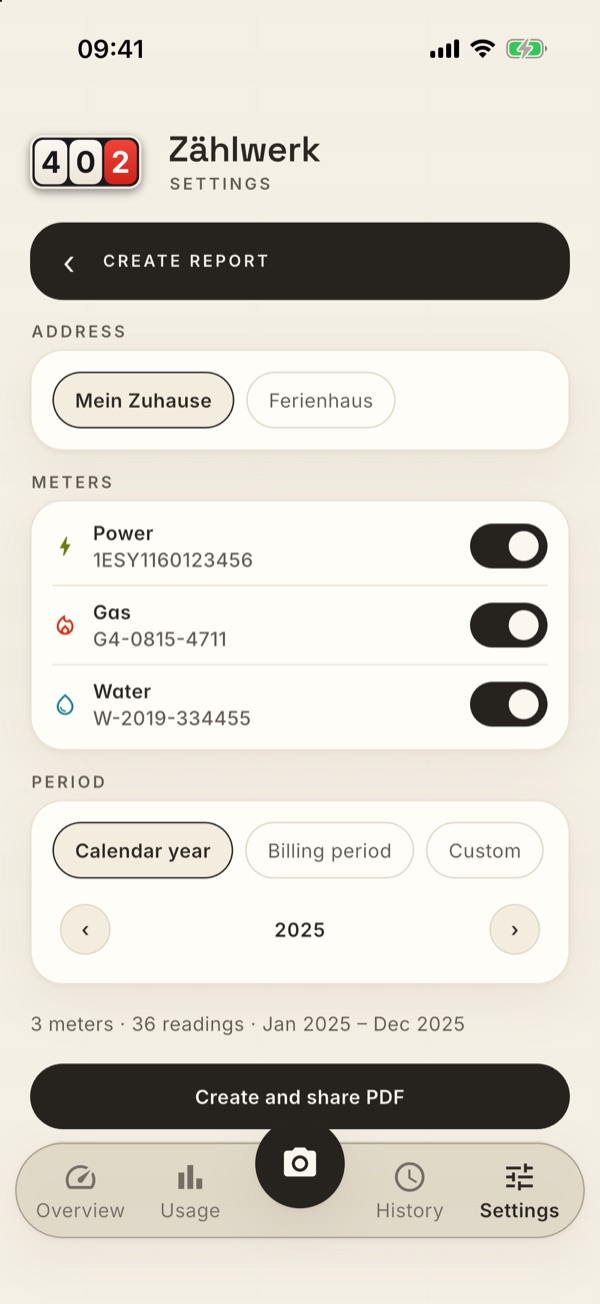
- Address — a report always covers one address. Your default address is preselected.
- Meters — all meters of the address that are in service. Switch off what should not be in the report; at least one stays on. Previous meters are not listed separately: after a meter change their history runs with the successor.
- Period — Calendar year or Billing period with a year stepper, or Custom with From and To as months. The last completed calendar year is preselected. The billing period comes from your contract; if the selected meters have different ones, the report follows the calendar year.
Below that you see how many meters and readings the report covers. Create and share PDF opens your device's share sheet — from there you save, print or send the file. Your selection is not stored.
What the report contains:
- Summary — usage and estimated cost per meter type, plus one line per meter.
- One page per meter — the monthly chart and the monthly table with usage and estimated cost. For power, the wallbox share and feed-in with its payment are added where the meter has them. The column "Average" gives the mean of the same calendar month across all years.
- Contracts in this period — price, base price and instalment.
- Readings — every reading with date, meter reading, usage and note: "reported on …", "automatic", "Feed-in" or "corrected". If the app assigned a meter by itself, the reason is stated, along with the number the recognition had read.
The figures are the same as on the Usage page. Costs are an estimate from your contract data, not a bill from your supplier — the report says so too. The PDF is always light and in A4, whatever the app's design, and it is created on your device: none of it goes to a server.
Export/Import
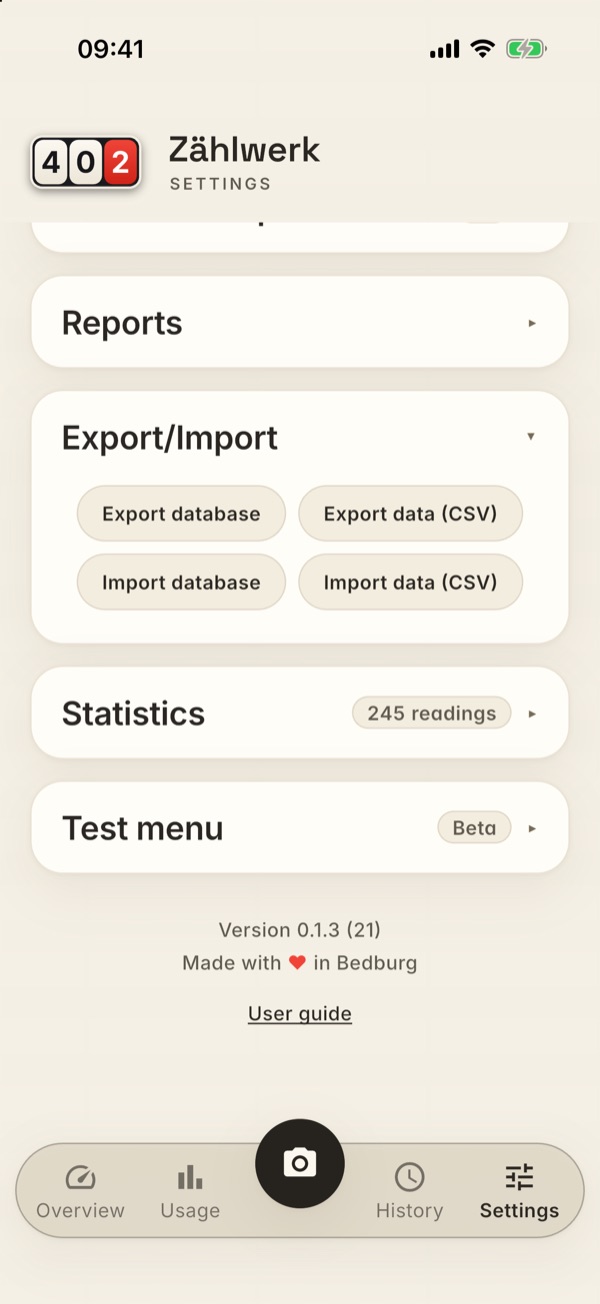
Four functions for backing up and exchanging data:
- Export database — your complete backup: a zip file with the database and all proof photos. Via the share menu you save it in iCloud/Drive, for example, or send it to yourself by email. Recommendation: regularly, and at least before every device or app change.
- Export data (CSV) — all readings as a table (date, type, meter number, reading, consumption, …). The file opens cleanly in Excel. The last column “Reported on” carries the date on which you reported the reading to your supplier; for readings that weren't reported it stays empty. With Import data (CSV) the app reads the column back in — a date (also as DD.MM.YYYY) or a “yes”, in which case the reading counts as reported on the reading date. The column is optional: a table without it is read in as before, and an import never changes readings that already exist (it only adds).
- Import database — restores a backup: choose the zip file (database
and photos are restored), a raw database file or a compressed
.gzdatabase (from a backup email, for example — the app unpacks it itself, the iPhone doesn't have to be able to). Careful: the import replaces your entire current data — which is why the app asks first and tells you how many meters and readings will be lost. The file is checked before it is taken over — a broken file does no harm. At the end a dialog reports the result: on success, how many meters and readings are now in the app (that shows you straight away whether it was the right file), otherwise the reason — and in that case your previous data stays unchanged. The same message then remains below the buttons. - Import data (CSV) — reads such a CSV back in, from another device for example. The import is clever and safe: readings that already exist are recognised and skipped (importing the same file twice does no harm), unknown meters and addresses are created automatically, and if a row is faulty nothing at all is imported — with a clear error message including the row number. At the end a dialog reports the result — how many readings were imported and how many were skipped (because they already existed), or the reason if the import failed; the same message then remains below the buttons. The file may be saved in UTF-8 or in the Windows/Excel standard encoding (ANSI) — umlauts as in “Zählernummer” or “Küche” are read correctly in both cases. The import compares meter numbers the same way photo recognition does: spaces and capitalisation don't matter — “1 EMH 1027 1934” in the table matches the meter “1emh10271934” in the app. If the table contains a number for which there is no meter yet but a very similar one (because photo recognition read one digit too many, for instance), the app asks before the import “Did you mean …?”: if you assign it, the rows land with the meter you already have; otherwise it creates a new one — or you cancel, and then nothing is imported. You are asked beforehand because two meters can't be merged afterwards. A newly created meter without an address in the table goes to your default address, so that it shows up in the overview and in usage right away; the result dialog says how many meters were newly created. If the new meters or addresses in the table no longer fit into the package you bought, the app says so before reading it in and imports nothing (see The four packages). If your table contains a meter replacement (old and new meter, removal and installation on the same day), the app recognises it from the data: the old meter moves into the overview under Previous meters, and the card of the new one carries on its history. Addresses that come into being in the process don't have a country yet — they therefore use the currency of your default address; you add the country later under Addresses if you need it.
Statistics
Shows at a glance how many meters, readings and addresses are in your database.
Right at the bottom of the settings, below the last card, you'll find the installed app version (e.g. “Version 0.1.0 (10)”) — please mention it when you report a problem —, a small greeting from the app's home town (Made with ❤️ in Bedburg) and the User guide link, which opens this guide in your browser.
Your data
- Everything local: readings, photos and settings are only on your device. No account, no advertising, no tracking — your meter readings are not transmitted anywhere.
- Take it all with you: with Export database you take your entire data with you at any time — to a new device, for example.
- Cloud backup only if you want it: it is off out of the box. If you switch it on, a backup travels to your own cloud — on iPhone/iPad into your iCloud Drive folder “Zählwerk”, otherwise into the folder you choose yourself (Nextcloud, Dropbox, a folder on the device). Zählwerk has no server where any of it ends up, and doesn't see the contents of your cloud account. The sync between several devices also runs exclusively through that folder — there is no way station.
- Two online connections, both clearly limited:
- Photo recognition is switched on out of the box and sends the meter photo — and nothing else — to Zählwerk recognition for analysis (discarded after the analysis, not stored). It only runs when you are taking or choosing a photo right then, and can be switched off under Settings → Cloud recognition or changed to a provider of your own. After saving, the app reports back whether the recognised value was right — only as a class (yes/no, kind of deviation), never the value itself. If your recognition subscription is running, a pseudonymous licence identifier goes with it: a short string calculated from your subscription's transaction number. It counts your devices as one subscription and can't be traced back to you or your store account; during the trial it doesn't go along at all.
- The Easee wallbox query is off by default and only active if you set it up with your own Easee account.
- Purchase and subscription run through the store: Apple or Google handle the payment. Zählwerk gets to see neither your name nor your payment details, has no customer account and keeps no purchase history; which packages are yours is something the app asks your store at every start.
- Local source: if you set it up, Zählwerk asks the device in your home network — the reader head, the camera, the Raspberry Pi, Home Assistant. That query goes to no Zählwerk server and to no third-party service; it doesn't leave your network. Tokens and passwords for it are kept in your device's keychain, not in the database and not in the backup.
- Location: it is needed in exactly one place — for the address suggestion in the setup assistant, and there only if you tap the button. Zählwerk doesn't store it and doesn't transmit it to any server of its own; the conversion into an address is done by your operating system (an Apple or Google service). After that the app never asks for it again.
- Camera and photos: Zählwerk only needs the camera to photograph the meter — your device asks for permission with the first photo, never when the app starts. The app doesn't access your photo library: you choose an image from the gallery via your phone's system picker, and Zählwerk only gets to see that one image; that's why there is no permission prompt for it. The proof photos of your readings are kept in the app's storage on the device (and travel along with export and cloud backup) — they don't end up in your library.
Frequently asked questions
Do I have to read the meter regularly? No. The analysis distributes consumption to the day — even irregular intervals produce correct monthly figures. Reading regularly does make the trends more meaningful, though; the reminder helps with that.
What happens after the trial? Your data is fully preserved, and you can still get at everything: view, edit, delete, export, back up to the cloud. Only adding is blocked — a new meter reading, a new meter, a new address, a CSV import with new rows. For that you buy one of the packages (Settings → Buy Zählwerk). There is no subscription requirement: you buy a package once, then it's yours. If you buy DURING the trial, the trial ends with the purchase — from then on the limits of your package apply, and cloud recognition runs via the subscription.
Do I need the subscription for cloud recognition? No. Without a subscription everything stays usable — only photo recognition in the cloud doesn't. You enter the reading by hand, on-device recognition keeps running, and so do your own AI access and the Local source. The subscription only saves you the typing.
I have a new phone — are my purchases gone? No. Purchases are tied to your store account, not to the device. Sign in on the new device with the same Apple or Google account, open Settings → License and tap Restore purchases. Your meter readings come along separately — via export/import or the Cloud backup.
Photo recognition is off the mark — what can I do? Photograph the dials as head-on, sharp and reflection-free as possible. The suggestion is always just a suggestion: the reading and the meter can be corrected at any time before saving. If Zählwerk recognition got it wrong, a second, better photo usually helps — and if you choose the meter beforehand, the recognition knows your last reading and checks the result for plausibility against it.
What happens if I switch off cloud recognition? Then the app reads the photo itself on the device — fast, without a network, but considerably more error-prone. Mechanical roller meters are particularly difficult for this text recognition when engravings on the meter housing (serial number, calibration code) are in the picture as well; it does recognise such numbers as “not the reading”, but then prefers to suggest no value at all rather than guess. With some meter types it doesn't find the digit window at all — no amount of correcting helps against that, so you enter the reading by hand. That is exactly why Zählwerk recognition is the default: an AI image model “reads” the photo by its content instead of just looking for text. Every setting only affects the photos you take afterwards (not retroactively).
I have two meters of the same type at one address (e.g. household and heat pump electricity). No problem — both run in parallel and appear as cards of their own. Don't confuse this with a meter replacement: the assistant is only meant for exchanging a meter.
What happens to my analyses when a meter is replaced? Nothing bad — that's exactly what the assistant is there for. It books the final reading of the old meter and the initial reading of the new one on the day of the change; the consumption curves carry on without a gap and without double counting. The card on the overview keeps your entire history too: it carries on the history of the old meter and shows the full consumption of both in the month of the change. Only the meter reading on it is that of the new meter.
Can I create accidental duplicate entries? The app prevents exact duplicates (same meter, same day, same reading) automatically when recording and when importing CSV.
How do I move to a new phone? Old device: Settings → Export/Import → Export database, save the zip. New device: install the app, Import database, choose the zip — done, including all proof photos. The setup assistant doesn't get in the way: as soon as meters are there, the app skips it by itself.
I skipped the setup assistant — can I get it back? No, it runs exactly once. But it doesn't take anything away from you: you create meters in Settings → Meters, addresses under Addresses, and the first meter reading goes through the camera button like any other. Mind the address of the meter as you do — it is pre-filled when you create it, and your first address takes over meters that don't have one yet (see the next question).
I created a meter, but the overview and usage stay empty. Then it probably isn't attached to an address. The overview and usage always show the meters of the selected address; a meter without an address doesn't appear there as long as addresses exist. Open it in Settings → Meters, tap Edit and choose an address — or create your first address under Addresses, and it will take the meter over by itself.
I accidentally declined the location permission. No problem — just enter the address by hand in the same step. If you do want the suggestion after all, change the permission in your phone's system settings (iPhone: Settings → Privacy → Location Services → Zählwerk; Android: Settings → Apps → Zählwerk → Permissions). Outside the assistant the app never asks for your location anyway.
Why doesn't Zählwerk ask for access to my photos? Because it doesn't need it. An image from the gallery comes through your phone's system picker — that's where you pick the photo, and only that one image is shown to the app, not your library. That's on purpose: fewer permissions, less access. You are only asked about the camera, and even that only with the first “Take a photo”. If you declined the camera, you can grant the permission afterwards in the system settings (iPhone: Settings → Privacy → Camera → Zählwerk; Android: Settings → Apps → Zählwerk → Permissions) — or you simply enter the reading by hand.